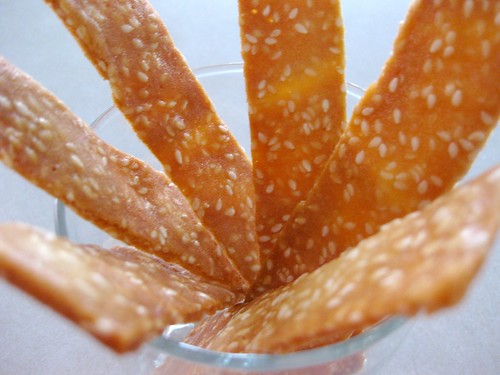
 I couldn't start off the first recipe of the year incomplete. Lately, school's been starting to get really busy so I didn't get a chance to shape the tuiles into pretty butterflies. Since I didn't want to go plain, I added sesame seeds seeds and spread the batter across the baking sheet. I think I may have spread the batter too thick, but they still ended up nice and crisp!
This month's challenge is brought to us by Karen of Bake My Day and Zorra of 1x umruehren bitte aka Kochtopf. They have chosen Tuiles from The Chocolate Book by Angélique Schmeink and Nougatine and Chocolate Tuiles from Michel Roux.
Don't forget to check out the DB's Blogroll!
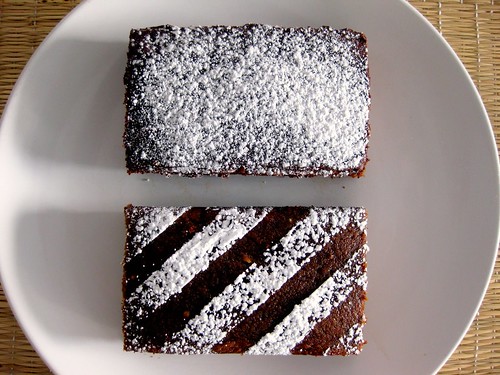 I've never had gingerbread before other than gingerbread cookies and by those I mean the ones you use to build the houses so they're not the greatest. To keep the portions small, I quartered the recipe and used my mini loaf pans. As for the egg, I just looked for the smallest large one in the carton instead of trying to divide out an egg into something I don't want to even calculate. I wasn't expecting to like this recipe, but it was delicious (I loved how gingery it was) and the texture was amazing! Moist and soft, dense, but not overly so and best of all, it wasn't like the types of cakes that dried out a few hours later. My cake stayed moist for 3 days.. I couldn't believe it! I'm still curious about why sometimes cakes made with all purpose flour are softer and better textured than those made with cake flour. Could it be the melted chocolate? Almost every chocolate cake I've made has a softer crumb. Or is it the extra liquid? Compared to most recipes, there is more milk (1 cup of milk to 2 cups of flour). Then there's also molasses, which contributes to the liquid and possibily to the soft texture? Since this is the first cake I've made with molasses, I have no idea if molasses has an effect on texture. Maybe it's none of the above and I've finally mastered how not to undermix. Or, am I overanalyzing.. again!..haha. I'm sure the icing was yummy, but I decided to save the calories and dust with some icing sugar (something I've never done before, suprisingly).

Thanks to Heather of Sherry Trifle for choosing this recipe, which can be found on her blog and in Dorie Greenspan's Baking: From my Home to Yours. Don't forget to checkout the TWD Blogroll!

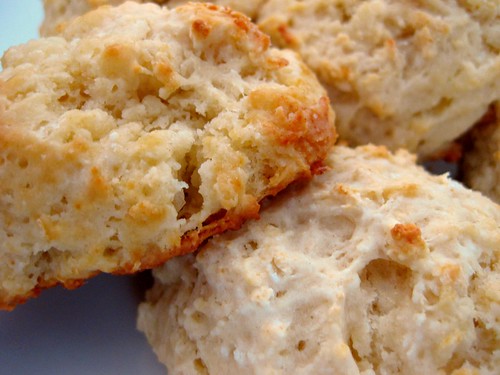 Flaky is definitely not my thing, so when it comes to biscuits, tea biscuits, pie crust, I can easily pass them by. Despite not liking them, biscuits have definitely been on my to-bake list for a long time mostly because I love how they just split in half when they're pullled apart. I chose this recipe because there was no food processor to clean, no frozen butter to grate and everything is done in one bowl, and two measuring cups. If the food processor made superior biscuits, I would drag that thing out, but this was a Cook's Illustrated recipe (how can I not believe them!). The coolest part was watching the melted butter turn into clumps when it was poured into the buttermilk. That's actually the secret to fluffy and flaky biscuits because the clumps mimick the effect of frozen clumped butter. Even though I'm not crazy about biscuits, these were pretty good and very light tasting. They were especially yummy with peanut butter!
By the way, what kind of baking sheets do you use when the baking temperature is 475!! If I used my jelly roll instead of the airbakes, the bottoms would have burned badly before the top would even cook. Does anyone have a good recommendation for a non burning, nicely browning jelly roll or cookie sheet pan?

Cook's Illustrated
Best Drop Biscuits Recipe
 This was the recipe I was most excited about for this month's round of TWD. Ever since I was finally able to sucessfully bake a chiffon cake, all I can think about is trying a foam-like cake again.. in case the first time was a fluke! Dorie had some pretty intimidating instructions for making this cake and it seemed like a lot of TWDers had problems with the rise/sinking. Since the method I used last time for my chiffon cake worked so well, I decided to just stick with it. Plus, the difference between this recipe and the recipe I used before is the use of all purpose instead of cake flour. This would be an excellent opportunity to compare textural differences between those two types of flour, since I was using the exact same mixing method. I didn't want to make the full recipe, but if I made half the recipe, 2 egg whites wouldn't beat up properly in the stand mixer. In the end I decided to make 3/4th of the original recipe, which actually converted perfectly to 3 eggs without weird half/quarter egg divisions and baked in a 9 inch springform. The other change I made was subbing in oil for the butter because the chiffon cake I made the first time used oil and I wanted to keep the recipes as consistent as possible to minimize possible flops and for a better comparison.
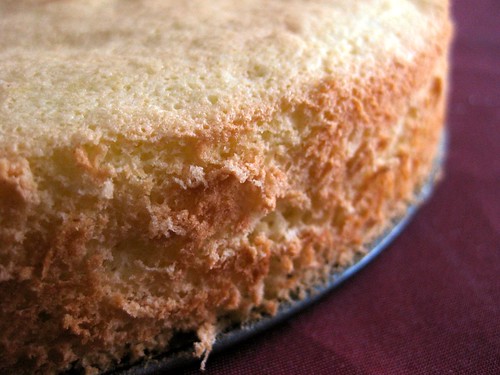
Similar to my first chiffon cake, I separated the eggs because my other experiences with trying to incorporate flour into a whole egg foam was diasterous! It's more foolproof for me to fold in egg whites and even that can be tricky! First, I whipped the egg whites to stiff peaks then I mixed all the dry ingredients in one bowl and all the wet in another and whisked them both quickly. Next I folded 1/3 of the egg whites to lighten the batter and then folded the rest of the whites. The texture was just as soft (so I guess the first time wasn't a fluke!), but there was more sinking with this cake compared to my other chiffon. I think I may have overfolded a little (but luckily not enough to affect the overall texture) or maybe I should have cooled the cake upside down, since this was a foam cake to keep the air pockets stretched. Anyway, I'm just glad that all purpose flour worked and actually tasted better because it felt like I was biting into cake vs air with the cake flour (although cake flour is a touch softer).
I didn't exactly have a suprise under the top layer of yummy filling with berries and I also changed the genoise to a chiffon, but this was a lot of fun to make. Next time I'm trying a whole egg foam, maybe that will give me those tiny holes..or if I could somehow get my hands on some sponge cake stabilizer. This is what I want to bake.
Thanks for choosing this recipe and allowing us to challenge our baking skills Mary Ann!! The recipe can be found at her wonderful blog Meet Me in the Kitchen and in Dorie Greenspan's Baking: From my Home to Yours. Don't forget to checkout the TWD Blogroll!
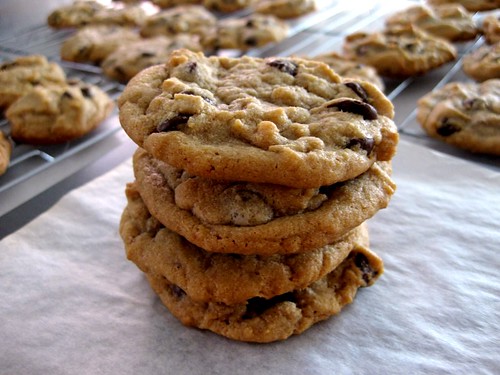 The neverending search for the best chocolate chip cookies continue..like it ever stops! Even though I think I found my favourite in CI's thick and chewy, I just can't help but think that there's something better out there. CI's CCC definitely has the best flavour, but I find that their chewiness is more soft than chewy and the crispy edges are gone a few hours later. Is the melted butter making the cookies too soft? They say that melted butter is the key for chewiness because it allows for more gluten development, but there are many cookies made with creamed butter that are chewy too. Maybe it's the large amount of brown sugar or the extra egg yolk.. seriously, this was driving me crazy so I just had to make another batch of CCC's even though I'm on a major butter overdose.
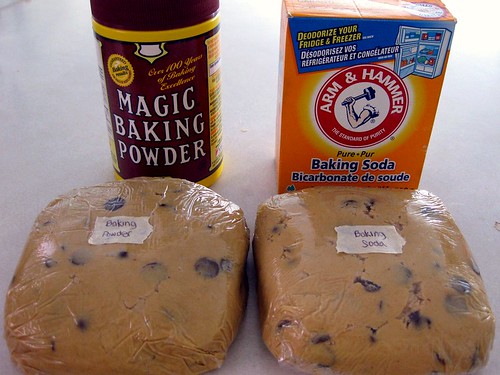
 I found a recipe by Chris Kimball in the Dessert Bible had the same ratio of ingredients as the CI recipe except for the use of some shortening instead of butter, an extra egg white instead of egg yolk and baking powder instead of baking soda. It also creamed the fat instead of melting the butter. This was the perfect recipe to try because the ratio of ingredients were basically the same as CI's with a few minor variations and a different mixing method. To make the most out of this batch of cookies I also compared baking powder and soda. After creaming the butter, shortening, sugar and eggs I divided the mixture evenly by weight. Then I measured out half the dry ingredients following the original recipe in the Dessert Bible and half the dry ingredients with baking soda substituted for baking powder.
Now I could compare these cookies with my usual go to, the thick and chewy and also compare the dessert bible recipe using different leavening. To make it completely fair, I used a medium cookie scoop to portion them out and baked both baking powder and baking soda versions on the same cookie sheet at the same time at 325. Even though the Dessert Bible uses 375, I knew the bottoms would burn before the tops could properly set in my oven. I also alternated the cookies, just in case one half of my oven was cooler or warmer than the other. On the left, we have the baking powder cookie and on the right, we have the baking soda cookie.
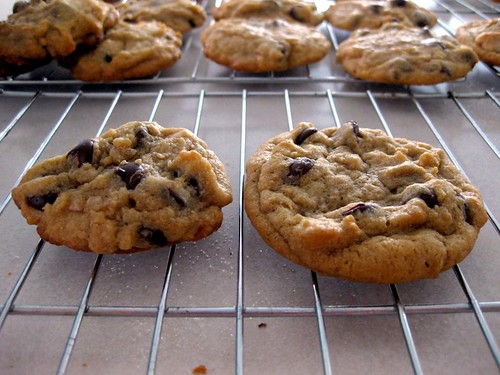
Compared to CI's thick and chewy, these were definitely less buttery. They had an extra crunch to them, but was not worth the sacrifice in flavour. Between the baking powder and baking soda versions from the Dessert Bible, there was a difference in texture that was more noticeable as the cookies cooled. By the way, I refrigerated the dough for 36 hours (because I'm sure we all know by now after the endless posts on the NYT recipe that refrigeration makes better cookies!)
What I learned:
* Baking powder sets up a cookie faster in the oven, producing a thicker cookie and baking soda produces more spread and crisp. Both leaveners produced chewy cookies, but the chew in the baking powder cookie was more of a 'doughy chew'
* Shortening makes the edges crispier, but there was a huge compromise in flavour and a slight greasiness so it's all butter from now on. Plus, the crispiness eventually goes away so it didn't really make a difference and was not worth it.
* Creaming produces chewy cookies too! (I guess as long as the amount of brown sugar is large enough)
Overaly, my ranking is: CI > Dessert Bible with baking soda (modified) > Dessert Bible with baking powder (original). Even though CI still comes up on top, I'm still searching for the best CCC. At least now I've settle my curiosity in using shortening and baking powder vs baking soda. I'll definitely have to make another batch of cookies! Hopefully, the search ends next time.
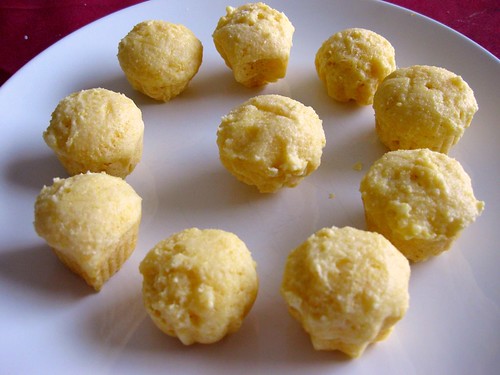
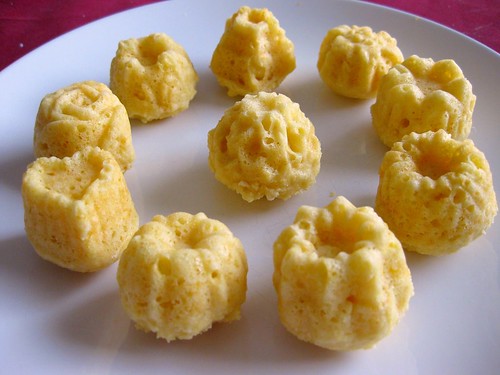 I made these muffins right after I found out our TWD schedule even though I didn't have any of the add-ins so I could use my new pan! I've never had corn or undessert-like muffins before so I wasn't sure what to expect. These were rough, gritty and dry, kind of tasteless except with a hit of canned corn flavour. It was my fault for omitting all the 'savoury' components though..kind of like like cooking without spices, but I still didn't enjoy the pebbly texture. I tried to like them though, eating 7 of my mini rock like muffins to prove it because I feel bad for not eating the bad stuff... everything deserves attention, right?!
Flip them around and now we have mini muffins! Isn't it great when there are 2 uses for the same pan, what a great value.. haha.
Thanks to Ezra of Ezra Pound Cake for choosing this recipe, which can be found on her blog and in Dorie Greenspan's Baking: From my Home to Yours. Don't forget to checkout the TWD Blogroll!
 What is your favourite kind of cake? I like mine light as a feather, fluffy, soft, not too sweet and moist. Basically, I love the texture of boxed mixes without all the funny tasting chemicals. Actually, I didn't know that boxed mixes had a funny taste until I went to a birthday party where they served my favourite (or so I thought) Betty Crocker rainbow mix with canned frosting. Many scratch cakes later, I was still not able to get that light texture. I tried creaming, reverse creaming, recipes with both whole eggs and egg whites, different quantities of milk until it hit me that maybe all this time I've just been baking the wrong cake. I've been avoiding sponges and chiffons ever since my horrible angel food cake experience where the cake was raw yet dry.. hmm.. weird, but it happened. I still wasn't sure about the folding egg white thing so off to youtube for a refresher on folding! I stumbled on an episode of Alton Brown's Good Eats and decided to give his recipe a try after many failed attempts with CI's chiffon cake recipe. The CI versions were such failures I didn't even bother to take a picture of the gooey, wet, mess (yes, I'm still talking about a cake)
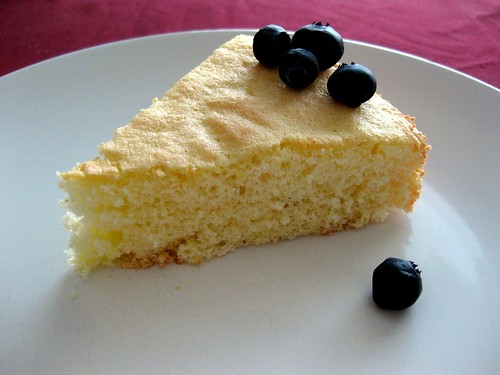
Alton's recipe had the perfect texture, but needs a little more sweetness. I can't imagine how many more butter cake recipes and tweaking I would've made if I didn't give the chiffon a try! To be honest, now I kind of miss the butter flavour. I'll have to try this recipe with melted butter and more sugar next time (it better work!). The non frosting eater in me decided to go healthy with decorating this cake and found whatever surviving (nonscriveled) blueberries in my fridge..haha.
I don't have a tube pan so I halved the recipe and baked in a springform.
Chiffon Cake recipe by Alton Brown
*this is important or you'll end up with a salty cake! I used 1/2 tsp of salt. Anymore and this probably won't be something you'll want to eat. Next time I would up the sugar too!
I actually used Alton's recipe, but with CI's procedure for making this cake. This was to prevent overmixing on my part. First I mixed all the dry ingredients in one bowl and all the wet (except for egg whites) in another bowl and then combined wet and dry. Next I whipped the egg whites + cream of tartar to stiff peaks and folded them into the mixture. I find it harder to incorporated flour into a ribboned egg + sugar mixture and also harder to fold egg whites when there's sugar beaten in them. I'm definitely making this recipe again following Alton's instructions to see if there's a difference. Alton also uses a handmixer, which I never use for cakes because they've always turned them tough and chewy. Maybe it's my Sunbeam.. I guess I do need a new kitchen aid hand mixer!
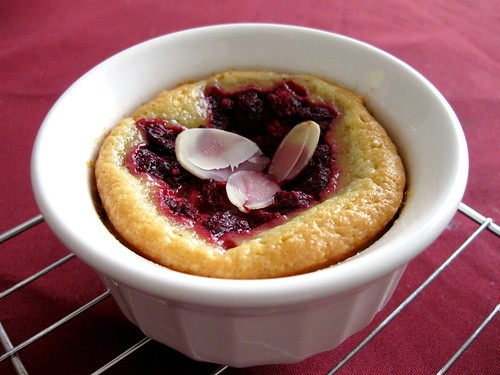 Still suffering from the aftermath of holiday eating, I decided to omit the tart shell and just bake the filling with pears. Baking just the filling in a tart pan without actual tart dough would probably start a fire in the oven and since I don't have a tart pan to begin with, it was my chance to use my brand new ramekins from Christmas! Halving the recipe, I managed to fill 2 ramekins with the almond cream, although after seeing the filling rise up like a cake in the oven, I should have divided the filling among 3 or 4. This mini filling job was perfect in my sort of 'food processor' attachment of my handmixer. I didn't have any canned fruit and I was too lazy to cook fresh ones so I threw in some defrosted raspberries. I was only able to carefully pick out a few whole ones and the rest was mush.
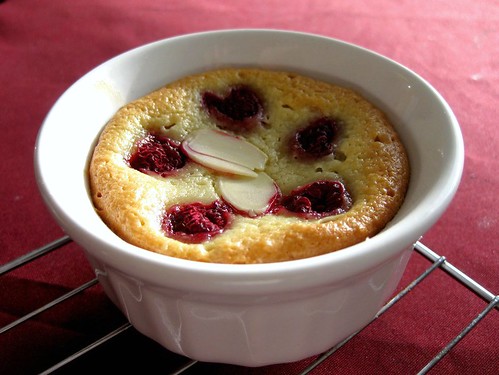
The almond cream was absolutely delicious! I'm so glad Dorie picked this recipe, because it's something that looks sophisticated (maybe not mine..haha), but easy to make.
Thanks to Dorie for choosing this recipe, which can be found on her site and in her book Baking: From my Home to Yours Don't forget to checkout the TWD Blogroll!
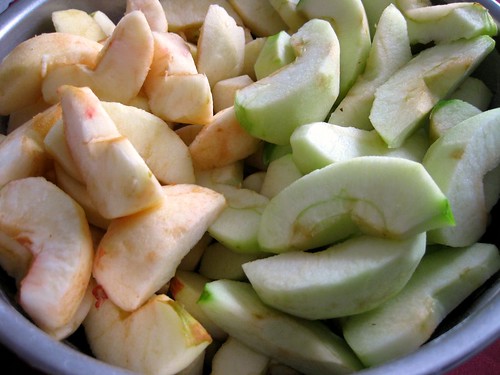
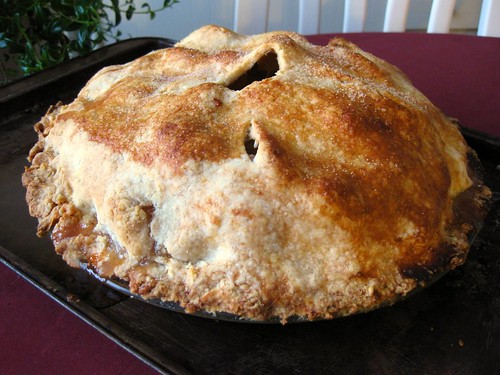 My mom was craving apple pie, so I decided to make her one.. plus, I could brush up on my pie pastry skills. The first time I ever made a pie crust, it was better than I anticipated. This time, however, it didn't turn out so well because the crust was hard and tough. I guess I must have overprocessed the dough in the food processor. That sure feels like a waste because anything with that much fat in it should taste good, right?! The purpose of this apple pie recipe was to let the apple flavour come out without going crazy with the cinnamon and nutmeg. I'll admit that this was a very clean tasting pie, but next time I'll add a touch more cinnamon. Normally, I'm don't post progress pictures because the counter is way too cluttered when I'm baking and I don't really want to ruin my camera. Plus, if I wait too long, I'm scared the baking powder and baking soda will wear off when I bake cakes! I'm so impresssed by people are able to get shots of caramel, considering how quickly to turns from clear to amber to burnt. Anyway, I just had to take a picture of the apples I peeled and sliced because it felt like an eternity! A little embarassing, but I didn't even really know how to use a knife until my grade 10 food and nutrition class when we made vegatable soup. I still remember when I was singled out because apparently I was being a little too dangerous when chopping up celery. On the right, I used the CI recommended Granny Smith apples and on the left was a bunch random ones I found.
I'm still not a crazy crust person so next time I'm definitely trying out a crumb/streusal topping. It would probably help prevent that huge gap I had under the crust. Don't let the height of the pie fool you because underneath it all, the layer of apple was pretty small. It was still really yummy with a huge scoop of vanilla icecream!
Pie Crust
Cook's Illustrated
One double-crust 9 inch or 10 inch pie
2 1/2 cups all purpose flour
1 teaspoon salt
2 Tablespoons sugar
3/4 cup (a stick and a half) unsalted butter, chilled, cut into 1/4 inch cubes
1/2 cup of all-vegetable shortening (8 Tbsp)
6-8 Tablespoons ice water
1 Process flour, salt, and sugar in a food processor until combined. Add shortening and process untl the mixture has the texture of coarse sand, about 10 seconds. Scatter the butter pieces over the flour mixture; cut the butter pices over the flour until the mixture is pale yellow and resembles coarse crumbs, with butter bits no larger than small peas, about 10 1 second pulses. Turn the mixture into a mixing bowl.
2 Sprinkle 6 tablespoons of ice water over flour mixture. With a rubber spatula, press down on the dough, using a folding motion, until the dough sticks together. Add up to 2 more tablespoons of ice water if the dough will not come together. Divide the dough into 2 balls and flatten each into 4 inch wide disks. Dust the disks lightly with flour, wrap each in plastic, and refrigerate for at least 30 minutes, or up to 2 days before rolling out.
Apple Pie
Cook's Illustrated
1/2 pounds Granny Smith apples (about 3 medium)
2 pounds McIntosh apples (about 4 large)
1 tablespoon juice and 1 teaspoon zest from 1 lemon
3/4 cups (5.25 ounces) plus 1 tablespoon sugar
2 tablespoons all-purpose flour
1/4 teaspoon salt
1 teaspoon cinnamon
1/4 teaspoon ground nutmeg
1/4 teaspoon ground allspice
1 egg white, beaten lightly
1. Adjust oven rack to lowest position and heat rimmed baking sheet and oven to 500 degrees. Remove one piece of dough from refrigerator (if refrigerated longer than 1 hour, let stand at room temperature until malleable).
2. Roll dough on lightly floured work surface or between two large sheets of parchment or plastic wrap to 12-inch disk. Transfer dough to pie plate by rolling dough around rolling pin and unrolling over 9 1/2-inch pie plate. Working around circumference of pie plate, ease dough into pan corners by gently lifting dough edges with one hand while pressing around pan bottom with other hand. Leave dough that overhangs lip of plate in place; refrigerate dough-lined pie plate.
3. Peel, core and cut apples in half, and in half again width-wise; cut quarters into 1/4-inch slices and toss with lemon juice and zest. In a medium bowl, mix 3/4 cup sugar, flour, salt and spices. Toss dry ingredients with apples. Turn fruit mixture, including juices, into chilled pie shell and mound slightly in center.
4. Roll out second piece of dough to 12-inch disk and place over filling. Trim top and bottom edges to 1/2-inch beyond pan lip. Tuck this rim of dough underneath itself so that folded edge is flush with pan lip. Flute edging or press with fork tines to seal. Cut four slits on dough top. If pie dough is very soft, place in freezer for 10 minutes. Brush egg white onto top of crust and sprinkle evenly with remaining 1 tablespoon sugar.
5. Place pie on baking sheet and lower oven temperature to 425 degrees. Bake until top crust is golden, about 25 minutes. Rotate pie and reduce oven temperature to 375 degrees; continue baking until juices bubble and crust is deep golden brown, 30-35 minutes longer.
6. Transfer pie to wire rack; cool to room temperature, at least 4 hours.
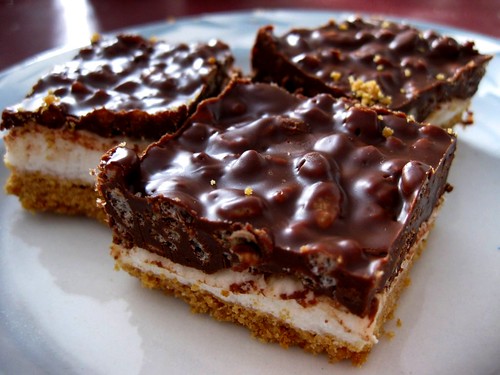 Happy New Year! I say that, but I wish time could just freeze. So let's backtrack to Christmas, when things were much simpler..haha..no need to think about new years resolutions or the constant reminder that time just passes by way too quickly. I had the hardest time trying to decide what to bake for Christmas. Chocolate chip cookies would be safe, but I wanted to try something new and easy. I like challenges, but I needed to make something I could do beforehand without worrying about staling. I don't mean actual staling, but it kills me when I bake something that is perfect texturally the first day and then have it turn into something remotely different the next. If I could, I would probably bake all my Christmas day cookies, the day of, but seriously, getting out of the door to my Grandparents' is hectic enough without the baking! I wanted something that was also basically foolproof because it's nice to know a dessert you try for the first time will actually turn out, especially when it's for a huge group or people. I finally decided to make bars, but with the million of recipes out there, which one? A long time ago, I starred the Deluxe Chocolate Marshmallow Bars from Jaime at Good Eats 'n Sweets in my google reader. To make them even more foolproof, I replaced the chocolate cake layer with a graham cracker crust so I wouldn't even have to worry about a dry cake layer. Plus, everyone likes graham crackers and now I've turned these bars into sort of smores. It's a little easier to say smores than chocolate peanut butter and marshmallow bars anyway.
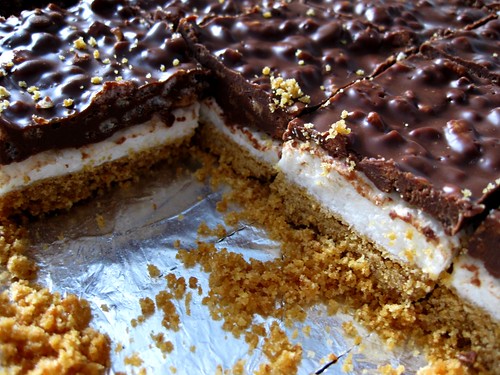
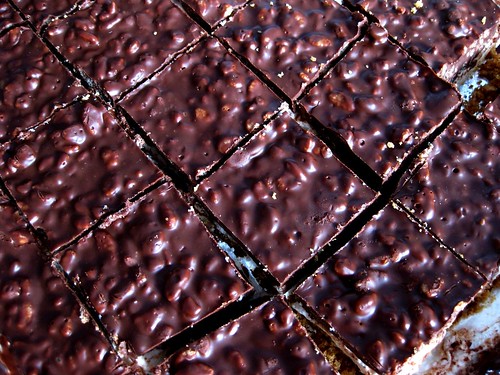
I can't believe I've never tried mixing peanut butter together with chocolate before because it was so unbelieveably delicious and addicting! Chipits are usually pretty grainy, but the addition of peanut butter gives the mixture a nice and creamy texture. The crunch from the rice krispies also gives it a nice contrast. You would think that something with chocolate and peanut butter would be popular, but it took a while before somebody except me was eating them. My family tends to think everything is too sweet or rich so I've been working hard to bake a chiffon cake. So far, they've all been flops, but I'm going to try Alton Brown's version next. Anyway, other than replacing the cake layer, I made a few changes to fit a 9x9 square pan.
Deluxe Chocolate Marshmallow Bars
Esther Shank, Taste of Home's Holiday Get-Together 2006
Original Recipe found here from Good Eats 'n Sweets
Recipe adapted by me
1 package of graham crackers (9 crackers)
6 tablespoons of butter melted
4 cups miniature marshmallows
Topping:
3/4 cup chocolate chips
3/4 cup peanut butter
2 tbsp butter
1.5 cups crisp rice cereal
1. In a food processor, process graham crackers into crumbs and add melted butter until well combined. Press mixture evenly into a 9x9 square pan lined with aluminum foil and bake at 325 for 10 minutes until it has set. Remove from oven
2. Turn the oven to broil. Sprinkle marshmallows evenly over graham cracker layer; return to oven until marshmallows have melted (this happens really quickly so don't take your eyes off the oven). If necessary, using a knife dipped in water, spread the melted marshmallows evenly over cake. Cool.
3. For topping, combine chocolate chips, peanut butter and butter in a small saucepan. Cook over low heat, stirring constantly, until melted and well blended. Remove from heat; stir in cereal. Immediately spread over bars. Chill.
I tried cutting these bars before they were actually chilled and that did not work. It is important to ensure that they are properly chilled or else it will be very messy.
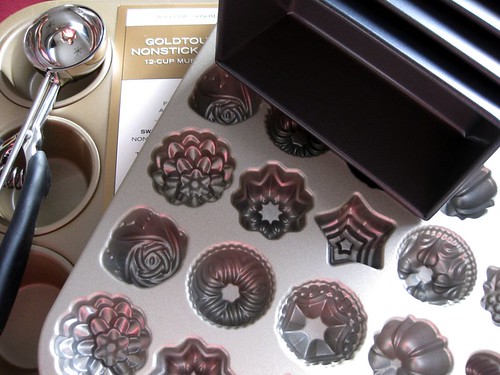
This is just some of the baking stuff I got this year. A large cookie scoop, the Williams Sonoma Goldtouch muffin tin, a Nordicware petit fours pan and some Chicago Metallic mini loaf pans!