 It's been, oh, I don't know... 6 months since my last TWD post! I'm shocked if I'm still on the blogroll for being such a lazy member. Anyway, I thought I'd make my return with blondies.
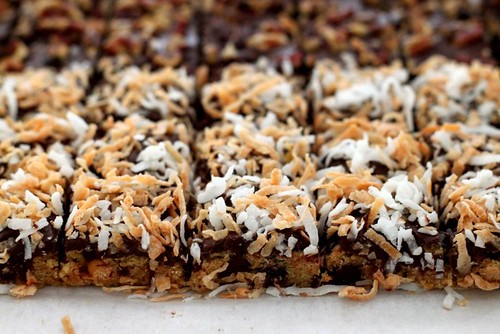
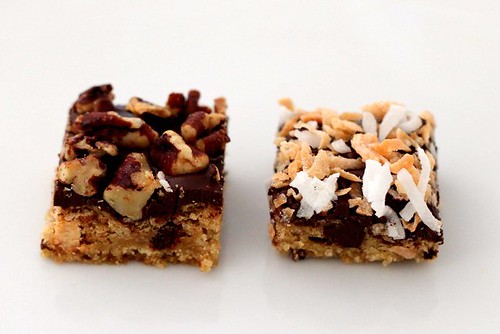
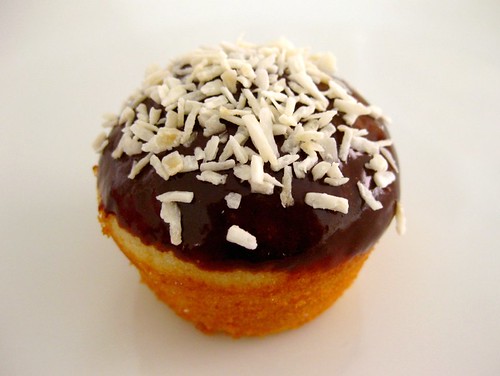
I used to be a coconut hater, but ever since I made the samoas bars, I've been finding excuses to bake with coconut. Instead of adding the coconut into the batter, I toasted it and sprinkled it on top for a nice textural contrast. I don't like putting coconut into the dough because it makes them gritty. For the coconut haters, I sprinkled the nuts on the other half. I also don't like putting nuts in the dough because I find that they get soggy. I omitted the white sugar completely to cut down on the sweetness. These were good, but I wasn't crazy about them. I would rather have a chocolate chip cookie so I can enjoy the crispy edges rather than a uniformly soft and chewy square. I may try these again with white rather than butterscotch chips.
Thanks to Nicole of Cookies on Friday for choosing this week's recipe
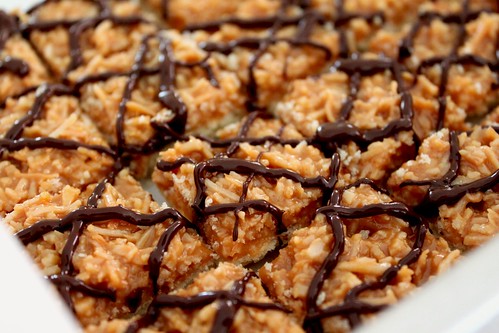 Have you ever had a samoas? I haven't, until now because the only girl guide cookies in Canada are vanilla, chocolate and thin mints. This is something that everyone must try, even coconut haters because they are that good! To make it easier, I made the bar version from Baking Bites. I was seriously addicted to these and they even contain coconut and shortbread, both of which I'm not a fan of.
Unwrap
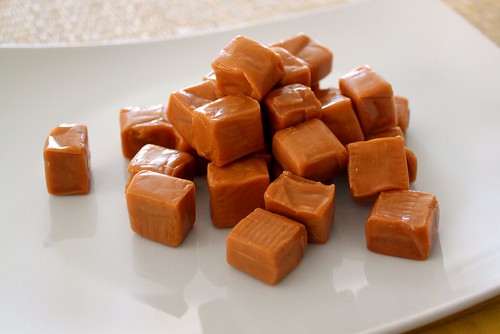
Melt
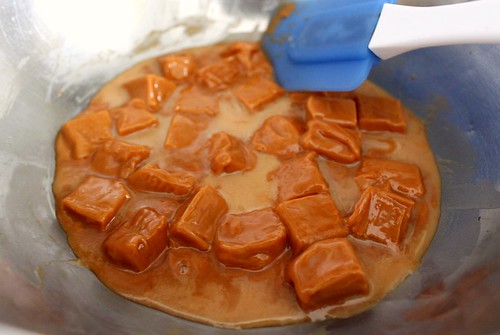
Enjoy

I'm posting the recipe showing the proportions of ingredients I used for an 8 x 8 square. For my bars, I made the crust thinner and topping thicker than it would have been had I followed the recipe for a 9 x 13 inch pan.
Homemade Samoas Bars from Baking Bites
Cookie Base:
1/4 cup sugar
6 tbsps unsalted butter, softened
1/2 large egg
1/2 tsp vanilla extract
1 cups all purpose flour
1/4 tsp salt
First, make the crust.
Preheat oven to 350F. Lightly grease a 8x8-inch baking pan, or line with parchment paper.
In a large bowl, cream together sugar and butter, until fluffy. Beat in egg and vanilla extract. Working at a low speed, gradually beat in flour and salt until mixture is crumbly, like wet sand. The dough does not need to come together. Pour crumbly dough into prepapred pan and press into an even layer.
Bake for 20-25 minutes, until base is set and edges are lightly browned. Cool completely on a wire rack before topping.
Topping
1.5 cups shredded coconut (sweetened or unsweetened) I used unsweetened
8-oz good-quality chewy caramels
1/4 tsp salt
1.5 tbsp milk
1 oz. dark or semisweet chocolate (chocolate chips are ok) - I only drizzled
Preheat oven to 300. Spread coconut evenly on a parchment-lined baking sheet (preferably one with sides) and toast 20 minutes, stirring every 5 minutes, until coconut is golden. Cool on baking sheet, stirring occasionally. Set aside.
Unwrap the caramels and place in a large microwave-safe bowl with milk and salt. Cook on high for 3-4 minutes, stopping to stir a few times to help the caramel melt. When smooth, fold in toasted coconut with a spatula. (I melted caramels over a double boiler)
Put dollops of the topping all over the shortbread base. Using the spatula, spread topping into an even layer. Let topping set until cooled.
When cooled, cut into 30 bars with a large knife or a pizza cutter (it’s easy to get it through the topping).
Once bars are cut, melt chocolate in a small bowl. Heat on high in the microwave in 45 second intervals, stirring thoroughly to prevent scorching. Dip the base of each bar into the chocolate and place on a clean piece of parchment or wax paper. Transfer all remaining chocolate (or melt a bit of additional chocolate, if necessary) into a piping bag or a ziploc bag with the corner snipped off and drizzle bars with chocolate to finish.
Let chocolate set completely before storing in an airtight container.
Makes 30 bar cookies.
Note: You can simply drizzle chocolate on top of the bars before slicing them up if you’re looking for yet an easier way to finish these off. You won’t need quite as much chocolate as noted above, and you won’t quite get the Samoas look, but the results will still be tasty.
 I haven't updated in ages, but I really don't want to get kicked out of MSC. It's just been so busy since the holidays that I kind of let everything slip. Maybe I just need a new camera for some inspiration... I used a ganache glaze instead of 7 minute frosting. I wasn't trying to be lazy or anything, but I had just enough leftover from cupcakes I made earlier for a birthday party and that little container of ganache in the fridge was just begging to be used.

These were the cupcakes I stole the ganache from. The ganache on this cupcake was actually whipped, but I heated it up again for the coconut cupcakes so it went back to glaze form. Sorry for the blurry picture, but I took this on my blackberry because I was in a rush to deliver them. The flower on top is made with royal icing and tinted with 'no taste' red gel colour. As usual, I went with the always reliable and crowd favourite Hershey's perfectly chocolate chocolate cake recipe. The leftovers were brought to work and I think it's safe to say that everyone enjoyed them!
The coconut cupcakes on the other hand weren't really a favourite of mine so I left them at home, but I'm starting to feel that as long as something is sweet or has chocolate in it, people will just eat it anyway. It's actually kind of sad because the standards for good tasting food seem to be getting lower as processed food becomes more available and easy. From the reactions I was getting when I brought in cookies to work, it's almost as if people have never had a cookie made with butter before!
Thanks to Jennifer of Cinema Cupcakes for choosing coconut cupcakes!
Hershey's Perfectly Chocolate Chocolate Cake
2 cups sugar
1-3/4 cups all-purpose flour
3/4 cup HERSHEY'S Cocoa (natural)
1-1/2 teaspoons baking powder
1-1/2 teaspoons baking soda
1 teaspoon salt
2 eggs
1 cup milk
1/2 cup vegetable oil
2 teaspoons vanilla extract
1 cup boiling water
Directions:
1. Heat oven to 350°F. Grease and flour two 9-inch round baking pans.
2. Stir together sugar, flour, cocoa, baking powder, baking soda and salt in large bowl. Add eggs, milk, oil and vanilla; beat on medium speed of mixer 2 minutes. Stir in boiling water (batter will be thin). Pour batter into prepared pans.
3. Bake 30 to 35 minutes or until wooden pick inserted in center comes out clean. Cool 10 minutes; remove from pans to wire racks. Cool completely. Frost with "PERFECTLY CHOCOLATE" CHOCOLATE FROSTING. 10 to 12 servings.
VARIATIONS:
ONE-PAN CAKE: Grease and flour 13x9x2-inch baking pan. Heat oven to 350° F. Pour batter into prepared pan. Bake 35 to 40 minutes. Cool completely. Frost.
THREE LAYER CAKE: Grease and flour three 8-inch round baking pans. Heat oven to 350°F. Pour batter into prepared pans. Bake 30 to 35 minutes. Cool 10 minutes; remove from pans to wire racks. Cool completely. Frost.
BUNDT CAKE: Grease and flour 12-cup Bundt pan. Heat oven to 350°F. Pour batter into prepared pan. Bake 50 to 55 minutes. Cool 15 minutes; remove from pan to wire rack. Cool completely. Frost.
CUPCAKES: Line muffin cups (2-1/2 inches in diameter) with paper bake cups. Heat oven to 350°F. Fill cups 2/3 full with batter. Bake 22 to 25 minutes. Cool completely. Frost. About 30 cupcakes.
Royal Icing
Whimsical Bakehouse
You'll have no worries about pasteurization with this easy recipe. Royal icing is ideal as the glue to assemble your gingerbread house or for decorating cookies with the flood method or sanding sugar. Meringue powder can be found at baking supply stores and some grocery stores.
In a large bowl of a clean electric mixer fitted with a whip attachment, whip to stiff peaks:
1/4 cup meringue powder
1/2 cup cold water
Add and mix at low speed with a paddle attachment, until combined:
1 lb confectioner's sugar
Continue mixing at high speed for 5 to 8 minutes, or until the icing is stiff.
Add and mix on low speed until combined:
1/2 tsp. lemon juice
Cover the bowl with a damp cloth while you are working with or coloring the icing, or immediately place it in an airtight container or pastry cone; otherwise, a hard crust will quickly form as it dries.
Yield: 4 cups
Chocolate Ganache
From Savoury, Sweet, Life (with an excellent tutorial)
8 ounces of chocolate, chopped into small pieces
1 cup heavy cream
*optional 3 tbl. of flavored liqueor
Place chocolate pieces in a large bowl. Heat heavy cream on medium high until it comes to a boil. Remove from heat and immediately pour cream over chocolate and stir until completely mixed and glossy. Allow ganache to cool before pouring over cakes as a glaze. The longer you allow the ganache to cool, the thicker it will set. Typically I stick mine in the refrigerator so it is slightly cold before whipping. For piping or frosting, allow the ganache to completely cool and set up. When you are able to spoon the ganache and it can hold its texture, it is ready for piping
 My first TWD since coming back and boy, was I excited it didn't involve pastry crust or fruit! Fun and all, pastry dough can be a little annoying to make when the food processor has to be lugged out and cleaned. I didn't have granola or peanuts so I subbed old fashioned oatmeal and pecans instead. Compared to what I'm usually make, this was one loaded cookie with nuts, raisins, cocunt and wheat germ. When it comes to add-ins I'm definitely not the 'adventurous' type... I've never even mixed nuts and chocolate together. Anyway, that's why I love TWD because I get to try things I would've never done on my own. Overall, it was a good cookie, but not something I would go crazy over. It could have been my fault for using regular oats and ending up with an oaty cookie rather than one with actual oat chunks. This may be my shortest post, but the olympics are on... Go Canada! Thanks to Michelle of Bad Girl Baking for choosing this recipe, which can be found on her site and in Dorie Greenspan's Baking: From my Home to Yours. Don't forget to checkout the TWD Blogroll!