Sugar cookies always look so pretty, but most of the time they taste bland and leave me feeling like I just wasted a lot of calories on what could have been a delicious chocolate chip cookie. Instead of reading through all the sugar cookie recipes I could find in hopes of lucking out on one that actually tastes great, I made Dorie's espresso shortbread minus the espresso. These are pure and buttery with excellent texture. It almost feels like waste to slather it up with cloyingly sweet icing, which also only took me hours to decorate. For decorating cookies, I would definitely recommend royal icing over the glaze kind simply because it has a nicer finish. I prefer the texture of it better too even though the meringue powder has a slightly sour aftertaste. To colour the icing, it is important to use the icing gels instead of food colouring because that might dilute the royal icing too much. When using royal, you also have to make sure to keep it covered because it dries quickly. For one batch of cookies, you'll probably only need to make half a batch of royal icing..

Espresso-Chocolate Shortbread Cookies
Adapted from Dorie Greenspan
Baking: From My Home to Yours
Makes 32 cookies
Ingredients
1 tablespoon instant espresso powder (I omitted)
1 tablespoon boiling water (I omitted)
2 sticks (8 ounces) unsalted butter, at room temperature
2/3 cup confectioners’ sugar
1/2 teaspoon pure vanilla extract
2 cups all-purpose flour
4 ounces bittersweet chocolate finely chopped, or 3/4 cup store-bought mini chocolate chips (I omitted)
Confectioners’ sugar, for dusting (optional)
Directions
Working with a stand mixer, preferably fitted with a paddle attachment, or with a hand mixer in a large bowl, beat the butter and confectioners’ sugar together on medium speed for about 3 minutes, until the mixture is very smooth. Beat in the vanilla and, then reduce the mixer speed to low and add the flour, mixing only until it disappears into the dough. Don’t work the dough much once the flour is incorporated.
Form 2 discs and refrigerate the dough for 2 hours.
Preheat the oven to 325 degrees F. Line baking sheets with parchment or silicone mats.
Roll the dough into a 9 x 10 1/2 inch rectangle that’s 1/4 inch thick or your desired thickness. Use cutters to cut out shapes.
Bake one tray at a time for 18 to 20 minutes, rotating at the midway point. The shortbreads will be very pale–they shouldn’t take on much color. Let cookies cool for 5 minutes and then transfer the cookies to a rack.
Royal Icing
Whimsical Cakehouse
In a large bowl of a clean electric mixer fitted with a whip attachment, whip to stiff peaks:
1/4 cup meringue powder
1/2 cup cold water
Add and mix at low speed with a paddle attachment, until combined:
1 lb confectioner's sugar
Continue mixing at high speed for 5 to 8 minutes, or until the icing is stiff.
Add and mix on low speed until combined:
1/2 tsp. lemon juice
Cover the bowl with a damp cloth while you are working with or coloring the icing, or immediately place it in an airtight container or pastry cone; otherwise, a hard crust will quickly form as it dries.
Yield: 4 cups
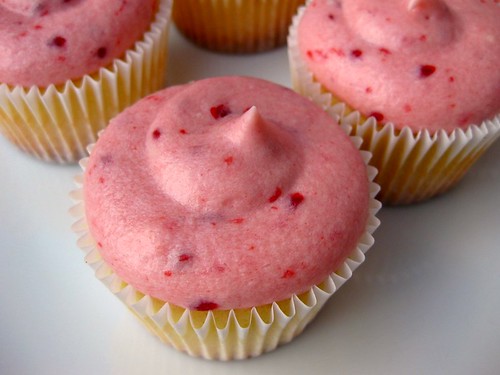 A woman who I used to work with asked me to bake cupcakes for a birthday party. This was my first paid cupcake order so it was a little nerve wracking. She gave me a lot of freedom with the flavours, which was was actually worse for me because I can never make up my mind. In the end, I went with raspberry cream cheese because you can never really go wrong with cream cheese frosting... that's why we eat red velvet cupcakes right? I wish I could have done something super cool with the decorating, but it was really difficult to pipe cream cheese frosting without it looking sloppy and melty so I swirled it using my largest round tip. I was beyond excited when she told me how much she loved them!
Amy Sedaris' Cupcakes
24 cupcakes
Ingredients
1 1/2 stick (12 tbsp) unsalted butter
1 3/4 cup sugar (I used 1 1/2 cup sugar)
2 large eggs
2 teaspoons vanilla
1/2 teaspoon salt
2 1/2 teaspoons baking powder
2 1/2 cups flour
1 1/4 cup milk
Directions
1. Preheat over to 350 degrees (Amy uses 375, but I think that's too high).
2. In a bowl, whisk flour, baking powder, salt together
3. Cream butter and sugar until light and fluffy.
4. Beat in eggs, one at a time making sure it's well incorporated
5. Beat in vanilla
6. Add flour mixture in 3 batches, alternating with milk. Do not overbeat.
7. Divide batter evenly. Bake for 16 to 20 minutes and toothpick inserted into center comes out with a few moist crumbs attached.
9. Cool on wire rack for 5-10 minutes then transfer cupcakes to cool completely
Raspberry Cream Cheese Frosting
1 stick butter, room temperature
1 block (8oz) cream cheese, room temperature
1 1/3 cup powdered sugar
1/4 cup raspberry jam
Beat butter on medium-low speed until smooth and creamy
Add cream cheese and beat on medium-low speed until smooth and creamy (30 seconds-1 minute)
Sift powdered sugar over creamed mixture and beat on medium low until the sugar is all incorporated
Add jam and continue beating.
Make sure you don't overbeat or else the frosting will become soupy.
 I can't believe New Moon is finally coming to theatres in 2 days! When I saw the werewolf cupcakes in Hello Cupcake, I knew I would eventually get around to making them. Even though I'm on Team Edward, I had to make something to support Twilight. It only took me forever to try and attempt these because I was afraid they would turn out looking more like blobs. The piping part actually wasn't as hard as I thought it would be even though my super hot hands kept softening the frosting. I would have loved to use all butter, but I think the little bit of shortening was necessary for stability. Store bought frosting might have been easier for piping because of its consistency, but for something that I spent hours working on, it felt like a waste to have to eat the canned stuff. Instead, I kind of came up with my own, beginning with a 1:3 ratio of shortening to butter and then adjusting the other ingredients for taste and consistency. One of the best things about Hello Cupcake is, you don't really have to buy special tools. I wasn't really up for making my own ziplock piping bag so I used the Wilton tip 352
I know a lot of people were disappointed with Twilight, but I think New Moon will be a gazillion times better. It seems to have a more 'real movie' feel to it and they got rid of that annoying blue tint!

Hershey's Perfect Chocolate Chocolate Cake
2 cups sugar
1-3/4 cups all-purpose flour
3/4 cup HERSHEY'S Cocoa (natural)
1-1/2 teaspoons baking powder
1-1/2 teaspoons baking soda
1 teaspoon salt
2 eggs
1 cup milk
1/2 cup vegetable oil
2 teaspoons vanilla extract
1 cup boiling water
Directions:
1. Heat oven to 350°F. Grease and flour two 9-inch round baking pans.
2. Stir together sugar, flour, cocoa, baking powder, baking soda and salt in large bowl. Add eggs, milk, oil and vanilla; beat on medium speed of mixer 2 minutes. Stir in boiling water (batter will be thin). Pour batter into prepared pans.
3. Bake 30 to 35 minutes or until wooden pick inserted in center comes out clean. Cool 10 minutes; remove from pans to wire racks. Cool completely. Frost with "PERFECTLY CHOCOLATE" CHOCOLATE FROSTING. 10 to 12 servings.
VARIATIONS:
ONE-PAN CAKE: Grease and flour 13x9x2-inch baking pan. Heat oven to 350° F. Pour batter into prepared pan. Bake 35 to 40 minutes. Cool completely. Frost.
THREE LAYER CAKE: Grease and flour three 8-inch round baking pans. Heat oven to 350°F. Pour batter into prepared pans. Bake 30 to 35 minutes. Cool 10 minutes; remove from pans to wire racks. Cool completely. Frost.
BUNDT CAKE: Grease and flour 12-cup Bundt pan. Heat oven to 350°F. Pour batter into prepared pan. Bake 50 to 55 minutes. Cool 15 minutes; remove from pan to wire rack. Cool completely. Frost.
CUPCAKES: Line muffin cups (2-1/2 inches in diameter) with paper bake cups. Heat oven to 350°F. Fill cups 2/3 full with batter. Bake 22 to 25 minutes. Cool completely. Frost. About 30 cupcakes.
Chocolate Frosting
6 tbsp butter
1.5 tbsp shortening
3 oz chocolate, melted and cooled
1 cup powdered sugar
2 tbsp cocoa
1 tbsp corn syrup
Melt chocolate and set aside to cool
Cream butter and shortening until creamy and there are no lumps
Add cooled melted chocolate to butter and shortening mixture
On low, add powdered sugar and cocoa until incorporated
Add corn symrup and continue mixing on medium low.
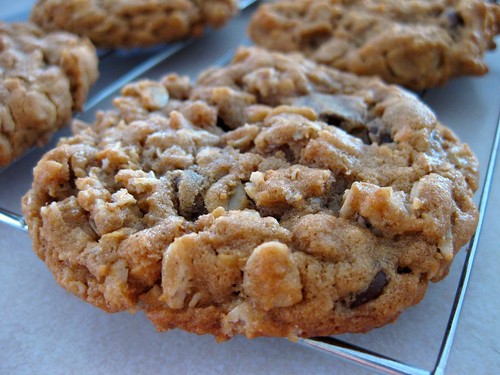
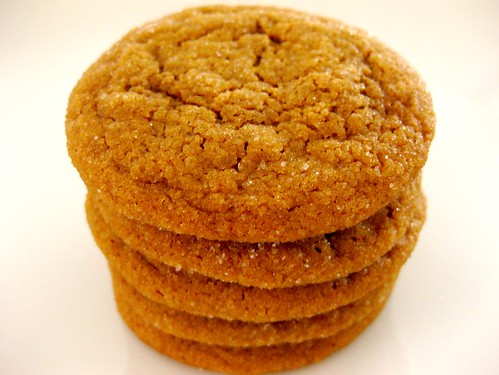 Pamela, thank you so, so much for choosing these!! I would have never tried them on my own seeing as they contain my favourite (not) spices, allspice and cloves. If cinnamon is sometimes too overpowering for me, then there's no question that the other two are way too strong. I was brave this time and didn't reduce the spices... I'm so proud of myself...haha. My cookies aren't as dark because I ran out of brown sugar and had to use half granulated sugar, but they were still delicious. I wanted these to be chewy rather than crisp, but may have underbaked these a little too much because the centre was soft with an almost, but not quite raw dough quality to them. Another 30s-1 minute and these would have been perfect. Next time I'm baking these until they're crisp so I won't have to obsess over getting that perfect chewy texture. I'm surprised I had enough dough to form cookies because this has to be one of the yummiest cookie doughs ever (and I don't generally like cookie dough)
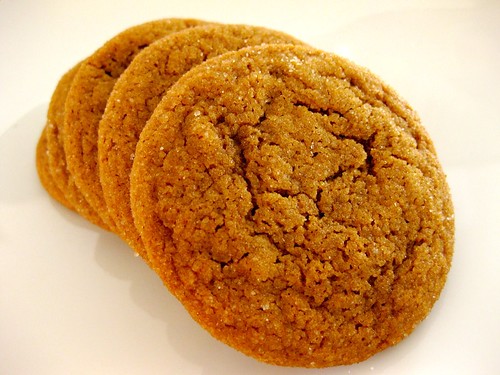
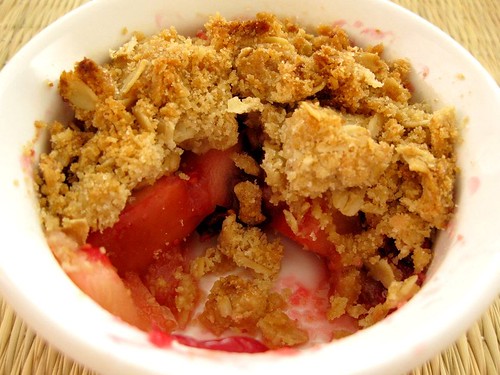
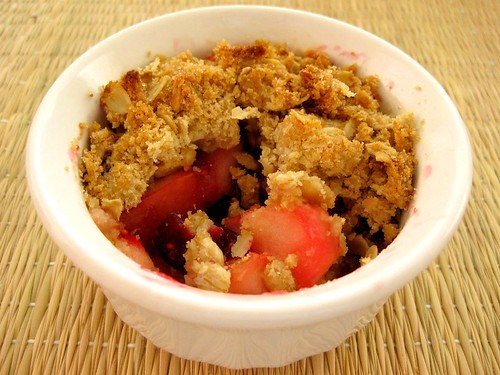 I think it's obvious that I have no self control when it comes to crumbs and dug into this immediately. The apple cranberry crisp was the perfect version of a pie for the non crust lover in me. I absolutely loved the addition of ginger, which I think made this crisp extra special. The spicy ginger, sweet apples and tart cranberries complemented each other really well. Before baking, I cooked the cranberries and apples with the sugar until they released their juices so I wouldn't end up with soup because who likes soggy crumbs?! It also helps to cut down on baking time, which is a plus considering I used the toaster oven and the ramekin is so close to the coil. So far, there haven't been any explosions... I'm keeping my fingers crossed.
Thanks to Em of The Repressed Pastry Chef for choosing this week's recipe
10 more days til New Moon comes out!! Is anyone else excited?!?!
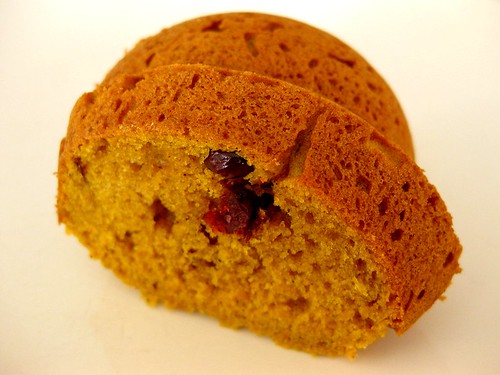 This pumpkin dessert was liked a little more by my family compared to the previous scones or cupcakes/muffins. Thank god because I didn't want to finish the entire bundt myself, even though I halved the recipe (which is why it looks a little funny and short). I really liked the texture of the cake and was glad I omitted the apples. As nice as apples in desserts sound, I find that they add sogginess, which eventually leads to questions like 'eww, why is this cake raw?' and me replying, 'it's not raw, it's apples'. Since there was already so much pumpkin puree in this, I decided that any more moisture would scare my family away. I also used dried instead of fresh cranberries to keep the wetness down. Overall, I really enjoyed this cake, which would have surprised me a year ago when I wasn't exactly open to the idea of pumpkin in desserts... I blame the pumpkin pie!
Thanks to Britin of The Nitty Britty for choosing this recipe!
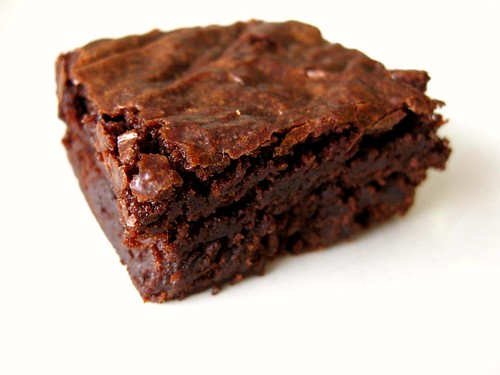
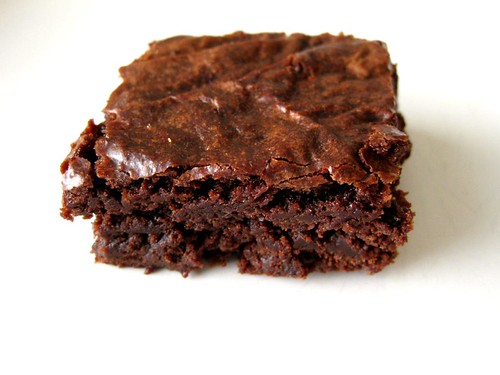
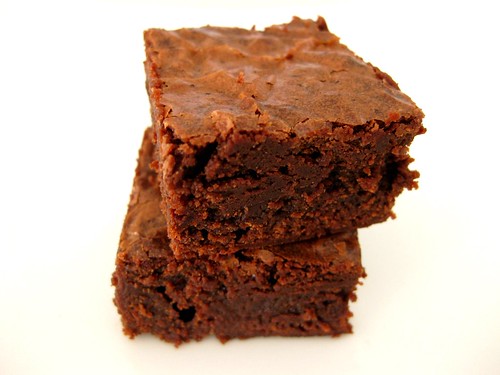 I didn't get a chance to complete this week's TWD, but if it makes it sort of better, I made brownies (just not the recipe I was supposed to). I know I said I wasn't a huge fan of regular brownies because I find that they're excessively rich, but I didn't want to give up on full fat brownies just yet, especially since they always look irresistable. I decided to give CI's chewy, fudgy brownies a try because they sounded like they would have the perfect balance between chewy and fudgy. To be honest, I was a little disappointed considering how much richer these were compared to the low fat fudgy brownies. I would have thought that more fat = tastier, but these didn't really do it for me. They were a little too light and not 'brownie dense' or fudgy enough. The texture and flavour improved by day 2. These weren't horrible, but I guess they're just not for me. If I'm going to eat something with so much fat packed into a tiny square, they better be special or exceptional!
Chewy, Fudgy Triple Chocolate Brownies
Cook's Illustrated
Either Dutch-processed or natural cocoa works well in this recipe. These brownies are very rich, so we prefer to cut them into small squares for serving.
Makes Sixty-four 1-inch Brownies
5 ounces semisweet chocolate or bittersweet chocolate, chopped
2 ounces unsweetened chocolate , chopped
8 tablespoons unsalted butter (1 stick), cut into quarters
3 tablespoons cocoa powder
3 large eggs
1 1/4 cups granulated sugar
2 teaspoons vanilla extract
1/2 teaspoon table salt
1 cup unbleached all-purpose flour
1. Adjust oven rack to lower-middle position and heat oven to 350 degrees. Spray 8-inch square baking pan with nonstick vegetable cooking spray. Fold two 12-inch pieces of foil lengthwise so that they measure 7 inches wide. Fit one sheet in bottom of greased pan, pushing it into corners and up sides of pan; overhang will help in removal of baked brownies. Following illustration 1 below, fit second sheet in pan in same manner, perpendicular to first sheet. Spray foil with nonstick cooking spray.
2. In medium heatproof bowl set over a pan of almost-simmering water, melt chocolates and butter, stirring occasionally until mixture is smooth. Whisk in cocoa until smooth. Set aside to cool slightly.
3. Whisk together eggs, sugar, vanilla, and salt in medium bowl until combined, about 15 seconds. Whisk warm chocolate mixture into egg mixture; then stir in flour with wooden spoon until just combined. Pour mixture into prepared pan, spread into corners, and level surface with rubber spatula; bake until slightly puffed and toothpick inserted in center comes out with a small amount of sticky crumbs clinging to it, 35 to 40 minutes. Cool on wire rack to room temperature, about 2 hours, then remove brownies from pan using foil handles (see illustration 2, below). Cut into 1-inch squares and serve. (Do not cut brownies until ready to serve; brownies can be wrapped in plastic and refrigerated up to 5 days.)
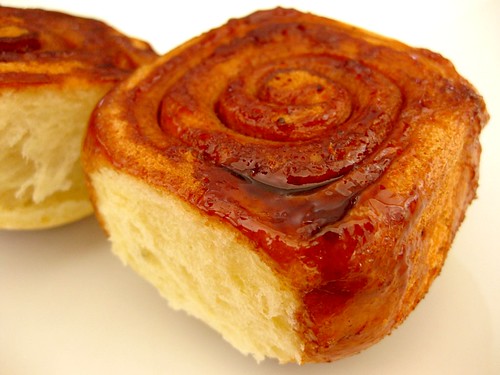 I waited way too long to finally give cinnamon rolls a try. These were fantastic!! They were sticky, sweet, cinnamony, fluffy and very addicting. If I didn't have a little more self control, I probably would have fallen into a sugar coma after devouring one too many. I was supposed to make a caramel glaze and pecan topping, but I skipped it because I didn't want these to be sickly sweet. These could have benefited from a little more goo so next time I'll make half the glaze.
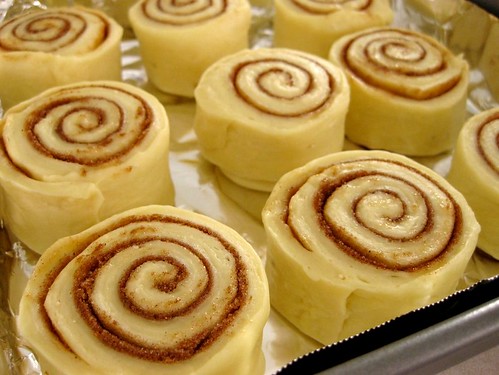
It's so satisfying for me to see the transformation of cinnamon rolls...skinny to fat. If you ever make cinnamon rolls, don't forget to line the pan. I almost did and that would have been such a pain to scrub away after all that sugar caramelization.
These were so tempting, I almost couldn't resist digging into the ones I was photographing too. I like to unravel my cinnamon roll, how do you like to eat yours?

Sticky Buns with Pecans for Freezing (I baked the buns right away instead of freezing them. It took me 25 minutes to bake in total).
Cook's Illustrated
Makes twelve 3 1/2-inch buns.
This recipe has four components: the dough that is shaped into buns, the filling that creates the swirl in the shaped buns, the caramel glaze that bakes in the bottom of the baking dish along with the buns, and the pecan topping that garnishes the buns once baked. Although the ingredient list may look long, note that many ingredients are repeated.
Ingredients
Dough
3 large eggs at room temperature
3/4 cup buttermilk at room temperature
1/4 cup granulated sugar
1 1/4 teaspoons table salt
2 1/4 teaspoons instant yeast
4 1/4 cups unbleached all-purpose flour (21 1/4 ounces), plus additional for dusting work surface
6 tablespoons unsalted butter , melted and cooled until warm
Caramel Glaze
6 tablespoons unsalted butter
3/4 cup packed light brown sugar (5 1/4 ounces)
3 tablespoons corn syrup , light or dark
2 tablespoons heavy cream
Pinch table salt
Cinnamon-Sugar Filling
3/4 cup packed light brown sugar (5 1/4 ounces)
2 teaspoons ground cinnamon
1/4 teaspoon ground cloves
Pinch table salt
1 tablespoon unsalted butter , melted
Pecan Topping
3 tablespoons unsalted butter
1/4 cup packed light brown sugar (1 3/4 ounces)
3 tablespoons corn syrup , light or dark
Pinch table salt
1 teaspoon vanilla extract
3/4 cup pecans (3 ounces), toasted in a skillet over medium heat until fragrant and browned, about 5 minutes, then cooled and coarsely chopped
Instructions
1. For the dough: In bowl of standing mixer, whisk eggs to combine; add buttermilk and whisk to combine. Whisk in sugar, salt, and yeast. Add about 2 cups flour and butter; stir with wooden spoon or rubber spatula until evenly moistened and combined. Add all but about 1/4 cup remaining flour and knead with dough hook at low speed 5 minutes. Check consistency of dough (dough should feel soft and moist but should not be wet and sticky; add more flour, if necessary); knead at low speed 5 minutes longer (dough should clear sides of bowl but stick to bottom). Turn dough out onto lightly floured work surface; knead by hand about 1 minute to ensure that dough is uniform (dough should not stick to work surface during hand kneading; if it does stick, knead in additional flour 1 tablespoon at a time).
2. Lightly spray large bowl or plastic container with nonstick cooking spray. Transfer dough to bowl, spray dough lightly with cooking spray, then cover bowl tightly with plastic wrap and set in warm, draft free spot until doubled in volume, 2 to 2 1/2 hours.
3. For the glaze: Meanwhile, combine all ingredients for glaze in small saucepan; cook over medium heat, whisking occasionally, until butter is melted and mixture is thoroughly combined. Pour mixture into nonstick metal 13- by 9-inch baking dish; using rubber spatula, spread mixture to cover surface of baking dish. Set baking dish aside.
4. To assemble, store, and reheat buns: For filling, combine brown sugar, cinnamon, cloves, and salt in small bowl and mix until thoroughly combined, using fingers to break up sugar lumps; set aside. Turn dough out onto lightly floured work surface. Gently shape dough into rough rectangle with long side nearest you. Lightly flour dough and roll to 16 by 12-inch rectangle. Brush dough with 1 tablespoon melted butter, leaving 1/2-inch border along top edge; with butter remaining on brush, brush sides of baking dish. Sprinkle filling mixture over dough, leaving 3/4-inch border along top edge; smooth filling in even layer with hand, then gently press mixture into dough to adhere. Beginning with long edge nearest you, roll dough into taut cylinder. Firmly pinch seam to seal and roll cylinder seam side down. Very gently stretch to cylinder of even diameter and 18-inch length; push ends in to create even thickness. Using serrated knife and gentle sawing motion, slice cylinder in half, then slice each half in half again to create evenly sized quarters. Slice each quarter evenly into thirds, yielding 12 buns (end pieces may be slightly smaller).
5. Arrange buns cut side down in prepared baking dish; cover tightly with plastic wrap and set in warm, draft-free spot until puffy and pressed against one another, about 1 1/2 hours. Place baking dish in freezer; store for up to 1 month.
6. To bake, adjust oven rack to middle position and heat oven to 350 degrees. Remove buns from freezer, remove plastic wrap, wrap dish tightly with foil, and set on baking sheet. Bake buns for 30 minutes, then remove foil and continue to bake until golden brown and center of dough registers about 180 degrees on instant-read thermometer, about 20 minutes longer. Cool on wire rack 10 minutes; invert onto rimmed baking sheet, large rectangular platter, or cutting board. With rubber spatula, scrape any glaze remaining in baking dish onto buns; let cool while making pecan topping.
7. For the topping: Combine butter, brown sugar, corn syrup, and salt in small saucepan and bring to simmer over medium heat, whisking occasionally to thoroughly combine. Off heat, stir in vanilla and pecans until pecans are evenly coated. Using soupspoon, spoon heaping tablespoon nuts and topping over center of each sticky bun. Continue to cool until sticky buns are warm, 15 to 20 minutes. Pull apart or use serrated knife to cut apart sticky buns; serve.
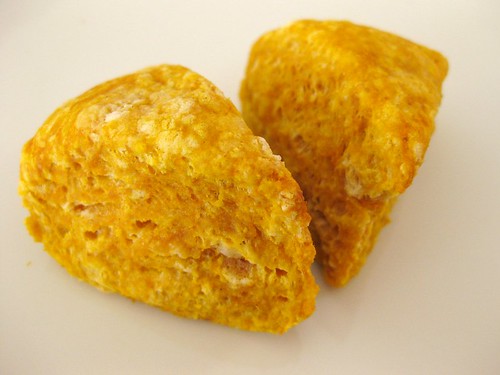 I really liked the creamy texture that the pumpkin added to these biscuits. Even my dad told me he liked these. I thought I was actually making progress with changing my family's mind about pumpkin until he had another one and realized that he was just starving before. O well, pumpkin just isn't for this family. I have to admit that I wasn't crazy about the taste of these either (or my embarrassing flour spots). Maybe it would have been better with the sweet potato, but I had some leftover pumpkin from the pumpkin patch cupcakes that I wanted to finish up.
Thanks to Erin of Prudence Pennywise for choosing this week's recipe! Don't forget to visit the TWD Blogroll. 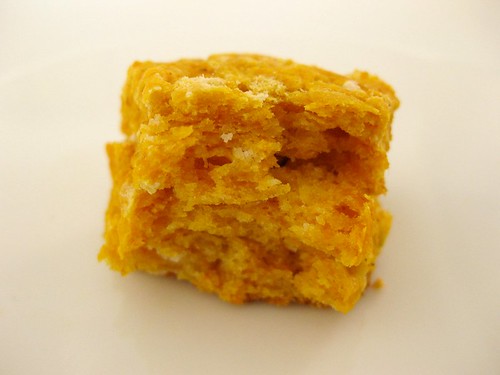
 Everyone in my family hates pumpkin except for me. It also doesn't help that these look really ugly! Since I wasn't going to get any help from anyone, I skipped the frosting. It wasn't easy eating all of these myself even though I quartered the recipe. Pacing myself at 2 to 3 a day, I eventually finished them. I'm making this sound like hard work... which it was especially after day 2, but when they were all gone I actually missed them. I doubt I'll be making another batch soon though!
Thanks to Kim of What the Whisk for choosing this recipe!
 The concept of 'you're supposed to have a few lumps in the batter' was part of the reason I was never really into muffins. Even though it's the way it should be, it just never felt right. The problem is, I tend to view cake batter as the standard of what batters should be and most of the time, that is not how muffin batter looks like... unless of course it is a cupcake in disguise.
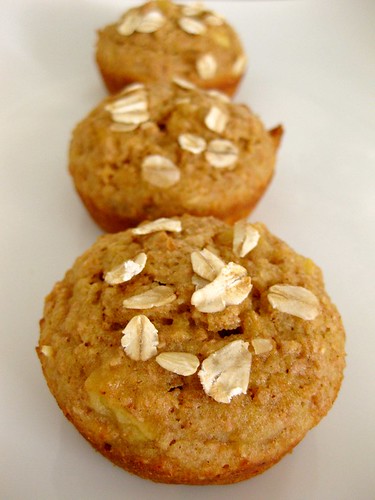
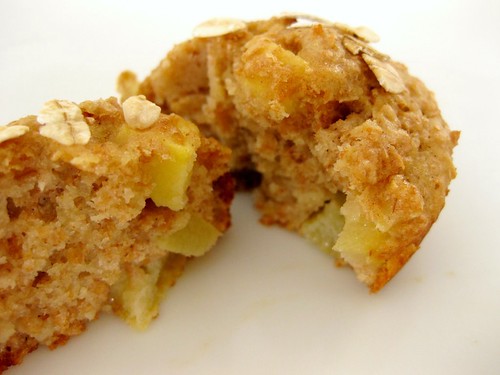
Anyway, not only did Steph of Steph Chows inspire me to bake muffins again, but she led me into the direction of the healthy variety. And yes, healthy muffins can actually taste good! I still have this fear that I'll end up with bricks if I bake with whole wheat flour so I found a recipe from my high school food and nutrition class that uses all purpose flour and wheat bran instead. I made half the recipe (which is the version I posted) and ended up with 11 squat muffins. Now that these are a keeper, I'll make the full recipe next time.
These were delicious and reminded me of apple pie, which was perfect for breakfast!
Apple Bran Muffins
3/4 cup flour
1/2 cup wheat bran
1 tsp baking powder
1/2 tsp cinnamon
1/4 tsp salt
1/2 cup unsweetened applesauce
1 egg
3 tbsp oil
1/3 cup brown sugar
1 cup of chopped apple
1. Preheat oven to 375, grease muffin tin
2. Mix flour, wheat bran, baking powder, cinnamon, salt in a bowl
3. Whisk applesauce, egg, oil, brown sugar until combined
4. Add chopped apples into wet mixture
5. Add wet mixture into dry mixture and fold until combined
6. Bake for 18-22 minutes or until a toothpick inserted the center comes out clean.
7. Let the muffins cool in the tin for 5 minutes before removing to cool on an oven rack.
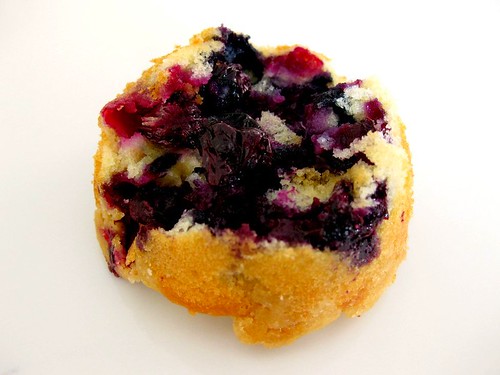 This wasn't what I envisioned for my blueberry cakes. When most of the berries sunk to the bottom and the cake wouldn't even support itself, I had to flip them upside down.
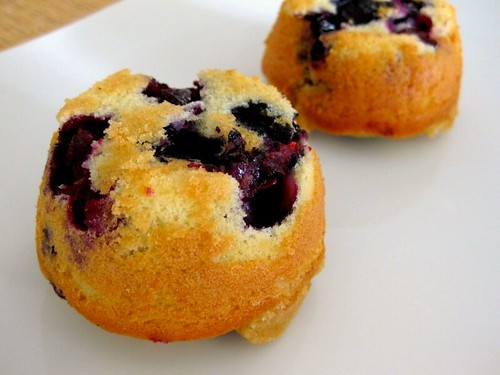
These were some of the better looking ones and the sinkage might even pass as intentional for decoration purposes.

Since I'm obsessed with texture shots, this is the best one I could get after splitting through 3 and only seeing an explosion of blueberries. Maybe I went a teeny tiny overboard with the addins.
Despite their appearance, these were amazing! I loved the tight crumb and light and fluffy texture. The blueberries added a really nice burst of flavour with each bite. I'm definitely going to give this recipe a try again as cupcakes. Blueberries add a lot of moisture and these cakes weren't soggy at all so I hope that the cake only version won't end up dry.
I used the cake part of the New York style crumb cake from CI
New York Style Crumb Cake
Cooks Illustrated
Crumb Topping
1/3 cup granulated sugar (2 2/3 ounces)
1/3 cup dark brown sugar (2 2/3 ounces)
3/4 teaspoon ground cinnamon
1/8 teaspoon table salt
8 tablespoons unsalted butter (1 stick), melted and still warm
1 3/4 cups cake flour (7 ounces)
Cake
1 1/4 cups cake flour (5 ounces)
1/2 cup granulated sugar (3 1/2 ounces)
1/4 teaspoon baking soda
1/4 teaspoon table salt
6 tablespoons unsalted butter (3/4 stick), cut into 6 pieces, softened but still cool
1 large egg
1 large egg yolk
1 teaspoon vanilla extract
1/3 cup buttermilk
Confectioners' sugar for dusting
1. FOR THE TOPPING: Whisk sugars, cinnamon, salt, and butter in medium bowl to combine. Add flour and stir with rubber spatula or wooden spoon until mixture resembles thick, cohesive dough; set aside to cool to room temperature, 10 to 15 minutes.
2. FOR THE CAKE: Adjust oven rack to upper-middle position and heat oven to 325 degrees. Cut 16-inch length parchment paper or aluminum foil and fold lengthwise to 7-inch width. Spray 8-inch square baking dish with nonstick cooking spray and fit parchment into dish, pushing it into corners and up sides; allow excess to overhang edges of dish.
3. In bowl of standing mixer fitted with paddle attachment, mix flour, sugar, baking soda, and salt on low speed to combine. With mixer running at low speed, add butter one piece at a time; continue beating until mixture resembles moist crumbs, with no visible butter chunks remaining, 1 to 2 minutes. Add egg, yolk, vanilla, and buttermilk; beat on medium-high speed until light and fluffy, about 1 minute, scraping once if necessary.
4. Transfer batter to baking pan; using rubber spatula, spread batter into even layer. Following photos below, break apart crumb topping into large pea-sized pieces and spread in even layer over batter, beginning with edges and then working toward center. Bake until crumbs are golden and wooden skewer inserted into center of cake comes out clean, 35 to 40 minutes. Cool on wire rack at least 30 minutes. Remove cake from pan by lifting parchment overhang. Dust with confectioners' sugar just before serving.
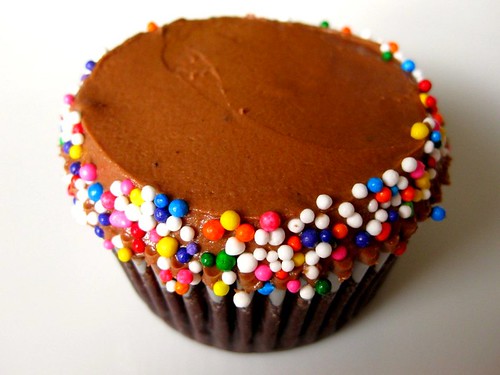 There's something about sprinkles that gets me excited every time. Even when they aren't particularly yummy and annoying to have beads of sugar stuck between my teeth, I will gladly reach for that sprinkly donut. When my chocolate cupcakes looked a little too plain, I decided to dress them up a little. To make them a teeny bit fancier, I topped them with a sunflower left from cake decorating. I went with the always reliable and easy Hershey's chocolate cake recipe and frosting.

I'm trying to get caught up on commenting, but my google reader is going to burst with 1000+ posts and that was from a while ago! It annoys me when my reader isn't cleared so I'm getting through as many as I can.
Hershey's Perfect Chocolate Chocolate Cake
2 cups sugar
1-3/4 cups all-purpose flour
3/4 cup HERSHEY'S Cocoa
1-1/2 teaspoons baking powder
1-1/2 teaspoons baking soda
1 teaspoon salt
2 eggs
1 cup milk
1/2 cup vegetable oil
2 teaspoons vanilla extract
1 cup boiling water
(I added 1 tsp of instant coffee)
Directions:
1. Heat oven to 350°F. Grease and flour two 9-inch round baking pans.
2. Stir together sugar, flour, cocoa, baking powder, baking soda and salt in large bowl. Add eggs, milk, oil and vanilla; beat on medium speed of mixer 2 minutes. Stir in boiling water (batter will be thin). Pour batter into prepared pans.
3. Bake 30 to 35 minutes or until wooden pick inserted in center comes out clean. Cool 10 minutes; remove from pans to wire racks. Cool completely. Frost with "PERFECTLY CHOCOLATE" CHOCOLATE FROSTING. 10 to 12 servings.
VARIATIONS:
ONE-PAN CAKE: Grease and flour 13x9x2-inch baking pan. Heat oven to 350° F. Pour batter into prepared pan. Bake 35 to 40 minutes. Cool completely. Frost.
THREE LAYER CAKE: Grease and flour three 8-inch round baking pans. Heat oven to 350°F. Pour batter into prepared pans. Bake 30 to 35 minutes. Cool 10 minutes; remove from pans to wire racks. Cool completely. Frost.
BUNDT CAKE: Grease and flour 12-cup Bundt pan. Heat oven to 350°F. Pour batter into prepared pan. Bake 50 to 55 minutes. Cool 15 minutes; remove from pan to wire rack. Cool completely. Frost.
CUPCAKES: Line muffin cups (2-1/2 inches in diameter) with paper bake cups. Heat oven to 350°F. Fill cups 2/3 full with batter. Bake 22 to 25 minutes. Cool completely. Frost. About 30 cupcakes.
Perfectly Chocolate Chocolate Frosting
1/2 cup (1 stick) butter or margarine
2/3 cup HERSHEY'S Cocoa
3 cups powdered sugar
1/3 cup milk
1 teaspoon vanilla extract
Melt butter. Stir in cocoa. Alternately add powdered sugar and milk, beating to spreading consistency. Add small amount additional milk, if needed. Stir in vanilla. About 2 cups frosting.
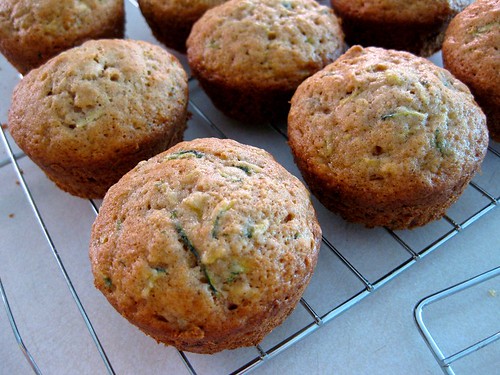
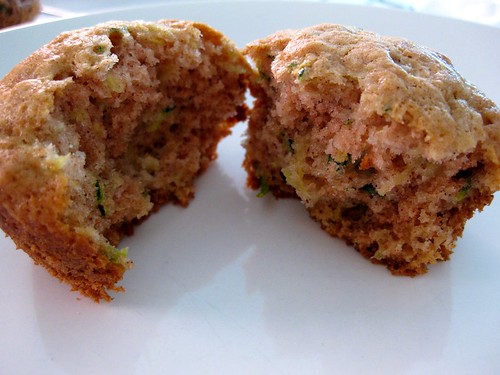 I don't exactly want to start off this post saying that I really didn't like these, but it's the truth. It's probably because I don't usually like spices so if you like zucchini and spices, you'll probably love these. I've gotten better though from TWD, but these were still too overpowering for me, especially since zucchini doesn't exactly taste like anything. I don't think frosting could have saved these so I left them as is.
I feel like I've been a little absent from blogging and havn't been commenting as much as I would love to, but right now everything feels a little bleh. I'm sure I'll get back into it because I can't ever imagine stopping with blogging or baking.
Thanks to Tracey for choosing these. Don't forget to check out the MSC Blogroll!
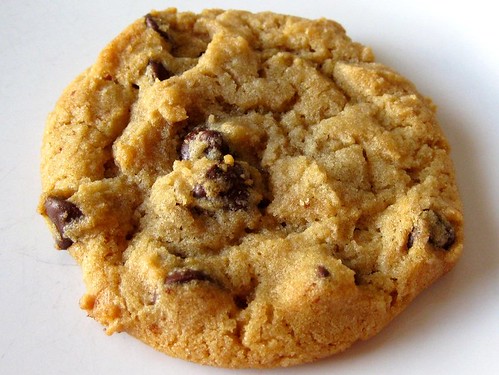 Crisp edges, chewy interior, buttery and the perfect thickness (for me at least). These were very, very good. I can't believe I waited so long to try them!
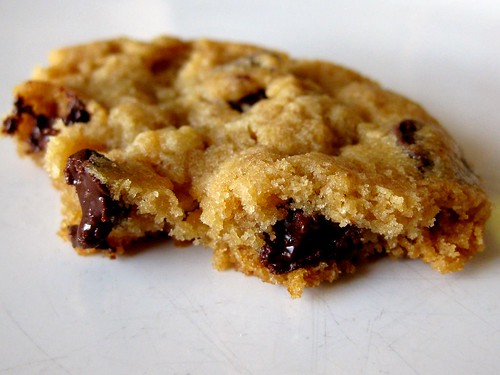
The best part? They weren't just good when they were warm and gooey, but also delicious the next day. I think these cookies retained the crispy edges the longest compared to other recipes I've tried. I also liked that these weren't too soft, but actually chewy. Soft cookies remind me of raw batter and that isn't something I'm too crazy about. Up next, I'm going to try these again with all purpose flour to see if there's a difference. Some people have said it matters, but others say it doesn't. I guess the only way to find out is to give it a try. It's really hard to say for sure that these are my favourite. I'm really tempted to have a bakeoff of some of the most popular recipes, but CCCs can be so dangerous!
NYT Chocolate Chip Cookies
Jacques Torres
8 1/2 ounces cake flour (2 cups minus 2 tablespoons)
8 1/2 ounces bread flour (1 2/3 cups)
1 1/4 teaspoons baking soda
1 1/2 teaspoons baking powder
1 1/2 teaspoons coarse salt
1 1/4 cups unsalted butter
10 ounces light brown sugar ( 1 1/4 cups)
8 ounces granulated sugar (1 cup plus 2 tablespoons)
2 large eggs
2 teaspoons vanilla extract
1 1/4 pounds bitterswee chocolate discs or shards
sea salt, for garnish
Sift flours, baking soda, baking powder and salt in a bowl. Set aside.
Using a mixer fitted with paddle attachment, cream butter and sugars together until very light, about 5 minutes. Add eggs, one at a time, mixing well after each addition. Stir in the vanilla. Reduce speed to low, add dry ingredients and mix until just combined, 5-10 seconds. Drop chocolate pieces in and incorporate them without breaking. Press plastic wrap against dough and refrigerate for 24-36 hours. Dough may be used in batches, and can be refrigerated for up to 72 hours.
When ready to bake, preheat oven to 350 degrees. Line a baking sheet with parchment paper or a nonstick baking mat. Scoop six 3 1/2 ounce mounds of dough (large golf balls) onto baking sheet, making sure to turn horizontally any chocolate pieces that are poking up. Sprinkle lightly with sea salt and bake until golden brown but still soft, 18-20 minutes. Transfer sheet to a wire rack for 10 minutes, then move cookies onto another rack to cool further. Eat warm.
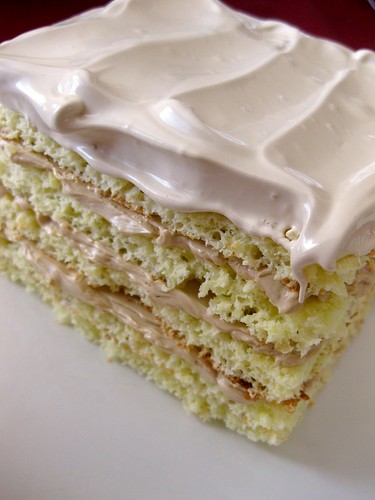 The August 2009 Daring Bakers' challenge was hosted by Angela of A Spoonful
of Sugar and Lorraine of Not Quite Nigella. They chose the spectacular Dobos
Torte based on a recipe from Rick Rodgers' cookbook Kaffeehaus: Exquisite
Desserts from the Classic Caffés of Vienna, Budapest, and Prague.
5 layer sponge
Frosting: Coffee Buttercream
Made: Yesterday morning. A rush job I'm not so proud of as you can see with the coarse texture.
Recipe
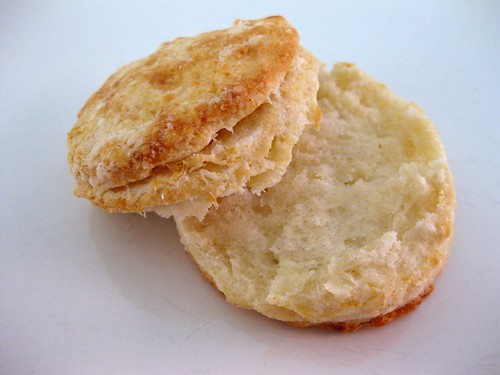
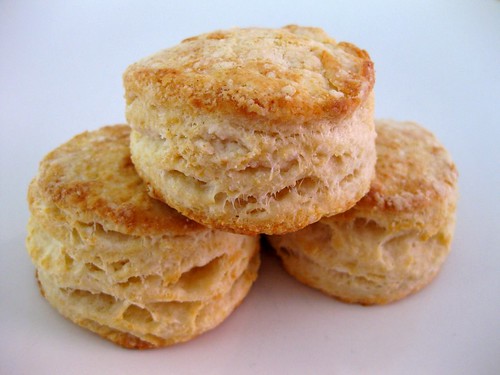 The day it was 40C (104F) outside, I had the sudden urge to bake biscuits... the kind of recipe that requires the oven to be preheated to 425F! I don't even like biscuits, but when I want to bake something, I have to or else it drives me crazy. These were so much fun because everything is done by hand. I made easy drop biscuits before, but I've never attempted buttermilk biscuits because I was afraid they wouldn't get those flaky layers or rise. These were inspired by Em and Kelly (who offers really great tips for getting those perfect layers and height). I used the recipe from Chris Kimball because I had all the ingredients available except that I subbed the shortening for butter. It's probably me, but the last time I made banana bread with shortening to see if there was a difference in texture with butter, it sort of had a meat aftertaste. Since these are not flavoured, I didn't want beef tasting biscuits...gross!
I was pretty pleased with the rise, but the texture wasn't as soft as I would have liked. I think it was my fault for over working the dough though. I wanted those layers so badly that I folded and patted the dough down more than I should have. Next time, I'm going to buy some lard so I can try Em's recipe. Overall, I would say that these were a success because my brother who I usually have to beg to try a cookie, brownie or cupcake had 4 of these!
Baking Powder Biscuits
Chris Kimball
If you do not have buttermilk, you can substitute regular sweet milk as indicated below. For extra height, let the cut biscuits sit on the baking sheet for 10 minutes before baking.
2 cups flour
1/4 teaspoon salt
2 teaspoons baking powder
1/2 teaspoon baking soda
4 tablespoons chilled butter
3 tablespoons chilled vegetable shortening (I used butter)
2/3 to 3/4 cup buttermilk
(I just used my fingers to rub the butter in and skipped the food processor)
Heat oven to 425 degrees. Combine the flour, salt, baking powder, and baking soda in the bowl of a food processor. Process for 2 seconds to mix.
Add the butter, cut into 1-tablespoon bits, to the flour and pulse 6 times for one second each. Add shortening and pulse another 5 times or until mixture looks like coarse meal (the flour should take on a slightly yellowish hue from the butter).
Place mixture into a large bowl. Using a rubber spatula, fold mixture together while adding buttermilk in a very thin stream. When mixture starts to hold together, press the dough with the side of the spatula. Note that you may use a little more or less than the 2/3-cup of buttermilk called for in this recipe.
Turn onto a floured surface and roll out dough very gently to a thickness of 1/2 inch. (I patted the dough down and folded it over a few times)
Use a biscuit cutter to cut the biscuits and then place on a cookie sheet. Bake in the preheated oven for about 10 minutes, turning the sheet after 5 minutes in the oven.
Makes 10 thick 2 3/4-inch biscuits or 16 2-inch biscuits.
SWEET-MILK VARIATION
Substitute milk for buttermilk, add 3 teaspoons cream of tartar, and reduce baking powder to 1 teaspoon.
 This week's creamiest lime turned lemon cream is definitely one of my favourite TWDs! As usual, I skipped the crust, but I was actually considering making one this time. It wasn't until I tasted the cream when I decided that it wasn't going to be shared with anything. I was enjoying it plain with blueberries (which were originally placed to hide the mark I made with my finger because I was a little anxious to taste it). The food processor is key for such a luscious filling. That and the 2 sticks + 2 tbsps of butter! I reduced it drastically, using only the 2 tbsps. Even though 2 tbsp is very little, it made the filling slightly richer and a little more special so I wouldn't omit it entirely. The best part about this recipe is you can adjust the butter/richness to your taste without screwing it up.
Thanks to Linda of Tender Crumb for choosing this week's recipe! You can find the recipe on her blog or in Dorie's book. Don't forget to check out the TWD blogroll!
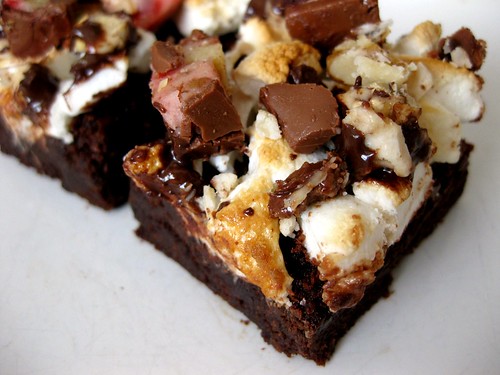 A while ago, Sees Candies kindly sent me 1lb of assorted chocolates. I absolutely loved their toffee crisps. They were so addicting! Initially I was going to bake cupcakes with a chocolate surprise in the centre. On second thought, I realized there would probably be sinkage and gooeyness from raw batter so that was out of the question. Soggy cake really grosses me out so I went with something where I wouldn't have to bake the chocolate. Ingrid inspired me to dress up my 'plain' low fat fudgy brownies so I topped them off with marshmallows and broiled it until it got toasty. Then I added chopped up See's chocolates. Some people are opposed to add ins when it comes to brownies and I'm usually one of them, but this was a fun twist. I really liked the combination of the chocolate chunks, marshmallows and fudgy base because of all the different textures. Plus, when it comes to assorted chocolates, I'm always curious about what they all taste like and have the urge to take a bite out of each of them. By chopping them up into smaller pieces, I can try more flavours at once!
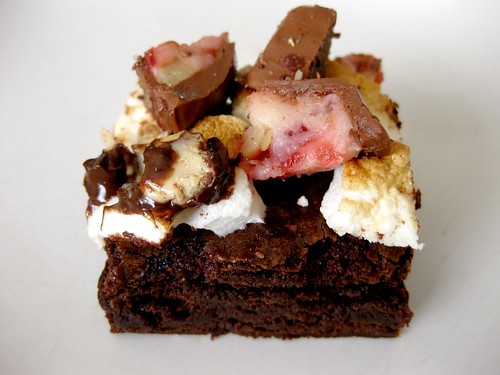 Low Fat Fudgy Brownies
Adapted from Cooks Illustrated
3/4 cup (3.75 oz) all-purpose flour
1/3 cup Dutch-processed cocoa powder
1/2 t baking powder
1/4 t salt
2 oz bittersweet chocolate, chopped
2 T unsalted butter
2 T low-fat sour cream
1 T chocolate syrup
2 t vanilla
1 egg
1 egg white (I omitted)
1 cup sugar
1/2 tsp instant coffee granules (I added)
enough marshmallows to scatter the top
chopped up chocolates
Adjust oven rack to middle position and preheat to 350.
Fold 2, 12-inch pieces foil lengthwise so each measures 7 inches wide. Fit sheets into 8-inch square pan, pushing foil into corners and up sides of pan (to help remove brownies--optional).
Spray foil or pan with cooking spray.
Whisk dry ingredients together.
Melt bittersweet chocolate and butter in large bowl over a double boiler until smooth.
(This is the part I changed: Add sugar and mix until slightly melted. It will look grainy because there is so little liquid. Add sour cream, syrup, vanilla and whisk, add egg and whisk, fold in dry ingredients until combined)
(The original directions tell you to: whisk in sour cream, syrup, vanilla, eggs, and sugar. Fold in dry ingredients until combined.)
Bake until slightly puffed and toothpick inserted in center comes out with a few sticky crumbs attached, 20-25 min.
Scatter marshmallows on top of brownie base and broil until they get toasty/melty. This happens quickly so keep an eye on the oven.
Remove from oven and scatter chopped up chocolates on top. You can press some of them down into the melted marshmallows so they don't fall off when being cut.
Cool completely in pan on wire rack.
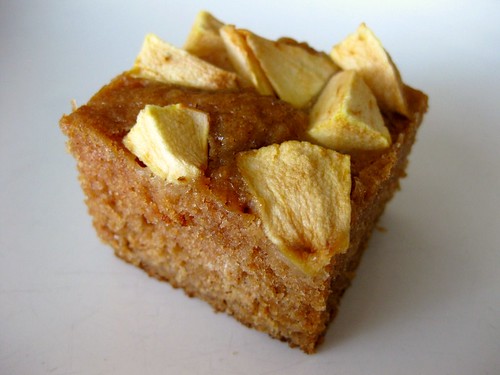 This week's recipe was a simple one bowl recipe.. the kind that always gives me the most stress because I can't just dump ingredients in a bowl. Unlike the creaming recipes where there is always a set sequence of cream the butter with sugar, adding the eggs one at a time... there are just so many ways to mix a one bowler. Should the sugar be whisked with the wet or the dry? Should the egg be whisked with the sugar first? Or could all the wet ingredients be whisked together at the same time? What really produces the best texture? That is why I tend to avoid one bowlers because as much as I would love to try all the different techniques, I'm not really up for trying 5 different versions of the same recipe.
Anyway...I made half the recipe, baked in a loaf pan to get more height and used brown sugar (2/3 cup instead of 1 to cut down on sweetness) instead of white. Since I don't usually like sugar glazes, I added the apples on top for a little decoration and to make it a little easier to photograph (because I can't make brown bars look pretty). These were more cake-like that bar-like and because of the medley of spices, no one would eat more than a piece. I thought it was ok, but needed more apple flavour. I don't know if adding more apple sauce would work though because that might just make things too gummy.
Thanks to Karen of Something Sweet by Karen for choosing this week's recipe! You can find the recipe on her blog or in Dorie's book. Don't forget to check out the TWD blogroll!
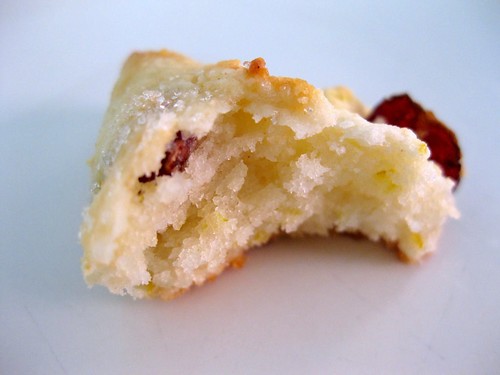
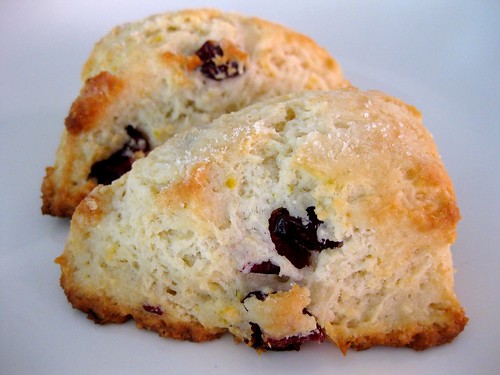 I'm not generally a huge scone fan except for maybe cream scones. I mean, how can something made with butter and cream not be melt-in-your-mouth tender?! This time I went with a recipe that's a little lighter, but still pretty rich. Using CI's blueberry scone recipe, I substituted the blueberries for craisins and doubled the lemon zest. To further enhance the lemon flavour, I used Dorie's tip to rub the zest with the sugar. CI's directions tell you to grate frozen butter, but I skipped that step because I don't like cleaning the box grater with bits of greasy butter stuck inside. I know they say it's the trick and I would totally do it if it made a huge difference, but I don't think the texture of these suffered. As long as it's still pebbly with pea size chunks and you don't rub the cold butter into the flour completely until it's a uniform mixture, they should be fine. And... sometimes I actually do like to keep it simple! Overall, these were really fluffy and soft. Best of all they were still moist the next day, but needed to be toasted to bring back those addicting crispy edges.
I actually made this recipe last year after my England trip when I was searching for a recipe just like the yummy scones from Harrods. I saw one posted on the internet, but seeing as there isn't that much butter and is made entirely of milk makes me wonder if they will be soft and fluffy.
Lemon Cranberry Scones
Cook's Illustrated
It is important to work the dough as little as possible—work quickly and knead and fold the dough only the number of times called for. The butter should be frozen solid before grating. In hot or humid environments, chill the flour mixture and workbowls before use. While the recipe calls for 2 whole sticks of butter, only 10 tablespoons are actually used (see step 1). If fresh berries are unavailable, an equal amount of frozen berries (do not defrost) can be substituted. An equal amount of raspberries, blackberries, or strawberries can be used in place of the blueberries. Cut larger berries into 1/4- to 1/2-inch pieces before incorporating. Refrigerate or freeze leftover scones, wrapped in foil, in an airtight container. To serve, remove foil and place scones on a baking sheet in a 375-degree oven. Heat until warmed through and recrisped, 8 to 10 minutes if refrigerated, 16 to 20 minutes if frozen. See final step for information on making the scone dough in advance.
16 tablespoons unsalted butter, frozen whole (see note above)
1 1/2 cups blueberries, fresh, about 7 1/2 ounces, picked over (see note) (I used 1 cup craisins)
1/2 cup whole milk
1/2 cup sour cream
2 cups (10 oz) unbleached all-purpose flour, plus additional all-purpose flour, for work surface
1/2 cup sugar, plus 1 tablespoon sugar, for sprinkling (3 1/2 ounces)
2 teaspoons baking powder
1/4 teaspoon baking soda
1/2 teaspoon table salt
1 teaspoon lemon zest, grated (I used 2 tsp)
Directions
1. Adjust oven rack to middle position and heat oven to 425 degrees. Score and remove half of wrapper from each stick of frozen butter. Grate butter and place grated butter in freezer until needed. Melt 2 tablespoons of remaining ungrated butter and set aside. Save remaining 6 tablespoons butter for another use. Place blueberries in freezer until needed.
2. Whisk together milk and sour cream in medium bowl; refrigerate until needed. Whisk flour, 1/2 cup sugar, baking powder, baking soda, salt, and lemon zest in medium bowl. Add frozen butter to flour mixture and toss with fingers until thoroughly coated.
3. Add milk mixture to flour mixture; fold with spatula until just combined. With rubber spatula, transfer dough to liberally floured work surface. Dust surface of dough with flour; with floured hands, knead dough 6 to 8 times, until it just holds together in ragged ball, adding flour as needed to prevent sticking.
4. Roll dough into approximate 12-inch square. Fold dough into thirds like a business letter, using bench scraper or metal spatula to release dough if it sticks to countertop. Lift short ends of dough and fold into thirds again to form approximate 4-inch square. Transfer dough to plate lightly dusted with flour and chill in freezer 5 minutes
5. Transfer dough to floured work surface and roll into approximate 12-inch square again. Sprinkle blueberries evenly over surface of dough, then press down so they are slightly embedded in dough. Using bench scraper or thin metal spatula, loosen dough from work surface. Roll dough, pressing to form tight log. Lay seam-side down and press log into 12 by 4-inch rectangle. Using sharp, floured knife, cut rectangle crosswise into 4 equal rectangles. Cut each rectangle diagonally to form 2 triangles and transfer to parchment-lined baking sheet.
6. Brush tops with melted butter and sprinkle with remaining tablespoon sugar. Bake until tops and bottoms are golden brown, 18 to 25 minutes. Transfer to wire rack and let cool 10 minutes before serving.
7. To Make Ahead: After placing the scones on the baking sheet, either refrigerate them overnight or freeze. When ready to bake, for refrigerated scones, heat oven to 425 degrees and follow directions in step 6. For frozen scones, heat oven to 375 degrees, follow directions in step 6, and extend cooking time to 25 to 30 minutes.
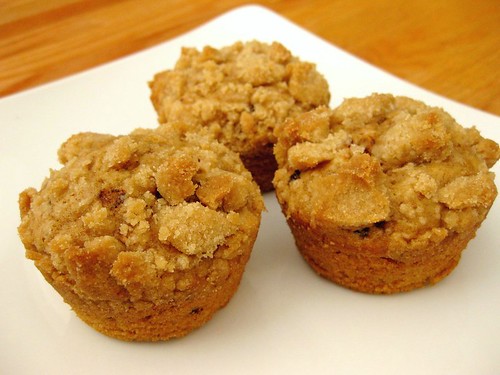
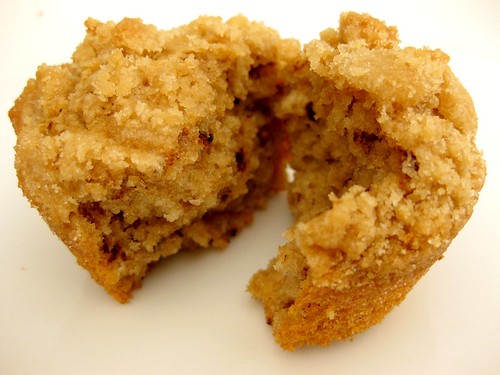
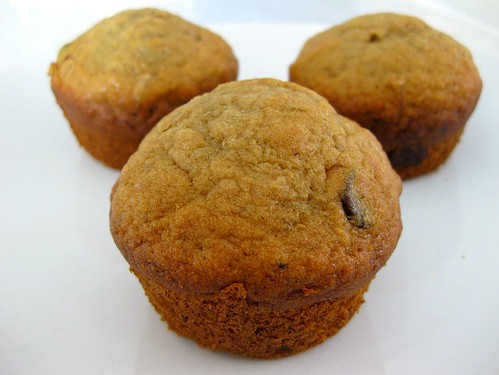 After seeing these muffins on Cassie's blog, I knew I had to make them except that I sort of didn't. When I bake, I usually start gathering stuff while the butter is being creamed. Even though this can lead to a little bit of scrambling, I feel like I'm saving time. Anyway, instead of measuring 1 1/2 cups of flour, I ended up measuring 2 cups by mistake. The baking soda and salt were already mixed in so I just went with it. Normally I wouldn't, but seeing as there was 1 1/2 cups of banana, there should be no dryness issues. I also creamed the butter so maybe these aren't really the Baked muffins anymore, but they were still good! The texture was definitely lighter than banana bread with the creaming. I think it would make a good banana cake because it was tender yet sturdy. The coffee wasn't strong, but it's probably because of the extra 1/2 cup of flour I added by mistake. I'll have to make the Baked version next time and premeasure instead of reading the ingredients off my laptop as the butter is being creamed.
Where did all the chocolate chips go?!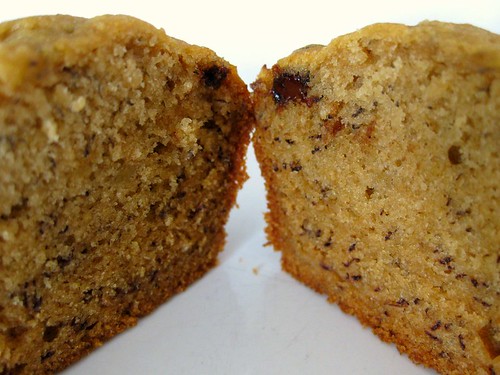
 A lower fat fudgy brownie that actually tastes good exists!! This was just too exciting because I don't usually like regular brownies. They're just too rich for me, but most low fat brownies come off tasting like cardboard and have a weird texture. Finding the right recipe was going to be difficult, but once again, Cook's Illustrated came to the rescue. They managed to lower the fat just enough without skimping on flavour. I adapted their low fat fudgy brownies by removing the extra egg white, adding instant coffee and following King Arthur's directions to get that crust I love so much. I like it better without the extra egg white because I think lightens the texture up too much. You won't get quite the density, heaviness (or greasiness) of a full fat brownie...obviously since these contain a fraction of the amount of fat, but you won't feel cheated on flavour and texture either. The best part was the surprise reaction I got from my friends and family after I told them the brownie was low fat.
I had to be careful not to overbake these because they are lower in fat. It's just as important not to underbake them either or the texture might end up being gummy and you'll feel like you're eating goo. These are ready when the center looks slightly puffed and a toothpick inserted into the center has sticky crumbs attached. If the toothpick comes out clean, then they'll be overdone and dry. You also have to make sure you don't overmeasure the flour or else they will be dry and lose its fudginess. I will definitely be making these again!
Low Fat Fudgy Brownies
Adapted from Cooks Illustrated
3/4 cup (3.75 oz) all-purpose flour
1/3 cup Dutch-processed cocoa powder
1/2 t baking powder
1/4 t salt
2 oz bittersweet chocolate, chopped
2 T unsalted butter
2 T low-fat sour cream
1 T chocolate syrup
2 t vanilla
1 egg
1 egg white (I omitted)
1 cup sugar
1/2 tsp instant coffee granules (I added)
Adjust oven rack to middle position and preheat to 350.
Fold 2, 12-inch pieces foil lengthwise so each measures 7 inches wide. Fit sheets into 8-inch square pan, pushing foil into corners and up sides of pan (to help remove brownies--optional).
Spray foil or pan with cooking spray.
Whisk dry ingredients together.
Melt bittersweet chocolate and butter in large bowl over a double boiler until smooth.
(This is the part I changed: Add sugar and mix until slightly melted. It will look grainy because there is so little liquid. Add sour cream, syrup, vanilla and whisk, add egg and whisk, fold in dry ingredients until combined)
(The original directions tell you to: whisk in sour cream, syrup, vanilla, eggs, and sugar. Fold in dry ingredients until combined.)
Bake until slightly puffed and toothpick inserted in center comes out with a few sticky crumbs attached, 20-25 min.
Cool completely on wire rack.
 The best part about bundt cakes is you never really have to decorate them because they're so pretty by themselves... that is, unless if they stick because then you have something that's a little tricky to fix. This was the first time I've ever had a cake stick on me. I knew something was wrong when the cake wouldn't budge as I was wiggling the pan around before turning it over. This was actually a pretty scary moment because the thought of having to dig my fingers down the sides and try to pry it out didn't sound too fun. Luckily, with enough shaking and jiggling around, the cake was loose enough so that I could turn it upside down. A few pieces remained stuck on the pan, but at least it came out in one piece!

This was really moist and so tender that it literally melted in my mouth. I had to retoast it because it was a little mushy. The banana flavour was good, but not as strong as I would have liked. I wish I loved this as much as everyone else seemed to on the P&Q, but I think I'm just not a banana cake person even though weirdly enough I love banana bread. I didn't like the banana cake recipes from Sky High or Chris Kimball either because they were also too sweet and a little mushy. I guess I'll just stick with banana bread, especially the Silver Palate recipe with its strong banana flavour and sturdy yet tender crumb. There's also less fat, which is always a plus!
Thanks so much to Mary of Food Librarian for choosing this recipe! You can find the recipe on her blog or in Dorie's book. Don't forget to check out the TWD blogroll!
 For my final cake, I decided to go with the stacked route rather than use the columns. It seemed a little less Wilton retro style...or at least I hope. Since MMF is a lot softer and dries slower than normal fondant, I was so happy it actually worked for the roses. You just have to hold the rose between your fingers while forming it instead of the sponge for better control. One advantage of the MMF is how easily it sticks when pressed together so you can skip the step where you brush clear vanilla?? (Wilton is really trying to sell their products because water so couldn't work..haha) to hold the petals together. One less thing to worry about always makes things a little easier especially since MMF is really delicate and tears easily. It took me a lot of practise (at least 2 movies (Knowing + Twilight) worth of time and some reruns of classic basketball playing at 1am) to finally get through my 38 roses. I wasn't even paying attention to Knowing, but I probably won't see it again after that weird ending and Twilight.. well even though it's not the best movie, I'm totally addicted and couldn't help watching it even those I've already seen it..many times.
Anyway, the sad part was, it took me about 30 roses in until I got the hang of it so these don't look as pretty as I would have liked. I can't wait to start course 4. I don't know if I'll be able to get away with using MMF, since we use gum paste, but I'll definitely give it a try. My instructor always says to me 'You have your own way of doing things.'
Marshmallow Fondant Recipe from What's Cooking America
16 ounces white mini-marshmallows (use a good quality brand)
2 to 5 tablespoons water (I used 2 tbsp)
2 pounds icing sugar (I didn't use all of the sugar)
1/2 cup Crisco shortening (you will be digging into it so place in a very easily accessed bowl)
Make sure you grease every bowl and spoon/spatula the marshmallows come in contact with first. I also find that if you stir in the sugar with a spoon/spatula until it doesn't seem so liquidy before kneading it with your hands, it's less sticky and hot.
Melt marshmallows and 2 tablespoons of water in a microwave or double boiler. Put the bowl in the microwave for 30 seconds, open microwave and stir, back in microwave for 30 seconds more, open microwave and stir again, and continue doing this until melted. Place 3/4 of the powdered sugar on the top of the melted marshmallow mix. (I stirred this with a spatula until it formed a large mass)
Now grease your hands GENEROUSLY (palms, backs, and in between fingers), then heavily grease the counter you will be using and dump the bowl of marshmallow/sugar mixture in the middle. (I did all this in a large bowl that I greased)
Start kneading like you would bread dough. You will immediately see why you have greased your hands.
Keep kneading, this stuff is sticky at this stage! Add the rest of the powdered sugar and knead some more. Re-grease your hands and counter when the fondant starts sticking. If the mix is tearing easily, it is to dry, so add water (about 1/2 tablespoon at a time and then knead it in). It usually takes me about 8 minutes to get a firm smooth elastic ball so that it will stretch without tearing when you apply it to the cake.
It is best if you can let it sit, double wrapped, overnight (but you can use it right away if there are no tiny bits of dry powdered sugar). If you do see them, you will need to knead and maybe add a few more drops of water.
Prepare the fondant for storing by coating it with a good layer of Crisco shortening, wrap in a plastic-type wrap product and then put it in a re-sealable or Ziploc bag. Squeeze out as much air as possible.
MM Fondant will hold very well in the refrigerator for weeks. If I know that I have a cake to decorate, I usually make two (2) batches on a free night during the week so it is ready when I need it. Take advantage of the fact that this fondant can be prepared well in advance.
 This was inspired by Wendy of Pinkstripes. After seeing her BBA post, I knew I had to make it right away. I omitted the walnuts, but added a cinnamon swirl and reduced the raisins to 1 cup. She's right, this bread is very addicting! I had a hard time taking photos without reaching out for a slice. I didn't even get a picture of the uncut loaf or wait the hour for it to cool because I was too anxious to dig into it. The only thing that bothers me when I bake bread are the large and irregular holes. Is it from not punching the dough down after the first rise? I have this fear that if I handle the dough too much, I'm going to kill the yeast and it won't rise the second time. This reminds me when I had my bouts of undermixing cake batter from fear of overmixing during my 'throwing out more than I was eating' phase. For the bread experts out there, can you please help me. The unevenness of my crumb is driving me crazy!
Cinnamon Raisin Bread Recipe
Peter Reinhart
 I rarely make the same recipe twice. Ok, that's not entirely true, I've only made banana bread a gazillion times and many variations of CI's thick and chewy CCCs hoping that one day I will find the best version. Dorie's chunky peanut butter and oatmeal chocolate chipsters are one of my favourite cookies. I love them so much that I waited almost an entire year to make them again because I didn't want to eat the whole tray. I reduced the butter from 2 sticks to 1. Yes, it sounds like a huge drop, but when you think about it, 1 stick of butter + 1 cup of PB should be plenty of fat for 1 cup of flour and 3 cups of oats. I also reduced the cinnamon in half and used all brown sugar. Although resting dough for 36 hours seems to do wonders to CCCs, I don't like to refrigerate oatmeal cookies for an extended period of time. I think it softens the oats too much, which some people like, but I love the sharp, jagged edges of oatmeal. My cookies didn't spread at all, which might have been due to the reduction of butter, but also from the use of peanut butter. No peanut butter cookie I've ever made has spread. I guess it's a good thing because there is no debating whether 'to flatten or not' in case the cookies might rise up like a scone or flatten like CDs. Instead, I simply flatten these as much as I would like my baked cookies to look.
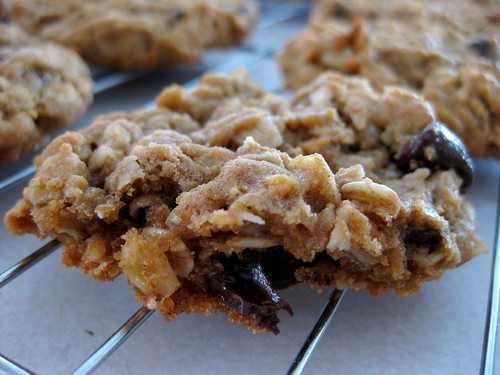
When's a better time to eat a cookie than when the chocolate chips are still gooey?
Chunky Peanut Butter and Oatmeal Chocolate Chipsters
Dorie Greenspan: Baking, From My Home to Yours
3 cups old fashioned oats
1 cup all purpose flour
1 tsp baking soda
2 tsp ground cinnamon (I used 1 tsp)
1/4 tsp freshly ground nutmeg (I omitted)
1/4 tsp salt (I used 1/2 tsp)
2 sticks (8 ounces) unsalted butter, at room temperature (I used 1 stick)
1 cup peanut butter--chunky (my choice) or smooth (but not natural)
1 cup sugar (I omitted)
1 cup (packed) light brown sugar (I used 1 1/2 cup)
2 large eggs
1 tsp pure vanilla extract
9 ounces bittersweet chocolate, chopped into chunks, or 1 1/2 cups store-bought chocolate chips or chunks
Getting Ready:
Position the racks to divide the oven into thirds and preheat the oven to 350 degrees F. Line two baking sheets with parchment or silicone mats.
Whisk together the oats, flour, baking soda, spices and salt.
Working with a stand mixer, preferably fitted with a paddle attachment, or with a hand mixer in a large bowl, beat the butter, peanut butter, sugar and brown sugar on medium speed until smooth and creamy. Add the eggs one at a time, beating for 1 minute after each addition, then beat in the vanilla. Reduce the mixer speed to low and slowly add the dry ingredients, beating only until blended. Mix in the chips. If you have the time, cover and chill the dough for about 2 hours or for up to one day. (Chilling the dough will give you more evenly shaped cookies.)
If the dough is not chilled, drop rounded tablespoonfuls 2 inches apart onto the baking sheets. If the dough is chilled, scoop up rounded tablespoons, roll the balls between your palms and place them 2 inches apart on the sheets. Press the chilled balls gently with the heel of your hand until they are about 1/2 inch thick.
Bake for 13 to 15 minutes, rotating the sheets from top to bottom and front to back after 7 minutes. The cookies should be golden and just firm around the edges. Lift the cookies onto cooling racks with a wide metal spatula - they'll firm as they cool.
Repeat with the remaining dough, cooling the baking sheets between batches.
Serving: I can't remember when I actually served these. They're more often plucked from a cookie jar than picked from a platter.
Storing: Wrapped airtight or piled into a cookie jar, the cookies will keep at room temperature for about 4 days. Wrapped and frozen, they'll be good for 2 months.
Playing Around: You can substitute soft, moist raisins for the chocolate chunks or just stir in some raisins along with them. If you're really looking for crunch, toss in chopped peanuts too (salted or not). With or without the chocolate chunks, raisins, and nuts, these cookies are great with ice cream or around ice cream - think about them the next time you want a chipwich-ish ice cream sandwich.