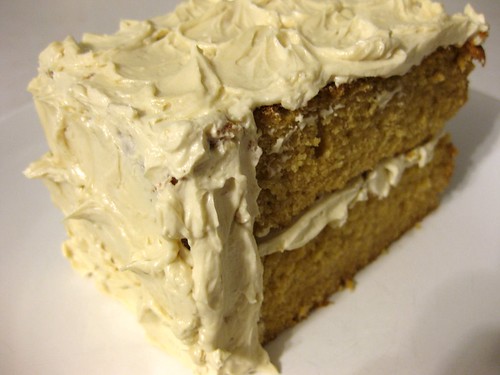
 I went into this month's DB challenge a little nervous (suprising?). We were basically making a white cake (with caramel).. something that has never turned out right for me! Either I'm looking for all the wrong things, I can't bake vanilla cakes or something is seriously wrong with every recipe I've tried. It annoys me insanely everytime I waste a perfectly gorgeous butter/sugar/egg emulsion. Luckily, this recipe was a little more forgiving and I was able to get away with even a not so pretty batter. That was such a relief considering the streak of caramel I had on the top of some cupcakes. Actually, it was more like a streak of caramel sugar crystals. Since I made the caramel sauce in advance, I had to microwave it to get it flowing again. The only problem is when the ever so slightly warm caramel hits the cool butter, you get melting butter and sugar crystals! Luckily, it all came together after the eggs were added, even though there were streaks of crystalized caramel.
Now for the tricky part, alternating dry and wet. If there's anything that's emphasized in virtually all recipes it is 'don't overmix'. To me, that translates into don't mix at all, or something close to that. To give you an idea of what I do, I add the flour at stir and stop the machine immediately so I can start pouring the milk, then I start the machine to add the next batch of flour and stop the machine to dump the rest of the milk followed by the rest of the flour. As I'm typing this out, I'm starting to realize how silly it sounds.. between the 10 seconds the machine is actually stiring, no wonder why I have patches of flour in some areas and puddles of liquid in others. Yet, I still get the feeling that if I let the machine run, I'm overmixing!
As for the frosting, as soon as I saw powdered sugar, it was already a warning for me. It's hard enough for me to eat frosting, but when there's powdered sugar involved, that's a signal for pasty, grainy or it may be a stretch to say this, but uncooked flour. How can I explain this better.. you know the taste and feel of a sauce or pie with added flour that isn't cooked through, well the raw flour taste is what I'm talking about. I wish there was a way to cook the cornstarch in powdered sugar, maybe then it will be less pasty.. but who knows I could be totally wrong with that theory I have! I started off slowly and gradually added the sugar starting with 1 cup and stopping when I got to 1.5 cups (how could this possibly take 4 cups of sugar!). There was no way I could handle any more sweetness, but the frosting was so liquidy, I was left with an icing. I decided to make a half batch of SMBC to frost the cupcakes I was serving to people and use this icing for the challenge. I ended up combining the two frostings and made a powdered-SMBC frosting duo. It was nowhere near as melt in your mouth as SMBC, but it covered up the pastiness of the icing. Everyone seemed to love the frosting, but I was really happy about the cake. It was really moist even the next day and suprisingly soft considering that all purpose flour was used. I can't wait for next month's challege.. I hope it's something sweet!
Thanks to Dolores of Chronicals in Culinary Curosity and her co hosts Alex of Blondie and Brownie and Jenny of Foray into Food for this month's SWEET DB challenge!
Here's a link to the original recipe Caramel Cake by Shuna Fish Lydon
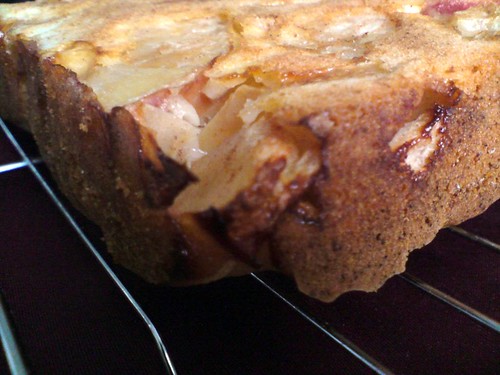 Sorry, no TWD this week. I love pumpkin, but even with scaling down and everything, I would be the only person in my family to eat it the pie. Plus, our thanksgiving already passed so instead I have something I've been dying to try since I saw it at Smitten Kitchen. It was only a matter of time before I knew I would make this. It just looked too good and how could I not make something loaded with apples! We actually had a whole bag of over ripe apples (which wouldn't ever happen at my house) that my aunt gave us. Whenever neighbours or family members ever have overripe apples or bananas, they get sent over to our house for apple pie or banana bread! If they're going to get wasted, we may as well make something good out of it! For some reason, when I read pour half the batter, I ended up pouring half the apples instead of the batter so the apples ended up on the bottom. It must have been those insanely gorgeous photos Deb from Smitten Kitchen takes. All I could think about was that apple topping, only except I envisioned that it was on the bottom instead.

I only made half the recipe, since it's the first time I've ever made apple cake. It also doesn't help when the only high capacity pan you have is a bundt. Muffin tins or 9 inch pans are my favourite to use because baking time is sped up by a lot. Who really wants to wait 1 hour for something to bake? I probably wouldn't be able to concentrate during the long baking time! This cake was really good and moist. Next time I'm definitely adding more apples though because mine did not look as apple-y.
This will be my final installment of pictures taken with the cell phone! I found my charger a while ago and these are the last of the cell phone pics! Speaking of electronics, I've noticed how dirty my laptop has gotten from all my baking. The other day in class, I was a little embarassed when I opened it up and I noticed some flour scattered on the screen, sugar in the keyboard and random stains. Normally, I take really good care of my stuff.. you should see my recipe books. Dorie's is always far from the baking site on a stool when I complete my TWD challenges, but my laptop on the other hand takes center spot, surrounded by ingredients. A book can be replaced, a computer.. well, not so easily.
Smitten Kitchen
Mom’s Apple Cake
6 apples, Mom uses McIntosh apples
1 tablespoon cinnamon
5 tablespoons sugar
2 3/4 cups flour, sifted
1 tablespoon baking powder
1 teaspoon salt
1 cup vegetable oil
2 cups sugar (I used 1.5 cups)
1/4 cup orange juice
2 1/2 teaspoons vanilla
4 eggs
1 cup walnuts, chopped (optional)
Preheat oven to 350 degrees. Grease a tube pan. Peel, core and chop apples into chunks. Toss with cinnamon and sugar and set aside.
Stir together flour, baking powder and salt in a large mixing bowl. In a separate bowl, whisk together oil, orange juice, sugar and vanilla. Mix wet ingredients into the dry ones, then add eggs, one at a time. Scrape down the bowl to ensure all ingredients are incorporated.
Pour half of batter into prepared pan. Spread half of apples over it. Pour the remaining batter over the apples and arrange the remaining apples on top. Bake for about 1 1/2 hours, or until a tester comes out clean.
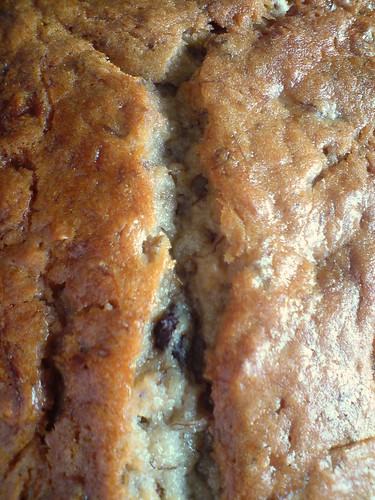 There was finally some serious ripening of bananas.. about time! My family should really stop eating bananas so I can bake more banana bread.. haha. Initially, I was going to bake peanut butter banana bread, but after the whole peanut butter pumpkin bread situation that didn't go so well, I decided to make some good old fashioned banana bread with chocolate chips. I ended up bringing some to school, since I didn't exactly need another excuse to eat chocolate. It turns out that banana bread is not as popular as I thought or maybe I just picked a bunch of banana bread haters. Who says 'no thank you' to banana bread?!?!

I used my usual banana bread recipe from Cook's illustrated. Since I'm into the whole fluffy baking thing, I creamed the butter and sugar instead of melting it. This was the first time I made this particular recipe this way and it did produce a softer crumb...YAY! On the other hand, there were a lot more dishes to be done (well, actually just the paddle and the mixing bowl..haha)
Banana Bread
Cook's Illustrated, The New Best Recipe
2 cups unbleached all-purpose flour, plus more for dusting the pan
1 1/4 cups walnuts, chopped coarse
3/4 cup sugar
3/4 teaspoon baking soda
1/2 teaspoon salt
3 very ripe, soft, darkly speckled large bananas, mashed well (about 1 1/2 cups)
1/4 cup plain yogurt
2 large eggs, beaten lightly
3/4 stick unsalted butter, melted and cooled
1 teaspoon vanilla extract
1. Adjust an oven rack to the lower-middle position and heat the oven to 350°F (175°C) degrees. Grease the bottom and sides of a 9 by 5-inch loaf pan; dust with flour, tapping out the excess.
2. Spread the walnuts on a baking sheet and toast until fragrant, 5 to 10 minutes. Set aside to cool.
3. Whisk the flour, sugar, baking soda, salt, and walnuts together in a large bowl; set aside.
4. Mix the mashed bananas, yogurt, eggs, butter, and vanilla with a wooden spoon in a medium bowl. Lightly fold the banana mixture into the dry ingredients with a rubber spatula until just combined and the batter looks thick and chunky. Scrape the batter into the prepared loaf pan.
5. Bake until the loaf is golden brown and a toothpick inserted in the center comes out clean, about 55 minutes. Cool in the pan for 5 minutes, then transfer to a wire rack. Serve warm or at room temperature. (The bread can be wrapped with plastic wrap and stored at room temperature for up to 3 days.)
 Rice pudding... the sound of those 2 words together somehow grosses me out a little. Maybe it's because I'm used to eating rice in a non dessert way or because boiled milk isn't something I really like and the whole milk, sugar, rice combination, well... that's pushing me a little into the nervousness territory. Even with bread pudding, it took me a while to get used to the thought of sweet milk soaked into bread. If that's not bad enough, I'm a dry cereal eater.. I just can't mix milk with anything! Something must be wrong with me.. haha.
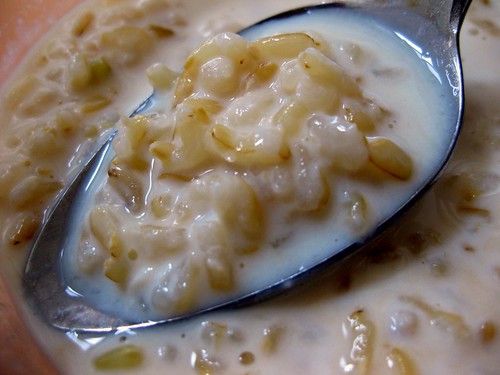
Why so many spoon shots? Well, I was trying my best to hide my rice soup. It was totally my fault for not using arborio rice and replacing it with brown. As much as I would love to buy an entire bag of arborio rice to use 1/4 cup of it (and I wouldn't considering I halved this recipe), I decided to go with brown. Plus, my other rice alternative was jasmine and you can imagine how gross that would've turned out, since jasmine rice does not hold its shape well through all that boiling. Out of all the desserts I've made, this one has definitely been the healthiest. A great source of fibre and calcium.. with no butter or any added fat, what can be better?! I'm so glad this was picked because I'm totally over my rice pudding fears.. I love rice pudding!!
Thanks to Isabelle of Les gourmandises d'Isa for choosing this recipe, which can be found on her blog and in Dorie Greenspan's Baking: From my Home to Yours. Don't forget to checkout the TWD Blogroll!
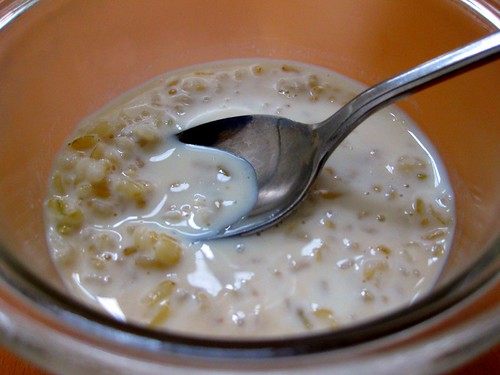
Rice soup!
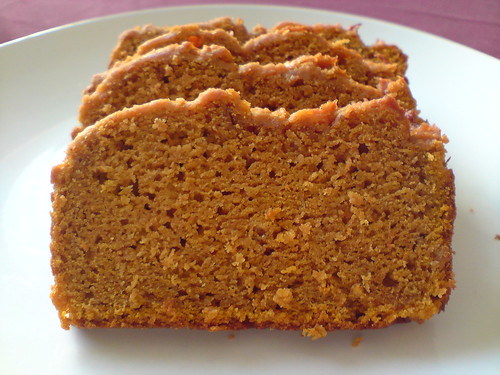
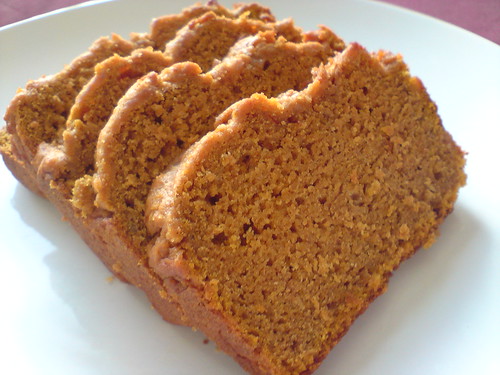 There was still some leftover pumpkin puree left in the freezer, but instead of making yet another batch of pumpkin muffins, I wanted to try something new. By something new, I was going to make the muffin recipe in a loaf pan, except add something better.. peanut butter. I love peanut butter so much I would like to think it goes with everything, but I guess there are times when well... it doesn't. I hate to admit it, but this is one of those times. There was just way too much competition going on with the pumpkin and the peanut butter, I don't even know what I was tasting! The best part about using peanut butter was I could totally eliminate the butter and use just two tablespoons of oil. Occasionaly, I see other bloggers use just one or two tablespoons of oil and always wondered how that would turn out. I mean, it's hard enough sometimes trying to get full fat desserts to work, think about how much harder it must be to do low fat baking! Since I had all that peanut butter going in, technically it wasn't low fat, but I guess I have to start somewhere.
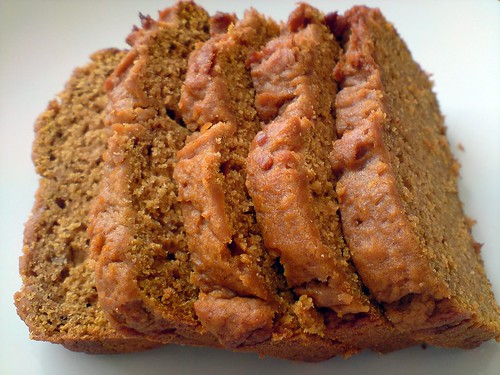
The quick bread ended up being something totally different from what I usually make. It was actually the first time I branched out from a recipe and changed things up a bit. I also skipped the whole mixer thing and folded everything by hand. Too bad no one in my family liked the flavour combination, but I thought it was still good. The best part was I didn't end up with something overmixed considering I went mixer-less.. hmm.. I guess those folding skills are improving! Maybe I should've thrown in some chocolate chips, since everything seems to taste better with chocolate! If you're still into regular pumpkin baked goods, you should definitely tryout this recipe from CI. Just replace the peanut butter and oil with 8 tablespoons of melted butter.
I still can't find my camera charger and I think I'm going to go crazy if I have to continue taking pictures with my phone!
Adapted from Cook's Illustrated Pumpkin Nut Bread
2 cups all-purpose flour
1 teaspoon baking soda
1 teaspoon baking powder
1 teaspoon ground cinnamon
3/4 teaspoon table salt
1/4 teaspoon ground nutmeg
2 cups pumpkin, mashed (or 1 15-ounce can pumpkin)
1 cup sugar
2 tablespoons oil
1 cup peanut butter
2 large eggs
2 teaspoons vanilla extract
Preheat oven to 350 F
1. Mix flour, baking soda, baking powder, cinnamon, nutmeg, salt in a bowl
2. Whisk peanut butter, oil, eggs, sugar in a bowl
3. Mix pumpkin puree with wet ingredients
4. Combine dry ingredients with wet being careful not to overmix
5. Pour batter in 9 x 5 inch loaf pan
6. Bake for 45-55 minutes or until a toothpick inserted in the centre comes out with a few crumbs attached
7. Cool in pan for 10 minutes and then transfer to wire rack
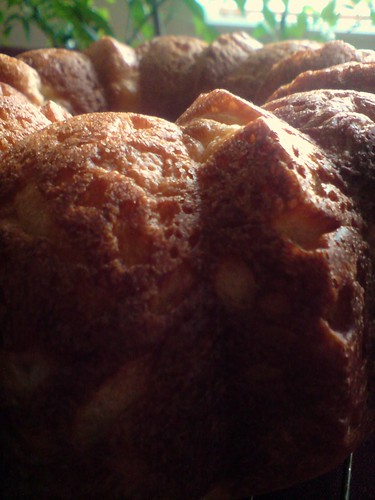 I love it when TWD challenges use equipment I don't already have because it gives me an excuse to buy a new pan or baking gadgets. The thing is, even if I wanted to buy a Kugelhopf pan, I'm pretty sure the stores around me don't carry one. I'm lucky if they carry stuff other than Wilton or Baker's Secret sometimes! Luckily, I had the time last weekend because the initial rise time was nowhere near 1.5 hours... it was more like 4 hours! Waiting for this thing to rise reminded me of when we used to take family trips and my brother and I would constantly ask if we were there yet.. except in this case, I was wondering, has this finally doubled in size yet.
The KA was making some pretty weird noises during the kneading process. I didn't even end up using the medium high speed and stopped the machine before the recommended times. If I ever broke the KA, I would probably cry! Instead of boiling water for the raisins, I just microwaved them in a cup with a splash of water to save time and clean up. I have a love-hate relationship with raisins... love them in oatmeal cookies and bread, not too crazy about them in quick breads and muffins. I think putting the Kugelhopf in the fridge was a bad decision because the dough never ended up rising as nicely as it did initally (and I was so proud when I saw it so puffy even though it took a long time). I had to put the pan on top of the heater in my room to get it to rise... 4 hours later it rose, well sort of. I was going turn the oven to 200F then off and throw the dough in there, but I wanted to keep it covered with saran wrap and a towel so it wouldn't dry out. After that foam fire I had last year in the oven, I wasn't going to leave plastic wrap and a towel into the oven even if it was shut off. A fellow TWDer suggested I put the pan ontop of the stove so I put the pan ontop of the toaster oven when I was warming up my bagel. The dough finally rose (8+ hours + refrigeration later)! It also solved my drying out issue and I didn't have to put things that don't belong in the oven, in the oven.
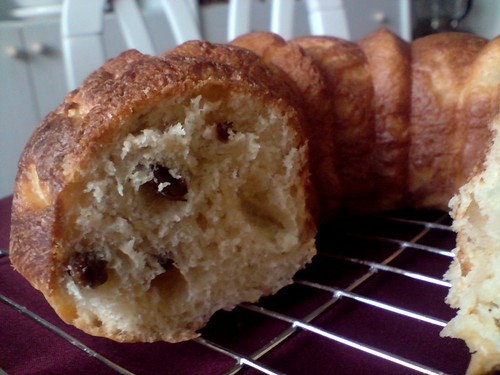
Overall, I didn't enjoy it as much as I thought I would considering all the time put into it. I guess that's not too suprising considering I don't really like croissants and these were croissant-tasting to me. I find croissants too flaky and buttery.. the very reason why people actually them.. haha. I'm glad this recipe was chosen though because it was quite the baking experience! I hope I can find my charger soon because taking these pics took forever!
Thanks to Yolanda of The all-purpose girl for choosing this recipe, which can be found on her blog and in Dorie Greenspan's Baking: From my Home to Yours. Don't forget to checkout the TWD Blogroll!

I received a few rewards, but didn't get a chance to thank everyone.. thanks! Sorry, about this really long post, but here we go..
Thanks Shari from A whisk blog for
 I've decided to pass this award to bloggers who have seriously always made my day whenever I stop by their blogs.
Adam from baking with dynamite. He's just too awesome! I can't never stop laughing whenever I drop by Adam's blog. Seriously, where does he come up with all those jokes?
Carla from chocolate moosey. She is always there to listen to me stress and ramble on about stuff.. haha I love how she always cooks such delicious meals for dinner instead of settling for college food.
Dee from choos and chews. She is one amazing writer. Her wit totally shines through her posts and is always entertaining. She is really encouraging and kind.. I always look forward from hearing from Dee.
Liz from veggiegirlvegan. She was actually the part of the reason I got over my fear and started a blog. When I first started reading blogs, there was always a nice and encouraging comment form veggiegirl. My first comment was from her! Her veganized and now gluten free baking (not to mention her multitasking) always amazes me.
Pamela from cookies with boys. I love her stories about her boys and her husband going to the gym. She's always baking yummy cookies!
Thanks Audrey from food from books and Dee from choos and chews for
 I'm passing this one to:
1. The food librarian
2. Amber of of chocolate and mangoes
3. Soni from sugarcraft by soni
4. Amy Ruth of amy ruth bakes
5. salute to sanity
Amy Ruth of Amy Ruth Bakes gave me

I'm passing this to:
1. Cate from fresh from cate's kitchen
2. Lucy from teen baker
3. Jamie from my baking addiction
4. Clara from iheartfood4thought
5. Natalie of snooky doodle cakes
Thanks Katherine from smokey mountain cafe for giving me

I'm passing this to:
Mary ann from meet me in the kitchen
Bridgett of la bella cook
Cathy of the tortefeasor
Audrey of food from books
Shari from A whisk blog
And if you're still with me, I've also been tagged by Carla and Silverrock.
7 things about me..
1. I've fractured 3 bones (left wrist, right wrist and right foot) and they've happened 6 years after another. Hopefully I won't break anything when I'm 23!
2. I am really shy.
3. I love trying new foods, give me anything and I'll eat it.
4. I get stressed way too easily (if you havn't figured that one out already!)
5. I love the sound of chocolate chips pouring into a mixing bowl.
6. I have a horrible sense of direction and would be lost, literally without a GPS.
7. I am obsessed with figure skating. They should really broadcast it more and it is a sport!
I guess since I was tagged twice I share another 7 things.
1. I love apples. I eat like 3 a day!
2. I love grocery shopping.
3. I love the smell of new cars. It's all chemical, but it's so yummy.
4. I've gained 5 pounds since I started blogging and at 5'2, that is a lot!
5. My favourite flavour of icecream is vanilla.
6. I have an obsession with cereal, especially Quaker's oat squares. The last time I went to Michigan, I bought a box and suprisingly, it tastes different.
7. I love holiday anything, commericals, music, Christmas trees.. I can never get too much!
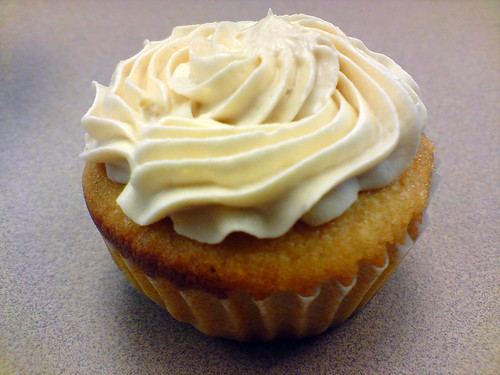
 I didn't have some sort of memory lapse and make the chocolate chocolate cupcakes for the second week in a row. There just wasn't enough time to make the rugalagh for TWD... I hope you guys don't stop reading! Last week, it was my friend's birthday so I decided to bake her cupcakes. She hasn't had anything I baked recently, since I put her through my rigorous chocolate chip cookie testing last year...haha Those were the days when only the batter tasted good while the baked result resembled something more like a hockey puck. It wasn’t until I stumbled on Cook’s Illustrated last Christmas when my desserts were finally edible. Not to mention, I also started to measure properly and stir the dry ingredients so that I wouldn’t end up with a cake that tasted soapy and bitter. Even though some may find CI to be a little annoying because they tend to focus on only one particular way of doing things and can put a limit on the creativity, I think they lay down the basics really well for an inexperienced baker. It also helps keep paranoid bakers like me from thinking too much and to just go with it. If I’m given too many choices, I’ll probably never end up baking anything! It’s kind of like when there are 2 parking spots in front of me and I end up parking in both. I hope you guys don’t take this to be a sign of a bad driver.. haha.. it’s just that I am that indecisive.
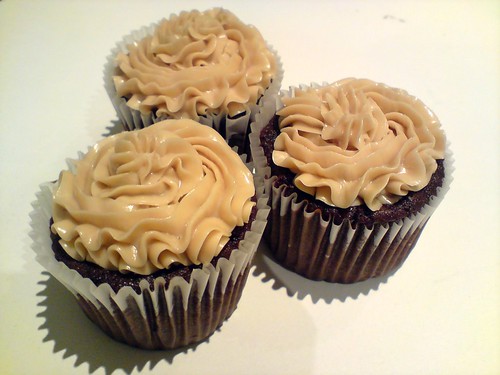
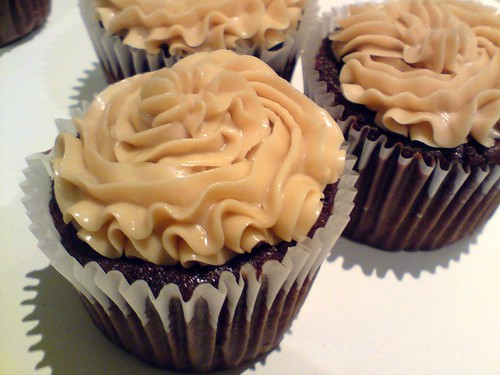
Earlier in the year during the PBS telethon, CI featured the old fashioned chocolate cake, which looked absolutely irresistible! I actually decided to bake a cupcake version of this recipe one hour before leaving for school. I even thought I could multitask and whip the eggs and sugar while measuring out the dry ingredients. It wasn’t until I tasted the batter when I realized I forgot to add salt! Luckily, I used salted butter, but there was still something that was definitely lacking. Thank god people eat with their eyes and seem to have some sort of obsession with frosting. I’m not usually into frostings other than whipped cream or cream cheese, but swiss meringue buttercream on the other hand, actually I should say, this SMBC from Cassie’s How to Eat a Cupcake is definitely worth the calories. It was simply melt in your mouth and creamy without coming off as tasting like a stick of butter. To help boost the flavour of the almost salt-less chocolate cake, I made a coffee flavoured frosting and used salted butter... hoping that the salt in the frosting would compensate.
After school, I made the frosting, but totally forgot that I wasn't bringing these until the next day. I wasn't into the idea of making people sick so I put the frosting in the fridge all ready to go in a piping bag. I was totally not expecting a lumpy curdled frosting the next day after I let the frosting come to room temperature. It was really gross and there was brown liquid from the coffee and vanilla separating out. Instead of taking out the mixer, somehow I thought I could hand whip this curdled mess into frosting again with my cake spatula. Well, after some vigorous mixing it was not coming together, but I already spent so much time on it, I didn't want to give in and take out the mixer. Then, it was almost like magic and the frosting came together. I could have easily avoided this whole mess had I just frosted the cupcakes and stored them in the fridge. But, no, my overly paranoid self was afraid that refridgeration would unfluffify the cake. I also wouldn't have to deal with the aftereffects of arm pain from all that hand mixing.. haha I know.. very embarassing!
The reaction? Well, the first thing people commented on was how amazing the frosting was, but the cake part was really good too. How can a cake made without salt taste good? I guess it’s true, a cake is simply a vehicle for frosting. This has officially taken over the place of Dorie's devil’s food white out cake as my favourite chocolate cake, mostly because of its texture. My friend actually ate 3 in one sitting! I'm not even going to mention how much butter was in the frosting alone, but then again, birthdays are only once a year. Sorry for the bad pics again, but I have no idea where my camera charger is so I took these with my cell phone.
Swiss Meringue Buttercream
Adapted from Cassie's How to eat a Cupcake
* I used salted butter to compensate for the lack of salt in my cake (it wasn't too salty because it was coffee flavoured, but I definitely wouldn't use salted butter for vanilla frosting)
* I increased the amount of butter by 1/2 a stick because the frosting was still really soft
* I added 2 teaspoons of instant coffee
Makes about 4 cups (enough to frost 24 cupcakes)
Ingredients
4 large egg whites
1 1/4 cups sugar
1 1/4 cup (2.5 sticks) salted butter, at room temp
2 teaspoons vanilla extract
2 teaspoons instant coffee
Directions
Put egg whites and sugar into the top of a double boiler over a pan of simmering water. Whisking constantly, cook until sugar has dissolved and mixture is warm (about 160 degrees).
Pour heated egg whites into the bowl of an electric mixer fitted with the whisk attachment. Beat egg white mixture on high speed until it forms stiff (but not dry) peaks. Continue beating until fluffy and cooled, about 7 minutes.
Switch to the paddle attachment. With mixer on medium-low, add butter two tablespoons at a time, beating well after each addition. Increase speed to medium-high; continue beating until frosting appears thick, about 3 minutes. Reduce speed to low; dissolve instant coffee in vanilla and pour mixture into mixing bowl and continue beating 2 minutes to eliminate air bubbles.


