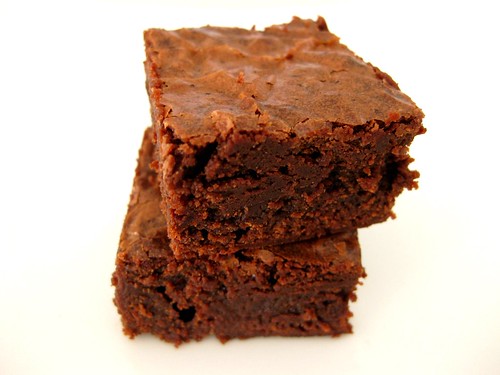
 I didn't get a chance to complete this week's TWD, but if it makes it sort of better, I made brownies (just not the recipe I was supposed to). I know I said I wasn't a huge fan of regular brownies because I find that they're excessively rich, but I didn't want to give up on full fat brownies just yet, especially since they always look irresistable. I decided to give CI's chewy, fudgy brownies a try because they sounded like they would have the perfect balance between chewy and fudgy. To be honest, I was a little disappointed considering how much richer these were compared to the low fat fudgy brownies. I would have thought that more fat = tastier, but these didn't really do it for me. They were a little too light and not 'brownie dense' or fudgy enough. The texture and flavour improved by day 2. These weren't horrible, but I guess they're just not for me. If I'm going to eat something with so much fat packed into a tiny square, they better be special or exceptional!
Chewy, Fudgy Triple Chocolate Brownies
Cook's Illustrated
Either Dutch-processed or natural cocoa works well in this recipe. These brownies are very rich, so we prefer to cut them into small squares for serving.
Makes Sixty-four 1-inch Brownies
5 ounces semisweet chocolate or bittersweet chocolate, chopped
2 ounces unsweetened chocolate , chopped
8 tablespoons unsalted butter (1 stick), cut into quarters
3 tablespoons cocoa powder
3 large eggs
1 1/4 cups granulated sugar
2 teaspoons vanilla extract
1/2 teaspoon table salt
1 cup unbleached all-purpose flour
1. Adjust oven rack to lower-middle position and heat oven to 350 degrees. Spray 8-inch square baking pan with nonstick vegetable cooking spray. Fold two 12-inch pieces of foil lengthwise so that they measure 7 inches wide. Fit one sheet in bottom of greased pan, pushing it into corners and up sides of pan; overhang will help in removal of baked brownies. Following illustration 1 below, fit second sheet in pan in same manner, perpendicular to first sheet. Spray foil with nonstick cooking spray.
2. In medium heatproof bowl set over a pan of almost-simmering water, melt chocolates and butter, stirring occasionally until mixture is smooth. Whisk in cocoa until smooth. Set aside to cool slightly.
3. Whisk together eggs, sugar, vanilla, and salt in medium bowl until combined, about 15 seconds. Whisk warm chocolate mixture into egg mixture; then stir in flour with wooden spoon until just combined. Pour mixture into prepared pan, spread into corners, and level surface with rubber spatula; bake until slightly puffed and toothpick inserted in center comes out with a small amount of sticky crumbs clinging to it, 35 to 40 minutes. Cool on wire rack to room temperature, about 2 hours, then remove brownies from pan using foil handles (see illustration 2, below). Cut into 1-inch squares and serve. (Do not cut brownies until ready to serve; brownies can be wrapped in plastic and refrigerated up to 5 days.)
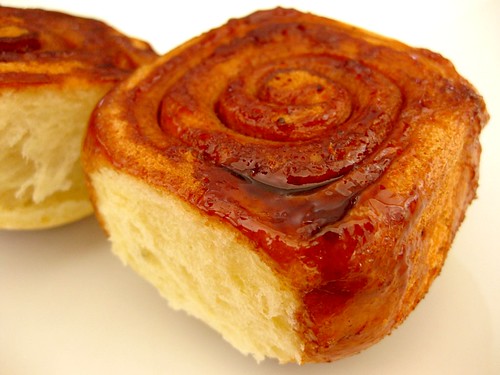 I waited way too long to finally give cinnamon rolls a try. These were fantastic!! They were sticky, sweet, cinnamony, fluffy and very addicting. If I didn't have a little more self control, I probably would have fallen into a sugar coma after devouring one too many. I was supposed to make a caramel glaze and pecan topping, but I skipped it because I didn't want these to be sickly sweet. These could have benefited from a little more goo so next time I'll make half the glaze.
It's so satisfying for me to see the transformation of cinnamon rolls...skinny to fat. If you ever make cinnamon rolls, don't forget to line the pan. I almost did and that would have been such a pain to scrub away after all that sugar caramelization.
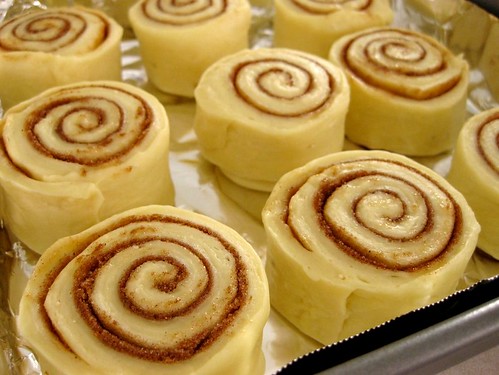
These were so tempting, I almost couldn't resist digging into the ones I was photographing too. I like to unravel my cinnamon roll, how do you like to eat yours?

Sticky Buns with Pecans for Freezing (I baked the buns right away instead of freezing them. It took me 25 minutes to bake in total).
Cook's Illustrated
Makes twelve 3 1/2-inch buns.
This recipe has four components: the dough that is shaped into buns, the filling that creates the swirl in the shaped buns, the caramel glaze that bakes in the bottom of the baking dish along with the buns, and the pecan topping that garnishes the buns once baked. Although the ingredient list may look long, note that many ingredients are repeated.
Ingredients
Dough
3 large eggs at room temperature
3/4 cup buttermilk at room temperature
1/4 cup granulated sugar
1 1/4 teaspoons table salt
2 1/4 teaspoons instant yeast
4 1/4 cups unbleached all-purpose flour (21 1/4 ounces), plus additional for dusting work surface
6 tablespoons unsalted butter , melted and cooled until warm
Caramel Glaze
6 tablespoons unsalted butter
3/4 cup packed light brown sugar (5 1/4 ounces)
3 tablespoons corn syrup , light or dark
2 tablespoons heavy cream
Pinch table salt
Cinnamon-Sugar Filling
3/4 cup packed light brown sugar (5 1/4 ounces)
2 teaspoons ground cinnamon
1/4 teaspoon ground cloves
Pinch table salt
1 tablespoon unsalted butter , melted
Pecan Topping
3 tablespoons unsalted butter
1/4 cup packed light brown sugar (1 3/4 ounces)
3 tablespoons corn syrup , light or dark
Pinch table salt
1 teaspoon vanilla extract
3/4 cup pecans (3 ounces), toasted in a skillet over medium heat until fragrant and browned, about 5 minutes, then cooled and coarsely chopped
Instructions
1. For the dough: In bowl of standing mixer, whisk eggs to combine; add buttermilk and whisk to combine. Whisk in sugar, salt, and yeast. Add about 2 cups flour and butter; stir with wooden spoon or rubber spatula until evenly moistened and combined. Add all but about 1/4 cup remaining flour and knead with dough hook at low speed 5 minutes. Check consistency of dough (dough should feel soft and moist but should not be wet and sticky; add more flour, if necessary); knead at low speed 5 minutes longer (dough should clear sides of bowl but stick to bottom). Turn dough out onto lightly floured work surface; knead by hand about 1 minute to ensure that dough is uniform (dough should not stick to work surface during hand kneading; if it does stick, knead in additional flour 1 tablespoon at a time).
2. Lightly spray large bowl or plastic container with nonstick cooking spray. Transfer dough to bowl, spray dough lightly with cooking spray, then cover bowl tightly with plastic wrap and set in warm, draft free spot until doubled in volume, 2 to 2 1/2 hours.
3. For the glaze: Meanwhile, combine all ingredients for glaze in small saucepan; cook over medium heat, whisking occasionally, until butter is melted and mixture is thoroughly combined. Pour mixture into nonstick metal 13- by 9-inch baking dish; using rubber spatula, spread mixture to cover surface of baking dish. Set baking dish aside.
4. To assemble, store, and reheat buns: For filling, combine brown sugar, cinnamon, cloves, and salt in small bowl and mix until thoroughly combined, using fingers to break up sugar lumps; set aside. Turn dough out onto lightly floured work surface. Gently shape dough into rough rectangle with long side nearest you. Lightly flour dough and roll to 16 by 12-inch rectangle. Brush dough with 1 tablespoon melted butter, leaving 1/2-inch border along top edge; with butter remaining on brush, brush sides of baking dish. Sprinkle filling mixture over dough, leaving 3/4-inch border along top edge; smooth filling in even layer with hand, then gently press mixture into dough to adhere. Beginning with long edge nearest you, roll dough into taut cylinder. Firmly pinch seam to seal and roll cylinder seam side down. Very gently stretch to cylinder of even diameter and 18-inch length; push ends in to create even thickness. Using serrated knife and gentle sawing motion, slice cylinder in half, then slice each half in half again to create evenly sized quarters. Slice each quarter evenly into thirds, yielding 12 buns (end pieces may be slightly smaller).
5. Arrange buns cut side down in prepared baking dish; cover tightly with plastic wrap and set in warm, draft-free spot until puffy and pressed against one another, about 1 1/2 hours. Place baking dish in freezer; store for up to 1 month.
6. To bake, adjust oven rack to middle position and heat oven to 350 degrees. Remove buns from freezer, remove plastic wrap, wrap dish tightly with foil, and set on baking sheet. Bake buns for 30 minutes, then remove foil and continue to bake until golden brown and center of dough registers about 180 degrees on instant-read thermometer, about 20 minutes longer. Cool on wire rack 10 minutes; invert onto rimmed baking sheet, large rectangular platter, or cutting board. With rubber spatula, scrape any glaze remaining in baking dish onto buns; let cool while making pecan topping.
7. For the topping: Combine butter, brown sugar, corn syrup, and salt in small saucepan and bring to simmer over medium heat, whisking occasionally to thoroughly combine. Off heat, stir in vanilla and pecans until pecans are evenly coated. Using soupspoon, spoon heaping tablespoon nuts and topping over center of each sticky bun. Continue to cool until sticky buns are warm, 15 to 20 minutes. Pull apart or use serrated knife to cut apart sticky buns; serve.
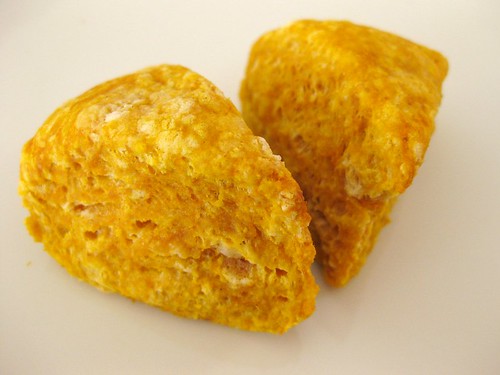 I really liked the creamy texture that the pumpkin added to these biscuits. Even my dad told me he liked these. I thought I was actually making progress with changing my family's mind about pumpkin until he had another one and realized that he was just starving before. O well, pumpkin just isn't for this family. I have to admit that I wasn't crazy about the taste of these either (or my embarrassing flour spots). Maybe it would have been better with the sweet potato, but I had some leftover pumpkin from the pumpkin patch cupcakes that I wanted to finish up.
Thanks to Erin of Prudence Pennywise for choosing this week's recipe! Don't forget to visit the TWD Blogroll. 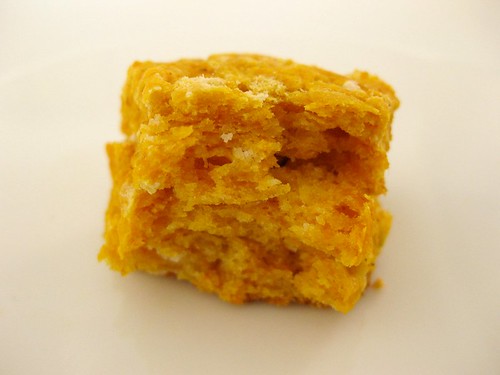
 Everyone in my family hates pumpkin except for me. It also doesn't help that these look really ugly! Since I wasn't going to get any help from anyone, I skipped the frosting. It wasn't easy eating all of these myself even though I quartered the recipe. Pacing myself at 2 to 3 a day, I eventually finished them. I'm making this sound like hard work... which it was especially after day 2, but when they were all gone I actually missed them. I doubt I'll be making another batch soon though!
Thanks to Kim of What the Whisk for choosing this recipe!
 The concept of 'you're supposed to have a few lumps in the batter' was part of the reason I was never really into muffins. Even though it's the way it should be, it just never felt right. The problem is, I tend to view cake batter as the standard of what batters should be and most of the time, that is not how muffin batter looks like... unless of course it is a cupcake in disguise.
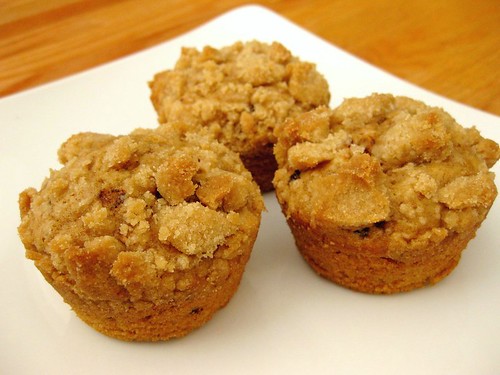
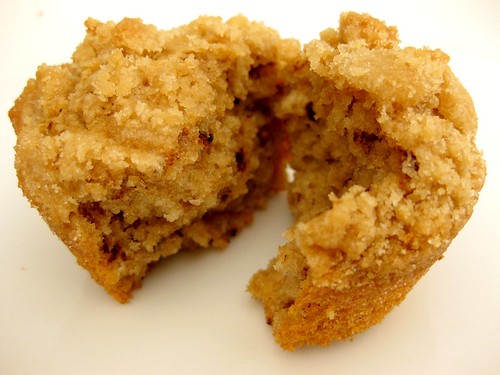
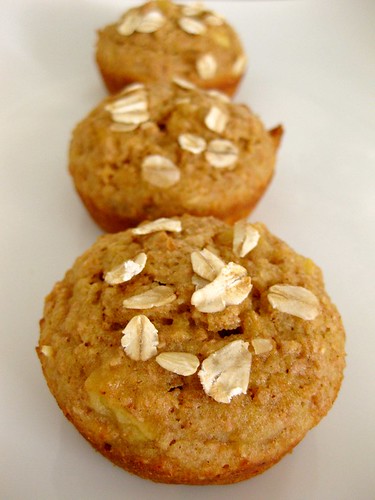
Anyway, not only did Steph of Steph Chows inspire me to bake muffins again, but she led me into the direction of the healthy variety. And yes, healthy muffins can actually taste good! I still have this fear that I'll end up with bricks if I bake with whole wheat flour so I found a recipe from my high school food and nutrition class that uses all purpose flour and wheat bran instead. I made half the recipe (which is the version I posted) and ended up with 11 squat muffins. Now that these are a keeper, I'll make the full recipe next time.
These were delicious and reminded me of apple pie, which was perfect for breakfast!
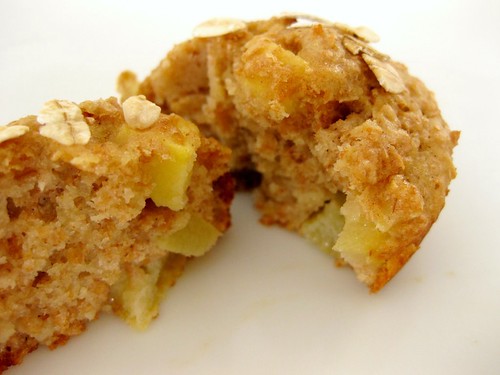
Apple Bran Muffins
3/4 cup flour
1/2 cup wheat bran
1 tsp baking powder
1/2 tsp cinnamon
1/4 tsp salt
1/2 cup unsweetened applesauce
1 egg
3 tbsp oil
1/3 cup brown sugar
1 cup of chopped apple
1. Preheat oven to 375, grease muffin tin
2. Mix flour, wheat bran, baking powder, cinnamon, salt in a bowl
3. Whisk applesauce, egg, oil, brown sugar until combined
4. Add chopped apples into wet mixture
5. Add wet mixture into dry mixture and fold until combined
6. Bake for 18-22 minutes or until a toothpick inserted the center comes out clean.
7. Let the muffins cool in the tin for 5 minutes before removing to cool on an oven rack.