Friday, September 19, 2008

Rustic Plum Cake

cakerusticplum (3)

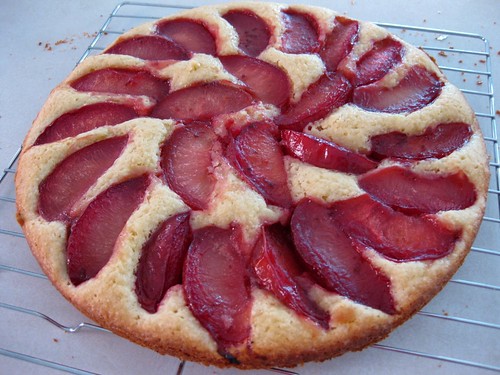
I've been dying to bake an unside down pineapple cake or an upside down any-fruit cake for the longest time because they look so pretty on their own undecorated. With an always growing list of things to bake, I never got to it and eventually pineapples were out of season. Now that plums are everywhere, I was not going to let a chance like this pass again so I decided to bake Cook's Illustrated rustic plum cake. Unlike the pineapple version, this type of cake isn't exactly baked upside down. Great... I was really hoping to get a suprise from unmoulding the springform. Regardless, I baked this cake because we had a lot of pluots (not that that would be a problem since fruits are like candy to me!) If you're wondering, I did say pluots. I had no idea what they were except that they looked like plums with a light patchy coloured skin. After a quick google search, I found out they're actually a cross between a PLUm and an apricOT. Don't you just love it when they cross different fruits.. it makes everything so much more interesting.
cakerusticplum

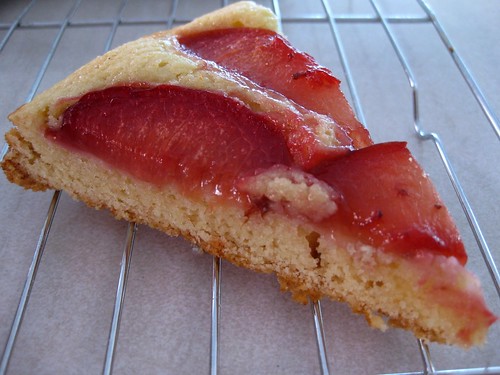
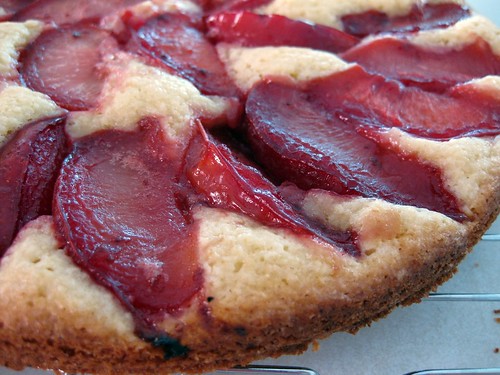
The batter came together in no time especially since it was all done in the food processor and boy was it thick! I loved the use of almonds because it added a nice nutty flavour to the cake and provided extra structure for the plums or pluots. The best part about this cake is you don't have to worry about overbaking because of all the moisture coming from the fruit. Suprisingly there wasn't any sogginess either and thank god because I have a huge problem with all things soggy. That's why I can't eat cooked oatmeal, cereal with milk or bread pudding even when it looks totally irrestible.. at least not the bottom part. If you've never made a plum cake before, definitely make this one because it has the perfect balance of moisture and flavour. Plus, the food processor makes it really easy and quick. So anyway, I made this way before I knew Dorie's dimply plum cake would be part of September's TWD baking list. I guess this is a great opportunity for comparison, since they use 2 totally different mixing methods.. how exciting!
cakerusticplum (2)

Is it me or does my plum cake look more like a tomato cake?

Rustic Plum Cake Recipe

Tuesday, September 16, 2008

TWD: Chocolate Chunkers

cookiechocolatechunker

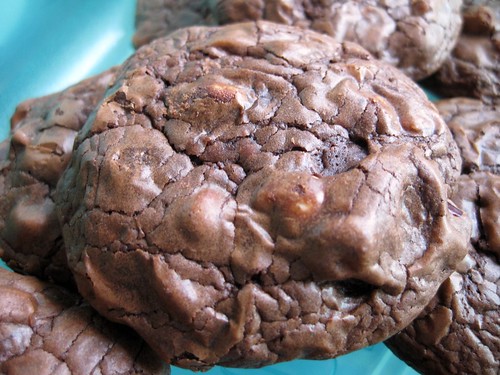
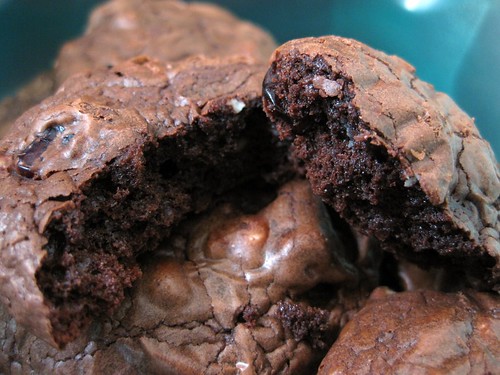
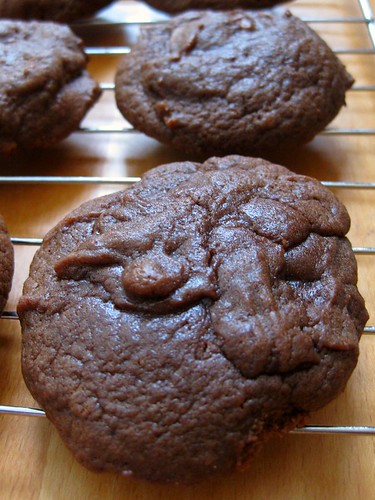
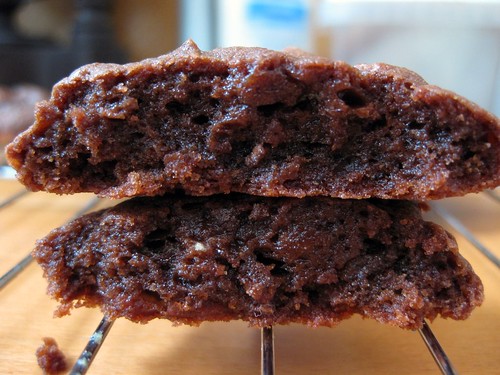
I wasn't too excited about this week's chocolate chunkers especially after last week's experience with a chocolate based cookie recipe. Oh, what am I saying.. I'm always excited when it comes to baking (just not the cleanup)! The best part about making these cookies was watching the sugar and eggs whip up to double the volume and transform from a yellowish mixture into something pale and fluffy. Even though these were supposed to be chunkers, mine looked more like chocolate crinkles. I ended up omitting the nuts, semi-sweet chocolate chips and added craisins instead of raisins. I know.. these are supposed to be chunkers, but I'm just not too crazy about a higher add-in to cookie ratio. The cookie is the best part, at least to me.. no one ever fights with me for the cookie with the fewest chips! I preferred these cookies better than last week's even though the texture was similar because the wet or soggy quality was gone. Luckily I had a birthday party to go to this weekend or I probably would have had to quarter this week's recipe if that was even possible! Plus I was able to get a lot of valuble feedback from all my taste testers. I always get really nervous with what people have to say, but it's the best way to improve my baking skills. In general, it was agreed that the cookies were moist, but not wet and chewy, but not underdone or gummy = a yummy cookie!

cookiechocolatechunkers (2)

So it doesn't really look like there's anything but cookie, but trust me.. 1 cup of white chocolate chips and 1/2 cup of craisins went into the batter.

Thanks to Claudia of Fool for Food for choosing this recipe, which can be found on her blog and in Dorie Greenspan's Baking: From my Home to Yours. Don't forget to checkout the TWD Blogroll!

Friday, September 12, 2008

Raisin Scones

sconesraisin

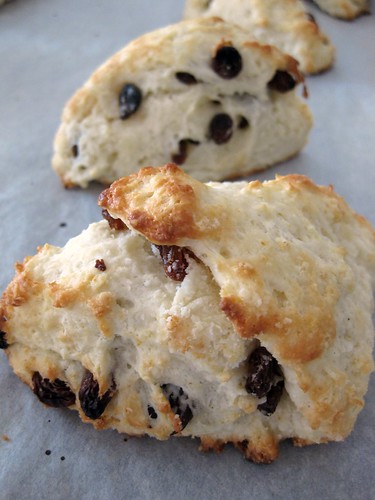
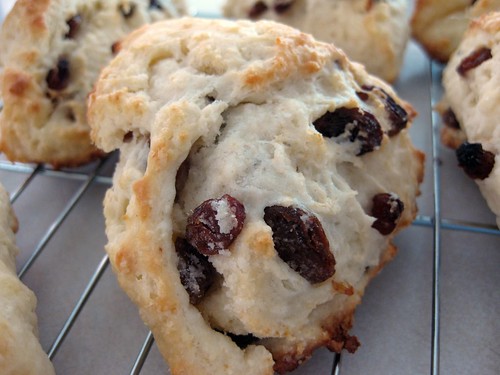
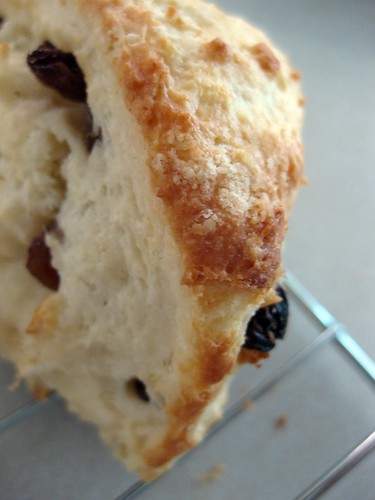
I will never forget the raisin scones at Harrod's high tea with their subtly sweet flavour and very fluffy texture. Since then, I've been dying for another one smothered with none other than clotted cream and jam! After hearing such rave reviews about Cook's Illustrated best blueberry scones, I decided to give them a try. These were definitely more labour intensive than Dorie's apple cheddar scones, from grating the frozen butter to rolling the dough out and folding it back up again, but it was well worth it. Although I wasn't able to get quite the fluffiness I wanted, these were pretty close. Luckily, my dollar store grater held up for the job, but it's definitely time for an upgrade to a large microplane.

sconesraisin (2)

These were supposed to be the best and they did not disappoint. Even my brother had a whole one and he usually doesn't eat a full-anything that I bake other than chocolate chip cookies. Maybe it was the un-dessert like nature of these scones that caught his attention because when it comes to desserts or anything sweet (other than candy) you literally have to offer it to him and sometimes force feed. Weird.. I know.. but on the bright side, there's never a fight for chocolate! It would be nice if I were like that for the sake of my never growing waistline since starting a blog, but then I would be missing out on all the wonderful desserts.

These are definitely on the 'make again' list and if you like your scones soft and fluffy, you have to try them out. They are portioned really big though so you might want to make them a little smaller. Now.. I must get some clotted cream!

sconesraisin (4)

Best Blueberry Scones Recipe
* I substituted 1/2 cup raisins for the blueberries
* Before adding the raisins in the dough, I plumped them up using CI's trick by microwaving them for 30 seconds with 1 tsp of water and then drying them on a paper towel
* I reduced the sugar to 1/4 cup since raisins are prety sweet in general

Tuesday, September 9, 2008

TWD: Chocolate Whopper Malted Drops

cookiechocolatemaltedwhopperdrops (2)

First day of school.. I only had a 1 hour physics (yuck!) class today and as much as I didn't want to commute all the way down to campus and back up again, I just couldn't skip a class... never have and never will. Even in high school when some declared the day before the Christmas holidays 'national skip day'.. nope, not for me. I and maybe a handful of other kids would go to class as if we were actually learning and spend time just talking about what we'd be doing for the holidays and stuff like that. Maybe I'm like this because my mom would never let us miss school unless we were deadly ill and that was determined according to her standards. Now let's steer away from school and focus on something more relaxing, fun to to make, eat and snap a million photos at.

Chocolate whopper malted drops, it sounds like something I would enjoy and I did if it were a brownie, but from cookie standards.. not so much. Maybe I screwed up the recipe when I decided to quarter it, but I ended up with a cakey brownie
type cookie... thick, soft and gooey. Now that may sound appealing to a lot of people, but I'm just not too into that when it comes to a cookie. The flavour was awesome though! I added brown sugar to boost the butterscotchy flavour and for extra moisture. I also had no idea I enjoyed malt so much, since the last time (a long time ago!) my grandmother made Ovaltine for me it was almost comparable to my pasty and soggy oatmeal experience... hopefully one day I'll get over it, but until then I can only eat my oatmeal and cereal dry.

cookiechocolatemaltedwhopperdrops

I'm so glad I had these on my first day of school.. even though they weren't exactly my favourite cookie because it's always nice to bite into something sweet and chocolatey to help relieve stress and anger. If there's one thing about going to school that totally annoys me, it is having to deal with the daily traffic jam. The worst are the ones that aren't caused by volume, but when people decide to drive 100-120km/hr on the passing lane with an open road in front of them and a whole lot of cars behind them. Honestly, I don't care if people drive fast or slow as long as they don't get in the way of others. When our family was driving down to Michigan, Pensylvannia or Florida, drivers seemed more courteous than here. Maybe we just lucked out in those states, but we certainly didn't have to deal with as many unnecessary traffic jams. Now that I'm done with my mini rant, off to a happier note.

Thanks to Pamela and Carla for giving me the I Love You This Much award! It definitely put a smile on my face, especially since school started today.

A little off topic (yet again), but my cell phone plan will be due and I'm probably renewing and getting a new phone this Friday. Should I get the iPhone? It's just so pretty and the screen is huge! Does anyone know what it's like for web browsing.. ie. google reader?

Thanks to Rachel of Confessions of a Tangerine Tart for choosing this recipe, which can be found on her blog and in Dorie Greenspan's Baking: From my Home to Yours. Don't forget to checkout the TWD Blogroll!

Thursday, September 4, 2008

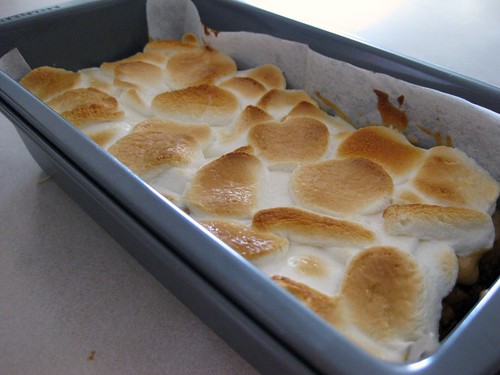
Marshmallowy Chocolate Chip Peanut Butter Bars

barchocolatechippeanutbuttermarshmallow

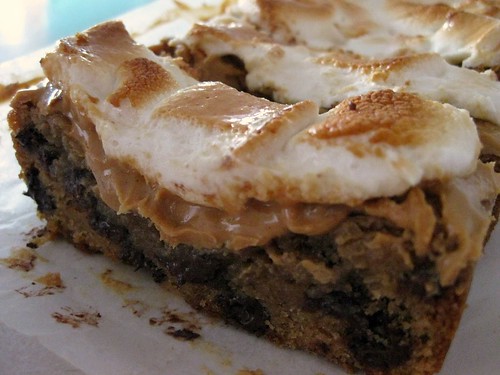
I've probably baked a million chocolate chip cookies, going through bags of brown sugar and chocolate chips on the way, but never a cookie bar recipe. The reason? No recipe or should I say, no set recipe because you can pretty much throw in whatever you want. I know.. it's sad I actually need someone to tell me what flavour of chips, types of nuts and if shredded coconut belongs. Ever since seeing Erin of Prudence Pennywise's version of Dorie's Chunky Peanut Butter and Oatmeal Chocolate Chipsters in a bar form, I just couldn't resist taking out a batch of chocolate chip cookie dough from the freezer to make some. I pressed as much dough to fill a 4x7 pan up to 1/2 an inch high and baked at 350 for 20 minutes. I was a little afraid that the bars would overbake and I think they did, but I followed Erin's instructions to spread peanut butter over the bars after they came out of the oven and I think that must have remoistened them. Since I didn't have mini marshmallows, I just piled a couple of large ones and set it back into the oven to broil. In a matter of seconds, they browned up really nicely and then came the hard part... waiting for them to cool.

barchocolatechippeanutbuttermarshmallow (2)

Slicing without ripping the entire layer of marshmallows off was really difficult, but it was nothing a pair of scissors couldn't handle. As the hugest peanut butter lover, I actually had to give this away so I wouldn't finish the entire pan. The bars were really thick and chewy without being underdone even though they look a little wet from the peanut butter. The overall flavour combination was delicious and the gooey marshmallows on top made it extra special. Thanks Erin for such a great bar idea! I will definitely have to make these again and try it out with another cookie recipe!

Marshmallowy Chocolate Chip Peanut Butter Bars
Adapted from Erin of Prudence Pennywise

Cook`s Illustrated thick and chewy chocolate chip cookie dough recipe (I used about 1/3rd of the dough)
peanut butter
7 large marshmallows cut in pieces

1. Preheat oven to 350. Line a 8.5x4.5 loaf pan with parchment
2. Press cookie dough with fingers until 1/2 inch thick
3. Bake 20 minutes or until the center looks just set. An inserted toothpick should have a few crumbs attached.
4. Immediately spread peanut butter over the bars
5. Layer with marshmallows
6. Return to oven and broil until marshmallows are nicely browned (it literally takes seconds so don't look away or it may burn)
7. Cool completely in pan

Tuesday, September 2, 2008

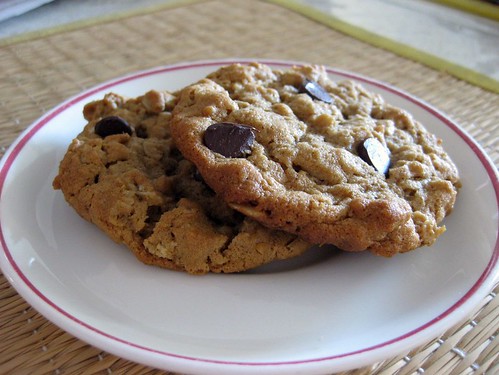
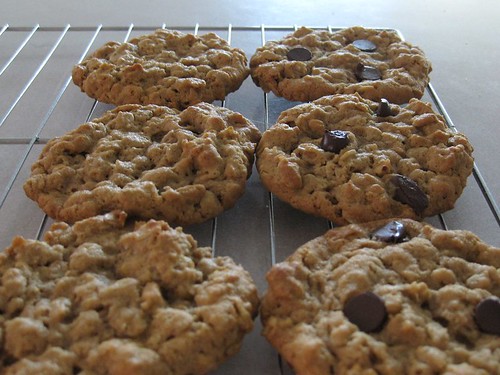
TWD: Chunky Peanut Butter and Oatmeal Chocolate Chipsters

<cookieschunkypeanutbutteroatmealchocolatechipster

When it comes to cookies, I can get a little crazy and by a little, I actually mean a lot. I obsess over whether or not to flatten the dough in case my cookies actually spread... although 90% of the time they rise; how long to cool the cookies on the sheet before moving them over to the rack and baking times. With all these variables, I usually end up sampling a few more than I should. Then again, it's not like it's difficult to eat endless amounts of cookies.. that is until the after-effects of too much butter and sugar starts to hit.

I was super excited over this recipe because it has everything I love all in one cookie, espeically peanut butter. The best part was that they tasted amazing cold and had the perfect balance of crunch and chew. They were so delicious I had 6! I reduced the butter to only one stick so I didn't chill the dough and flattened them down. Luckily they still ended up baking properly and didn't taste like a healthier low fat version either. Between the 1/2 cup of butter and 1 cup of peanut butter, it was probably enough to hold 1 cup of flour and 3 cups of oatmeal. For a little more brown sugar flavour, I added 1.5 cups of brown sugar only and no white sugar. At first I was a little hesitant about the cinnamon, but I just threw in 1 tsp instead of 2 tsp before I had a chance to think twice about it. I'm so glad I did because the cinnamon enhanced the flavour of peanut butter without overpowering.

cookieschunkypeanutbutteroatmealchocolatechipster (3)

Unlike most new cookie recipes I try, I will definitely make these again!
Thanks to Stefany of Proceed with Caution for choosing this recipe, which can be found on her blog and in Dorie Greenspan's Baking: From my Home to Yours. Don't forget to checkout the TWD Blogroll!

Sunday, August 31, 2008

Daring Bakers: Eclairs

DBeclairs (11)

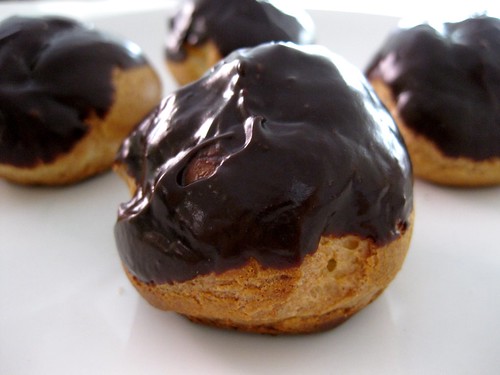
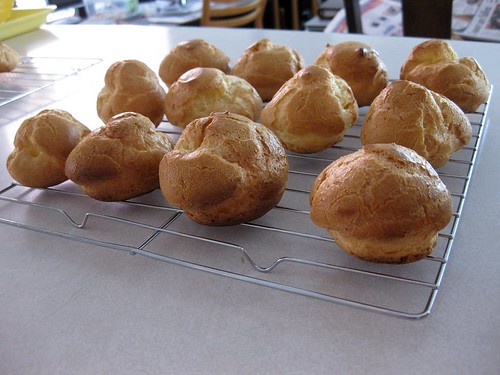
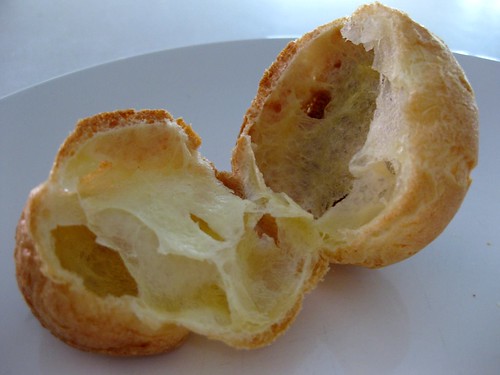
This month's challenge was a lot of fun and so delicious that I didn't need any help finishing them.. I practically ate all of them myself! It was amazing how something that was beaten, mixed and smeared around the pot so much would result in such a delicate pastry. If only this was the case for layer cakes, then I would never have to worry about toughness or chewiness. After piping out four eclairs, I realized that there just wouldn't be enough so I decided make the rest as puffs. Many daring bakers were complaining about their choux pastry deflating so I cranked up the oven temperature to 425 hoping that they would puff up like popovers. Well.. let's just say that it worked, but only for one. The rest deflated as soon as they were removed from the oven so I ate them as is while they were still warm. Suprisingly, they were really addicting plain and the eggy taste didn't bother me one bit. In fact, I loved it! My sole surviving choux pastry was left to cool while the second batch of puffs were in the oven.

DBeclairs

Luckily, none of the puffs deflated (probably due to their smaller size).. although I kind of wished some of them did so I could snack on a few more. I was almost tempted to skip the pastry cream and glaze all together and eat them warm. Then again, it would be such a shame not to enjoy them properly filled and glazed.

DBeclairs (2)

DBeclairs (7)

For the pastry cream, I omitted the chocolate and added vanilla extract. I was a little worried it would turn into vanilla flavoured scrambled eggs, which happens every time I made vanilla pudding. Something must have gone right because the pastry cream was so good. I could have eaten that on its own too.

DBeclairs (8)

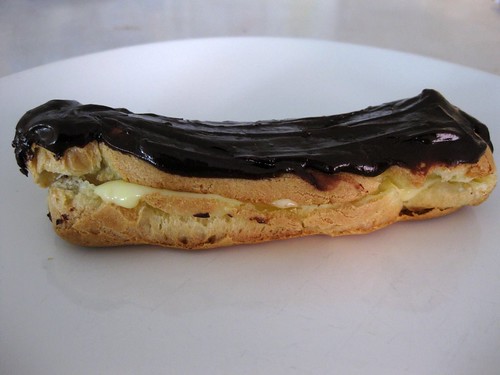
Here is my only surviving eclair in it's complete form.. there weren't too many of those! Since I ate so many puffs, I thought I had way too much pastry cream so I started to eat some of that. I must have eaten way too much because some of my puffs couldn't be filled and were only glazed.

DBeclairs (10)

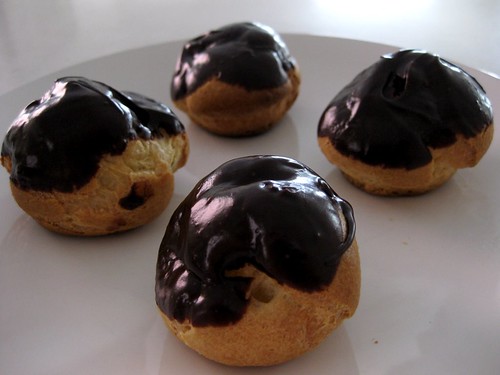
3 eclair shells, 4 filled and glazed puffs and a whole lot of pastry cream later, I was starting to feel a little sick. I love how each component on its own is so good and how tempting it is not to wait for all the shells to cool, pastry cream to cook and chocolate sauce. If I didn't have a little more self control, I probably would have eaten this as I completed each component, but it was definitely worth the wait. Thanks to Meeta and Tony for choosing such a fun and delicious recipe that will be made again!


Pierre Hermé’s Chocolate Éclairs
Recipe from Chocolate Desserts by Pierre Hermé
(makes 20-24 Éclairs)

• Cream Puff Dough (see below for recipe), fresh and still warm

1) Preheat your oven to 375 degrees F (190 degrees C). Divide the oven into thirds by
positioning the racks in the upper and lower half of the oven. Line two baking sheets with
waxed or parchment paper.

2) Fill a large pastry bag fitted with a 2/3 (2cm) plain tip nozzle with the warm cream puff dough.
Pipe the dough onto the baking sheets in long, 4 to 41/2 inches (about 11 cm) chubby fingers.
Leave about 2 inches (5 cm) space in between each dough strip to allow them room to puff.
The dough should give you enough to pipe 20-24 éclairs.

3) Slide both the baking sheets into the oven and bake for 7 minutes. After the 7 minutes, slip the
handle of a wooden spoon into the door to keep in ajar. When the éclairs have been in the
oven for a total of 12 minutes, rotate the sheets top to bottom and front to back. Continue
baking for a further 8 minutes or until the éclairs are puffed, golden and firm. The total baking
time should be approximately 20 minutes.

Notes:
1) The éclairs can be kept in a cool, dry place for several hours before filling.

Assembling the éclairs:

• Chocolate glaze (see below for recipe)
• Chocolate pastry cream (see below for recipe)

1) Slice the éclairs horizontally, using a serrated knife and a gently sawing motion. Set aside the
bottoms and place the tops on a rack over a piece of parchment paper.

2) The glaze should be barely warm to the touch (between 95 – 104 degrees F or 35 – 40
degrees C, as measured on an instant read thermometer). Spread the glaze over the tops of
the éclairs using a metal icing spatula. Allow the tops to set and in the meantime fill the
bottoms with the pastry cream.

3) Pipe or spoon the pastry cream into the bottoms of the éclairs. Make sure you fill the bottoms
with enough cream to mound above the pastry. Place the glazed tops onto the pastry cream
and wriggle gently to settle them.

Notes:
1) If you have chilled your chocolate glaze, reheat by placing it in a bowl over simmering water,
stirring it gently with a wooden spoon. Do not stir too vigorously as you do not want to create
bubbles.

2) The éclairs should be served as soon as they have been filled.

Pierre Hermé’s Cream Puff Dough
Recipe from Chocolate Desserts by Pierre Hermé
(makes 20-24 Éclairs)

• ½ cup (125g) whole milk
• ½ cup (125g) water
• 1 stick (4 ounces; 115g) unsalted butter, cut into 8 pieces
• ¼ teaspoon sugar
• ¼ teaspoon salt
• 1 cup (140g) all-purpose flour
• 5 large eggs, at room temperature

1) In a heavy bottomed medium saucepan, bring the milk, water, butter, sugar and salt to the
boil.

2) Once the mixture is at a rolling boil, add all of the flour at once, reduce the heat to medium
and start to stir the mixture vigorously with a wooden spoon. The dough comes together very
quickly. Do not worry if a slight crust forms at the bottom of the pan, it’s supposed to. You
need to carry on stirring for a further 2-3 minutes to dry the dough. After this time the dough
will be very soft and smooth.

3) Transfer the dough into a bowl of a mixer fitted with the paddle attachment, or using your
handmixer or if you still have the energy, continue by hand. Add the eggs one at a time,
beating after each egg has been added to incorporate it into the dough.
You will notice that after you have added the first egg, the dough will separate, once again do
not worry. As you keep working the dough, it will come back all together again by the time you
have added the third egg. In the end the dough should be thick and shiny and when lifted it
should fall back into the bowl in a ribbon.

4) The dough should be still warm. It is now ready to be used for the éclairs as directed above.

Notes:
1) Once the dough is made you need to shape it immediately.

2) You can pipe the dough and the freeze it. Simply pipe the dough onto parchment-lined baking
sheets and slide the sheets into the freezer. Once the dough is completely frozen, transfer the
piped shapes into freezer bags. They can be kept in the freezer for up to a month.

Chocolate Pastry Cream
Recipe from Chocolate Desserts by PierreHermé

• 2 cups (500g) whole milk
• 4 large egg yolks
• 6 tbsp (75g) sugar
• 3 tablespoons cornstarch, sifted
• 7 oz (200g) bittersweet chocolate, preferably Velrhona Guanaja, melted
• 2½ tbsp (1¼ oz: 40g) unsalted butter, at room temperature

1) In a small saucepan, bring the milk to a boil. In the meantime, combine the yolks, sugar and cornstarch together and whisk in a heavy‐bottomed saucepan.

2) Once the milk has reached a boil, temper the yolks by whisking a couple spoonfuls of the hot milk into the yolk mixture.Continue whisking and slowly pour the rest of the milk into the tempered yolk mixture.

3) Strain the mixture back into the saucepan to remove any egg that may have scrambled. Place the pan over medium heat and whisk vigorously (without stop) until the mixture returns to a boil. Keep whisking vigorously for 1 to 2 more minutes (still over medium heat).Stir in the melted chocolate and then remove the pan from the heat.

4) Scrape the pastry cream into a small bowl and set it in an ice‐water bath to stop the cooking process. Make sure to continue stirring the mixture at this point so that it remains smooth.

5) Once the cream has reached a temperature of 140 F remove from the ice‐water bath and stir in the butter in three or four installments. Return the cream to the ice‐water bath to continue cooling, stirring occasionally, until it has completely cooled. The cream is now ready to use or store in the fridge.

Notes:
1) The pastry cream can be made 2‐3 days in advance and stored in the refrigerator.

2) In order to avoid a skin forming on the pastry cream, cover with plastic wrap pressed onto the cream.

3) Tempering the eggs raises the temperature of the eggs slowly so that they do not scramble.

Chocolate Glaze
Recipe from Chocolate Desserts by Pierre Hermé
(makes 1 cup or 300g)

• 1/3 cup (80g) heavy cream
• 3½ oz (100g) bittersweet chocolate, finely chopped
• 4 tsp (20 g) unsalted butter, cut into 4 pieces, at room temperature
• 7 tbsp (110 g) Chocolate Sauce (recipe below), warm or at room temperature

1)In a small saucepan, bring the heavy cream to a boil. Remove from the heat and slowly begin to add the chocolate, stirring with a wooden spoon or spatula.

2) Stirring gently, stir in the butter, piece by piece followed by the chocolate sauce.

Notes:
1) If the chocolate glaze is too cool (i.e. not liquid enough) you may heat it briefly
 in the microwave or over a double boiler. A double boiler is basically a bowl sitting over (not touching) simmering water.

2) It is best to glaze the eclairs after the glaze is made, but if you are pressed for time, you can make the glaze a couple days ahead of time, store it in the fridge and bring it up to the proper temperature (95 to 104 F) when ready to glaze.

Chocolate Sauce
Recipe from Chocolate Desserts by Pierre Hermé
(makes 1½ cups or 525 g)

• 4½ oz (130 g) bittersweet chocolate, finely chopped
• 1 cup (250 g) water
• ½ cup (125 g) crème fraîche, or heavy cream
• 1/3 cup (70 g) sugar

1) Place all the ingredients into a heavy‐bottomed saucepan and bring to a boil, making sure to stir constantly. Then reduce the heat to low and continue stirring with a wooden spoon until the sauce thickens.

2) It may take 10‐15 minutes for the sauce to thicken, but you will know when it is done when it coats the back of your spoon.

Notes:
1) You can make this sauce ahead of time and store it in the refrigerator for two weeks. Reheat the sauce in a microwave oven or a double boiler before using.
2) This sauce is also great for cakes, ice-cream and tarts.

LinkWithin

Related Posts with Thumbnails