Showing posts with label Wilton. Show all posts

Friday, July 31, 2009

Wilton Course 3: Final Cake

wiltoncake4

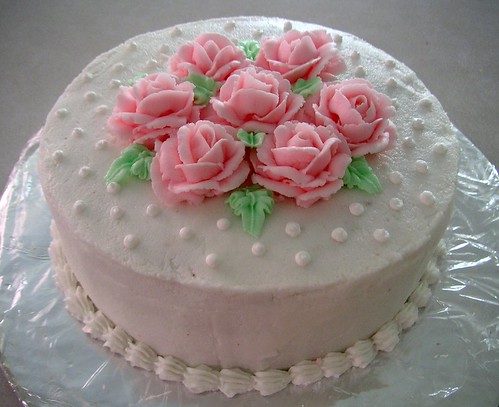
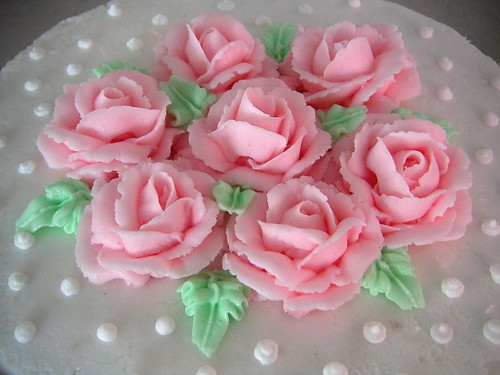
For my final cake, I decided to go with the stacked route rather than use the columns. It seemed a little less Wilton retro style...or at least I hope. Since MMF is a lot softer and dries slower than normal fondant, I was so happy it actually worked for the roses. You just have to hold the rose between your fingers while forming it instead of the sponge for better control. One advantage of the MMF is how easily it sticks when pressed together so you can skip the step where you brush clear vanilla?? (Wilton is really trying to sell their products because water so couldn't work..haha) to hold the petals together. One less thing to worry about always makes things a little easier especially since MMF is really delicate and tears easily. It took me a lot of practise (at least 2 movies (Knowing + Twilight) worth of time and some reruns of classic basketball playing at 1am) to finally get through my 38 roses. I wasn't even paying attention to Knowing, but I probably won't see it again after that weird ending and Twilight.. well even though it's not the best movie, I'm totally addicted and couldn't help watching it even those I've already seen it..many times.

Anyway, the sad part was, it took me about 30 roses in until I got the hang of it so these don't look as pretty as I would have liked. I can't wait to start course 4. I don't know if I'll be able to get away with using MMF, since we use gum paste, but I'll definitely give it a try. My instructor always says to me 'You have your own way of doing things.'

Marshmallow Fondant Recipe from What's Cooking America

16 ounces white mini-marshmallows (use a good quality brand)
2 to 5 tablespoons water (I used 2 tbsp)
2 pounds icing sugar (I didn't use all of the sugar)
1/2 cup Crisco shortening (you will be digging into it so place in a very easily accessed bowl)

Make sure you grease every bowl and spoon/spatula the marshmallows come in contact with first. I also find that if you stir in the sugar with a spoon/spatula until it doesn't seem so liquidy before kneading it with your hands, it's less sticky and hot.

Melt marshmallows and 2 tablespoons of water in a microwave or double boiler. Put the bowl in the microwave for 30 seconds, open microwave and stir, back in microwave for 30 seconds more, open microwave and stir again, and continue doing this until melted. Place 3/4 of the powdered sugar on the top of the melted marshmallow mix. (I stirred this with a spatula until it formed a large mass)

Now grease your hands GENEROUSLY (palms, backs, and in between fingers), then heavily grease the counter you will be using and dump the bowl of marshmallow/sugar mixture in the middle. (I did all this in a large bowl that I greased)

Start kneading like you would bread dough. You will immediately see why you have greased your hands.

Keep kneading, this stuff is sticky at this stage! Add the rest of the powdered sugar and knead some more. Re-grease your hands and counter when the fondant starts sticking. If the mix is tearing easily, it is to dry, so add water (about 1/2 tablespoon at a time and then knead it in). It usually takes me about 8 minutes to get a firm smooth elastic ball so that it will stretch without tearing when you apply it to the cake.

It is best if you can let it sit, double wrapped, overnight (but you can use it right away if there are no tiny bits of dry powdered sugar). If you do see them, you will need to knead and maybe add a few more drops of water.

Prepare the fondant for storing by coating it with a good layer of Crisco shortening, wrap in a plastic-type wrap product and then put it in a re-sealable or Ziploc bag. Squeeze out as much air as possible.

MM Fondant will hold very well in the refrigerator for weeks. If I know that I have a cake to decorate, I usually make two (2) batches on a free night during the week so it is ready when I need it. Take advantage of the fact that this fondant can be prepared well in advance.

Friday, July 17, 2009

Wilton Course 3: Fondant

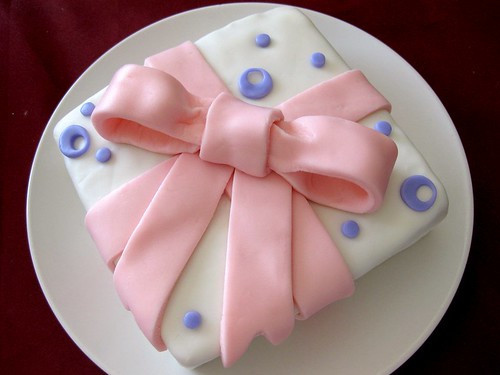
wiltoncake3 (2)

"What is this? Is it Wilton?"
"No"
"What is it??"
"Umm..."
"What is it? Did you make this? Marshmallows?"
"Umm... yes"
"Well then, that's why. Feel yours and feel hers. See the difference? That's why I said to use Wilton fondant instead of making your own because I would rather have something that always works instead of making batches that fail half the time."

"Yes, that's right, even though I covered the cake with no tears, it still failed." - I wish I was brave enough to say that.

O boy, now that was pretty embarrassing in front of the entire class. I also happened to be standing up too... talk about being at the centre of attention. Embarrassment wasn't the only thing I was feeling after being confronted like that with 9 pairs of eyes staring at me. I was so stunned at the time, I couldn't even think of anything to say except for feeling like I did something really bad by not buying the fondant. The worst part was after I successfully covered the cake with no tears, it still felt bad because oh wait, this isn't store bought. That's like saying we shouldn't bake scratch cakes, pie crusts or yeast breads because they're not always bound to turn out. I totally understand that the classes are designed so that we use the products, but to be humiliated in front of everyone like that felt really unfair. It's not like I was parading around my homemade fondant to encourage others to make their own. I have to be honest and say that I'm not completely satisfied with my cake (being a little bumpier than I would like), but I think it has to do more with my decorating skills (poor frosting job and rolling out the fondant way too thin) than the MMF because I've seen so many amazing MMF cakes.

Making the marshmallow fondant was a lot easier and less messy than I expected, but you have to make sure everything is properly greased (bowls, spoons, anything that comes in contact with the marshmallows). Most recipes do the kneading on the table, but I wanted to keep cleaning to a minimum. Instead, I greased a large metal bowl so that I wouldn't have to scrub shortening off the counter (a huge pain!). Also, no matter how much I clean the counter beforehand, it still feels dirty to me. Anyway, the MMF came together pretty quickly and tasted like marshmallows except doughier. I can't imagine snacking on the entire ribbon/bow, but I can definitely see the appeal of fondant when it comes to decorating. Just in case you are interested in making your own marshmallow fondant (but beware.. there is a 50% failure rate..haha), I got it from What's Cooking America

Marshmallow Fondant Recipe from Here

16 ounces white mini-marshmallows (use a good quality brand)
2 to 5 tablespoons water (I used 2 tbsp)
2 pounds icing sugar (I didn't use all of the sugar)
1/2 cup Crisco shortening (you will be digging into it so place in a very easily accessed bowl)

Make sure you grease every bowl and spoon/spatula the marshmallows come in contact with first. I also find that if you stir in the sugar with a spoon/spatula until it doesn't seem so liquidy before kneading it with your hands, it's less sticky and hot.

Melt marshmallows and 2 tablespoons of water in a microwave or double boiler. Put the bowl in the microwave for 30 seconds, open microwave and stir, back in microwave for 30 seconds more, open microwave and stir again, and continue doing this until melted. Place 3/4 of the powdered sugar on the top of the melted marshmallow mix.

Now grease your hands GENEROUSLY (palms, backs, and in between fingers), then heavily grease the counter you will be using and dump the bowl of marshmallow/sugar mixture in the middle. (I did all this in a large bowl that I greased)

Start kneading like you would bread dough. You will immediately see why you have greased your hands.

Keep kneading, this stuff is sticky at this stage! Add the rest of the powdered sugar and knead some more. Re-grease your hands and counter when the fondant starts sticking. If the mix is tearing easily, it is to dry, so add water (about 1/2 tablespoon at a time and then knead it in). It usually takes me about 8 minutes to get a firm smooth elastic ball so that it will stretch without tearing when you apply it to the cake.

It is best if you can let it sit, double wrapped, overnight (but you can use it right away if there are no tiny bits of dry powdered sugar). If you do see them, you will need to knead and maybe add a few more drops of water.

Prepare the fondant for storing by coating it with a good layer of Crisco shortening, wrap in a plastic-type wrap product and then put it in a re-sealable or Ziploc bag. Squeeze out as much air as possible.

MM Fondant will hold very well in the refrigerator for weeks. If I know that I have a cake to decorate, I usually make two (2) batches on a free night during the week so it is ready when I need it. Take advantage of the fact that this fondant can be prepared well in advance.

Friday, July 3, 2009

Wilton Course 2: Final Cake

wilton2finalcake

This was my final cake for Wilton Course 2. I was so proud of my basketweave and rope, but the entire cake? Not so much. The flowers and birds make it look so umm.. dated? Simple and elegant.. definitely not here. Not suprisingly, I just stared at my cake for the longest time not knowing where to start. It wasn't until my instructor started putting random flowers on for me when I finally got going. She thinks I have commitment issues. I agree.

The part I hate about these courses is all the wastage that comes with it. I can't stand wasting food, but I can't eat the shortening frosting either because the greasy film that's left on the roof of my mouth and plastic tasting qualities grosses me out. Also, it just feels dirty to be eating something that has been played around with that much (piping, scooping it back into the bag and repiping) in the middle of a Michael's store. To minimize waste, I just use a cake mix + water so it doesn't feel nearly as bad as throwing out butter and eggs. Next week I'm starting course 3: fondant and we'll be needing 2 cakes + Wilton fondant. This cake is already in the freezer so no wasting or turning on the hot oven for me! My instructor who found out about my homemade royal icing (and wasn't too pleased about) told me to buy the Wilton fondant, but I'm making my own. The whole class will probably hear about it and it will probably be embarrassing, but honestly, I would rather buy myself a new pan than something that even she says tastes gross.

Friday, July 25, 2008

Wilton Decorating Course 1: Class 4

wiltoncake4

July has gone by way too fast! For my final class, we finally learned how to do the wilton rose. We were so slow with learning how to coordinate twisting the flower nail while squeezing the piping bag and moving the petal tip up and down that we didn't even get a chance to learn the leaves. Being the clumsy person I am, 4 of my roses didn't actually make it to the cake and landed on the table. By the time class was over, I only piped the center 7 roses onto my cake so again, I had to finish the rest at home.

Now the question is.. what to do with the cake? Everytime I get back from class, I can never bring myself to eat it, but feel like it's such a waste to throw out. Shortening freaks me out a little.. I don't know if it's the slimy feeling it leaves on your tongue or the pure whiteness of it. What makes it worse is I used noname transfats shortening so that the roses would pipe better. Apparently, we need those transfats to keep the frosting stabilized. As my instructor always says, desserts are not meant to be healthy...


wiltoncake4 (2)

Saturday, July 19, 2008

Wilton Decorating Course 1: Class 3

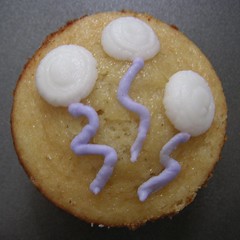
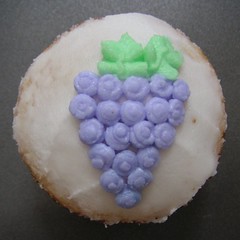
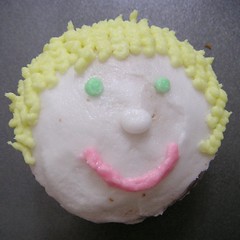
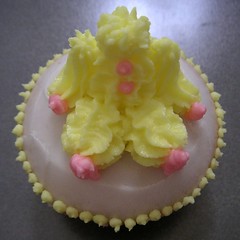
This week we decorated cupcakes in class. Since we were given the freedom to pipe whatever we wanted to, I couldn't finish and ended up only decorating 3/8. This is so typical of me.. I can never decide!

wiltoncake3wiltoncake3 (2)wiltoncake3 (3)

I finished the rest of the cupcakes at home...

wiltoncake3 (4)wiltoncake3 (6)wiltoncake3 (5)

Thanks to everyone for the encouraging words in my other post. I'm still confused, but I'm sure I don't want to be dietitian after speaking with a few of them. It defintiely wasn't the job I was expecting it to be, but at least I know I won't be spending the next 4 years in school for dietetics.

Friday, July 11, 2008

Wilton Decorating Course 1: Class 2

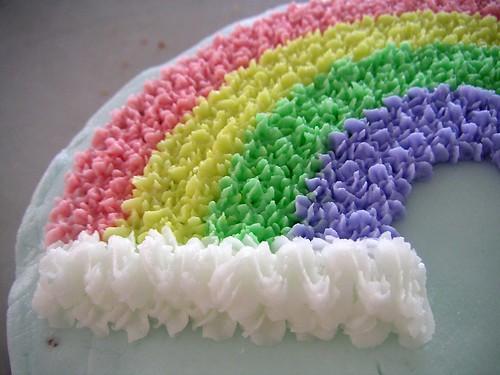
wiltoncake2

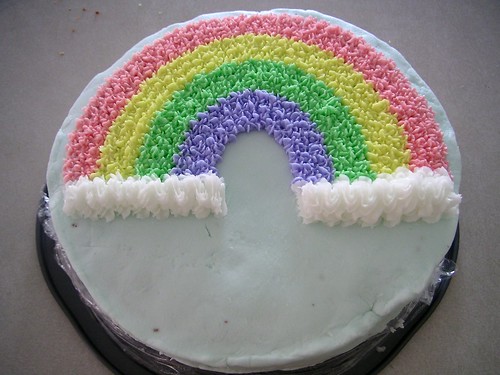
I woke up with a very sore arm after my second cake decorating class where we traced a couple of practise boards and piped a rainbow pattern. It must be the lack of muscle tone in my body... how embarassing! We were required to bring an 8 inch cake, but I wasn't planning on eating shortening/icing so I took out my cake mix from hmm.. 1999? only to discover that there were little black bugs everywhere! Having just made Dorie's devil's food cake, I decided to buy a devil's food cake mix for comparison. I have to admit that I'm pretty jealous of the fluffy texture that I can never achieve with homemade cakes. Tastewise, Dorie's cake wins hands down! The cake mix seemed a one dimensional and it was like eating a very sweet brown cake.

wiltoncake2 (2)

As easy as shortening + icing sugar frosting is to make, it is a huge mess to clean up. Hydrogenated oil does not seem to want to come off anything it touches. I didn't even bother to measure it out and just eyeballed it off the measurements on the box. Thankfully, I had lots of practise icing left. I love these classes and would recommend them to anyone who desperately needs to learn basic piping skills. Those who are more advanced may probably find it a little boring though.. espeically with all you amazing decorators out there! I'm excited that after one month of blogging, I've learned so much and piped frosting on a cake.

This icing is really good for practising, especially if you don't want to waste your precious butter!

Buttercream Icing

(Medium Consistency)

1 cup solid vegetable shortening
1 teaspoon Clear Vanilla Extract
4 cups sifted confectioners' sugar (approx. 1 lb.)
2 tablespoons milk or water

In large bowl, cream shortening and butter with electric mixer. Add vanilla. Gradually add sugar, one cup at a time, beating well on medium speed. Scrape sides and bottom of bowl often. When all sugar has been mixed in, icing will appear dry. Add milk and beat at medium speed until light and fluffy. Keep bowl covered with a damp cloth until ready to use. For best results, keep icing bowl in refrigerator when not in use. Refrigerated in an airtight container, this icing can be stored 2 weeks. Rewhip before using.

YIELD: Makes about 3 cups.

For thin (spreading) consistency icing, add 2 tablespoons light corn syrup, water or milk.

LinkWithin

Related Posts with Thumbnails