Showing posts with label Cream Cheese. Show all posts

Saturday, May 7, 2011

Red Velvet Cupcakes

cupcakeredvelvet (4)

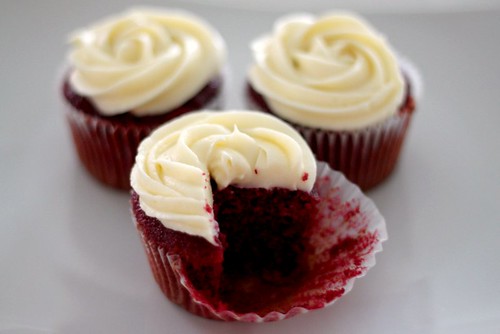
I've never eaten a red velvet cupcake before. I guess the whole, is it a vanilla or chocolate cake or just something in between steered me away from even attempting this cake. If it wasn't for my brother who begged me to make these cupcakes for his friend, I don't think I would ever make these. I chose a butter based instead of oil recipe for maximum flavour because I just couldn't see how a cake made with one tbsp of cocoa would have any taste. Red velvet isn't supposed to be a chocolate tasting cake, but the thought of a something tasting like it had a 'hint' of chocolate flavour didn't seem appealing to me. Plus with the tanginess from the buttermilk and vinegar, I was really worried these would have some weird flavour and that the only thing drawing me into eating these was the pretty red colour and cream cheese frosting!
cupcakeredvelvet (3)

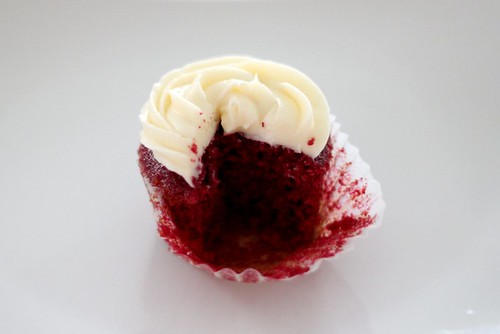
As it turns out, these weren't so bad. They were even moist the next day even after storing them in the fridge, which was great because most butter based cakes dry out. I used the recipe from the Joy of Baking, increasing the butter by 2 tablespoons.

Red Velvet Cupcakes:

1 1/4 cups (125 grams) sifted cake flour
1/4 teaspoon salt
1 tablespoons (10 grams) regular or Dutch-processed cocoa powder
1/4 cup (57 grams) unsalted butter, at room temperature (I used 6 tablespoons)
3/4 cups (150 grams) granulated white sugar
1 large egg
1/2 teaspoon pure vanilla extract
1/2 cup (120 ml) buttermilk
1 tablespoon liquid red food coloring
1/2 teaspoon white distilled vinegar
1/2 teaspoon baking soda

Preheat oven to 350 degrees F (175 degrees C) and line 12 muffin tins with paper cupcake liners.

In a large bowl sift together the flour, salt, and cocoa powder.

In the bowl of your electric mixer, or with a hand mixer, beat the butter until soft (about 1-2 minutes). Add the sugar and beat until light and fluffy (about 2-3 minutes). Add the egg and beat until incorporated. Scrape down the sides of the bowl. Add the vanilla extract and beat until combined.

In a measuring cup whisk the buttermilk with the red food coloring. With the mixer on low speed, alternately add the flour mixture and buttermilk to the butter mixture, in three additions, beginning and ending with the flour.

In a small cup combine the vinegar and baking soda. Allow the mixture to fizz and then quickly fold into the cake batter.

Working quickly, divide the batter evenly among the 12 muffin cups and smooth the tops with an offset spatula or the back of a spoon. Bake in the preheated oven for approximately 18 - 23 minutes, or until a toothpick inserted in the center of the cupcakes comes out clean.

Cool the cakes in their pans on a wire rack for 10 minutes and them remove from pan. Let cool completely before frosting. Either spread the frosting with a knife or offset spatula, or use a large 1M Wilton open star decorating tip to pipe the frosting.

Read more: http://www.joyofbaking.com/RedVelvetCupcakes.html#ixzz1LhfpGcJ0

Cream Cheese Frosting
6 tablespoons of butter at room temperature
8 oz cream cheese at room temperature
1.5-2 cups of icing sugar, sifted depending on how sweet you like your frosting

Cream butter at medium speed until smooth
Add cream cheese and continue beating at medium low speed until there are no lumps
Sift icing sugar and continue beating at medium low until incorporated
Do not overbeat or else frosting will be too soft to pipe

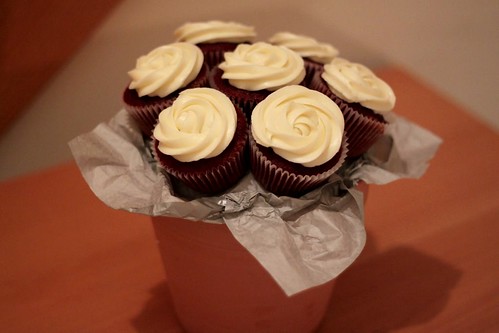
I could only take this picture at night when the lighting is all screwed up, but this is what the red velvet cupcakes were really made for.
cupcakeredvelvet (2)

Thursday, December 10, 2009

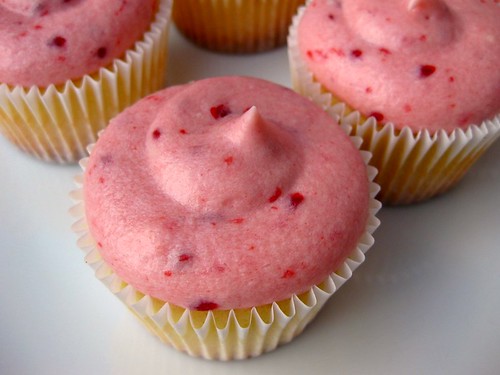
Vanilla Cupcakes with Raspberry Cream Cheese Frosting

cupcakevanillaraspberry

A woman who I used to work with asked me to bake cupcakes for a birthday party. This was my first paid cupcake order so it was a little nerve wracking. She gave me a lot of freedom with the flavours, which was was actually worse for me because I can never make up my mind. In the end, I went with raspberry cream cheese because you can never really go wrong with cream cheese frosting... that's why we eat red velvet cupcakes right? I wish I could have done something super cool with the decorating, but it was really difficult to pipe cream cheese frosting without it looking sloppy and melty so I swirled it using my largest round tip. I was beyond excited when she told me how much she loved them!

Amy Sedaris' Cupcakes

24 cupcakes

Ingredients
1 1/2 stick (12 tbsp) unsalted butter
1 3/4 cup sugar (I used 1 1/2 cup sugar)
2 large eggs
2 teaspoons vanilla
1/2 teaspoon salt
2 1/2 teaspoons baking powder
2 1/2 cups flour
1 1/4 cup milk

Directions
1. Preheat over to 350 degrees (Amy uses 375, but I think that's too high).
2. In a bowl, whisk flour, baking powder, salt together
3. Cream butter and sugar until light and fluffy.
4. Beat in eggs, one at a time making sure it's well incorporated
5. Beat in vanilla
6. Add flour mixture in 3 batches, alternating with milk. Do not overbeat.
7. Divide batter evenly. Bake for 16 to 20 minutes and toothpick inserted into center comes out with a few moist crumbs attached.
9. Cool on wire rack for 5-10 minutes then transfer cupcakes to cool completely

Raspberry Cream Cheese Frosting

1 stick butter, room temperature
1 block (8oz) cream cheese, room temperature
1 1/3 cup powdered sugar
1/4 cup raspberry jam

Beat butter on medium-low speed until smooth and creamy
Add cream cheese and beat on medium-low speed until smooth and creamy (30 seconds-1 minute)
Sift powdered sugar over creamed mixture and beat on medium low until the sugar is all incorporated
Add jam and continue beating.
Make sure you don't overbeat or else the frosting will become soupy.

Saturday, June 20, 2009

Chiffon Cake

sponge

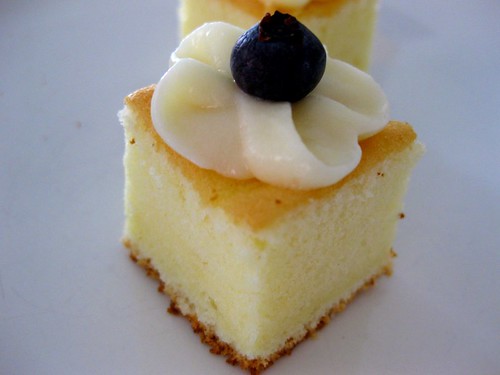
My favourite cakes are foam cakes, but they haven't been exactly the easiest kind to make. Alton's was a good start, but it was hardly perfect. I've definitely had my fair share of flops so I couldn't be happier when I cut into my cake and saw a tight knit crumb instead of the usual patches of egg or coarseness. I almost cried..haha. No seriously, I don't think I can even count the number of times I've whipped up a beautiful egg foam only to mess it up with my excessive folding and need to get rid of every single trace of egg white or flour until the whole thing deflated. It's kind of like making a batch of cookies with yummy batter only to have them come out of the oven burnt, hard and dry. I don't know what happened this time.. maybe the baking gods were on my side.. they better be there the next time I attempt a sponge or angel food cake! Since this cake is so light compared to butter cakes, I made a cream cheese frosting to add some richness. No crazy tower of frosting for me though!

This recipe comes from Rose Levy Beranbaum. I love her attention to detail, precision, accuracy and consistency. Her videos were really helpful and I would really suggest watching them if you're paranoid about folding like me. I made a vanilla version, replacing the orange juice with water and omitted all the flavouring except for vanilla. I also halved her recipe and baked in a 9 inch springform.

Rose Levy Beranbaum's All American Orange Chiffon Cake Recipe

Cream Cheese Frosting

1/4 cup butter, room temperature
2 oz cream cheese, room temperature
1 cup powdered sugar

Cream butter on medium speed until smooth and fluffy. Add cream cheese continue beating on medium until incorporated.

Add sugar and continue beating until incorporated. Don't overbeat or the frosting might turn soupy.

Saturday, May 30, 2009

Raspberry Cream Cheese Pound Cake

cakecreamcheesepoundrasp

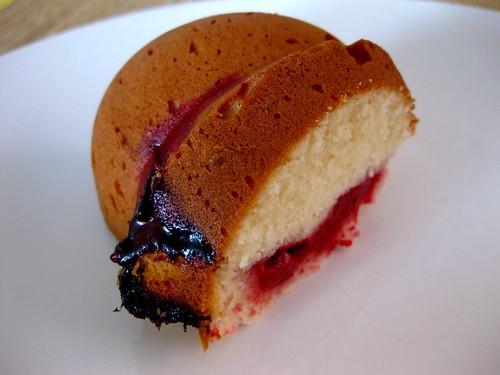
I wasn't expecting to bake a cream cheese pound cake. This actually started off as frosting that I made for fun and didn't want to waste. I'm starting to find that the process part of baking is more fun than the eating part, which usually means that sometimes I make desserts randomly. Lately, it's been frosting, especially ones made with powdered sugar because it's always nice to have a quick and easy recipe for emergencies. With so many similar recipes out there, it is very difficult to try them all and not literally eat a stick of butter. The recipe from the Whimsical Bakehouse looked interesting because the sugar is dissolved first in boiling water and it claims to be non-crusting! I liked that it wasn't super sweet, but so mad that I messed it up. It was not a pretty frosting, looking like it was on the verge of separating. It's probably my fault for overwhipping/underwhipping (I don't know) and substituting the butter for shortening, since the liquid in this recipe is water. I read a lot of great reviews for this recipe so I'm going to give it another try! Since I ruined this batch, I thought it would be fun to throw in some cream cheese to see what would happen. Instead of patiently waiting for my cream cheese to come to room temperature, I just threw half a block that I softened with my hands. That obviously was not a good idea because there were mini cream cheese chunks galore! I turned up the speed, but that only turned my thick, but chunky mixture into soup.

For some reason, I didn't want to give this up and wanted to throw more ingredients into my mixing bowl and hope that something edible would turn out. So far, I had 9 tbsps of butter, 4 oz cream cheese, 1 cup of powdered sugar and 1/6th cup of water. Don't those sound like basic ingredients for cake?! Cream cheese pound cake fit the best so I used the recipe from Deb of Smitten Kitchen as a guide. I was a little worried that the powdered sugar and water would mess this up, but the pound cake turned out to be delicious.. phew! My favourite is still the whipping cream pound cake because of it's velvety and melt in your mouth texture, but this one was good in its own way. It had a nice crust and the combination of sweetness, tanginess and burst of raspberries was really good!

I'm not sure if anyone actually wants the recipe, since it started off as being frosting, the mixing sequence might be weird and it wasn't very tall since the recipe is kind of small.

Raspberry Cream Cheese Pound Cake

1 cup powdered sugar
1/6th cup boiling water
9 tbsp butter
4 oz cream cheese
1/2 granulated sugar
2 eggs
1.5 cup (6.75 oz) sifted all purpose flour
1/4 tsp salt
3/4 cup (or more or less depending on preferences) of raspberries

1. Preheat oven to 350F. Grease a bundt pan
2. Combine flour and salt in a bowl
3. Beat powdered sugar and boiling water in a mixer until smooth and cool
4. Add butter and cream until smooth and fluffy on medium high.
5. Add cream cheese and cream until smooth and fluffy on medium high.
6. Add granulated sugar and cream until smooth and fluffy on medium high
7. Add eggs, one at a time until fluffy and well incorporated
8. On low speed, add flour until incorporated.
9. Add half the batter and spread evenly using a spatula.
10. Scatter raspberries on top
11. Add the rest of the batter on top and smooth with a spatula
12. Bake 30-40 minutes until a toothpick inserted in the center comes out clean.

Tuesday, May 5, 2009

TWD: Tiramisu

caketiramisu

This was delicious. I even ate almost 1/6th of it myself and I made the whole recipe.. eek... that's a lot of cream cheese frosting!

Sorry for the background furniture and not the prettiest pic, but I was in a big rush. Right now, I'm either panicking, nervous or stressed because I'm either waiting to write, writing, or just finished writing my exam.

Thank you so much Megan of My baking adventures for this week's amazing pick! The recipe can be found on her blog or you can buy the book here. Don't forget to visit the TWD blogroll.

Friday, February 27, 2009

Chocolate Cake with Peanut Butter Cream Cheese Frosting

cakechocolatepeanutbutter (2)

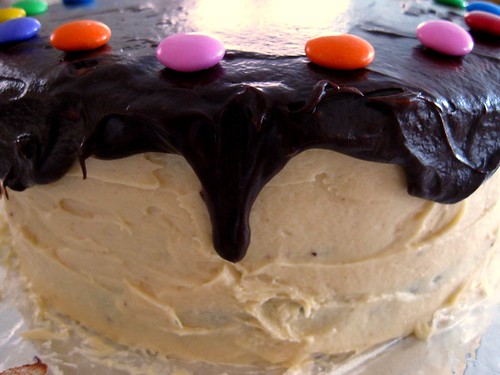
Making this cake was a lot harder than I expected. The baking part was easy, trying to decide which chocolate recipe to use...well... that was more difficult than it should've been. Originally, I was going to make the Chocolate Peanut Butter Cake after seeing it on Smitten Kitchen. The only problem was, after I scanned through the recipe, I noticed that there was only 1/2 cup of cocoa for 2 cups of flour and a lot of liquid. I can't stand it when there's only a hint of chocolate flavour in chocolate cakes. Deb also said in her comments section that this cake wasn't as chocolatey compared to others. Still, the pairing of peanut butter cream cheese frosting + chocolate was too good too pass so I searched for another cake recipe. The only problem was that everyone claimed to have the 'best' version. I narrowed it down to only butter based because I find that the crumb seems finer than oil based cakes, which are coarser. I also prefer cakes made with both cocoa and chocolate because without the actual chocolate, it seems like that extra decadence and depth of flavour is missing. At the same time I had to make sure I didn't cross into brownie territory with the richness.

I decided to make the chocolate cake from CI's chocolate blackout cake. This is a cocoa based recipe, but I wanted to try it because it was a little different. The cocoa was heated and everything was done in one pot with a whisk. I've never made a 'one bowl' cake recipe because I've always been sceptical about them. There has to be a reason why we have to cream butter and sugar or ribbon eggs and sugar together...right? Plus, what if I'm not a good whisker!! Being a huge peanut butter lover, I was a little disappointed when I didn't like the frosting. There was just a little too much going on for me with the tanginess, saltiness and sweetness. The cake was moist and a little fudgy + dense, although that's not suprising because the butter was melted and everything was whisked by hand. I think it might have benefitted from some melted chocolate, although heating the cocoa defintely brought out more flavour. Overall, the cake part was good, but not the best chocolate cake I've eaten.

IMG_2419


Chocolate Blackout Cake
Cook's Country

8 tablespoons unsalted butter (1 stick), plus extra for greasing pans
1 1/2 cups all-purpose flour , plus extra for dusting pans
2 teaspoons baking powder
1/2 teaspoon baking soda
1/2 teaspoon Table salt
3/4 cup Dutch-processed cocoa powder
1 cup strong black coffee
1 cup buttermilk
1 cup packed light brown sugar (I used 3/4 cup)
1 cup granulated sugar (I used 3/4 cup)
2 large eggs
1 teaspoon vanilla extract

Instructions
1. For the cake layers: Adjust oven rack to middle position and heat oven to 325 degrees. Butter and flour two 8-inch cake pans (I used 3 8 inch pans because I didn't not crumble one layer). Whisk flour, baking powder, baking soda, and salt in bowl.
2. Melt butter in large saucepan over medium heat. Stir in cocoa and cook until fragrant, about 1 minute. Off heat, whisk in coffee, buttermilk, and sugars until dissolved. Whisk in eggs and vanilla, then slowly whisk in flour mixture.
3. Divide batter evenly between prepared pans and bake until toothpick inserted in center comes out clean, 30 to 35 minutes. Cool layers in pans 15 minutes, then invert onto wire rack. Cool to room temperature, at least 1 hour.

(This cake is originally written to be a chocolate blackout cake, so that's why 2 8 inch pans were used to get 4 layers. I didn't crumble one layer for my cake so I divided the batter into 3 8 inch pans to get 3 layers)

Peanut Butter Frosting
Makes about 5 cups

10 ounces cream cheese, at room temperature
1 stick (4 ounces) unsalted butter, at room temperature
5 cups confectioners’ sugar, sifted
2/3 cup smooth peanut butter, preferably a commercial brand (because oil doesn’t separate out)

1. In a large bowl with an electric mixer, beat the cream cheese and butter until light and fluffy. Gradually add the confectioners’ sugar 1 cup at a time, mixing thoroughly after each addition and scraping down the sides of the bowl often. Continue to beat on medium speed until light and fluffy, 3 to 4 minutes.

2. Add the peanut butter and beat until thoroughly blended.

Tuesday, December 30, 2008

TWD: Tall and Creamy Cheesecake..sort of

cheesecakelemon

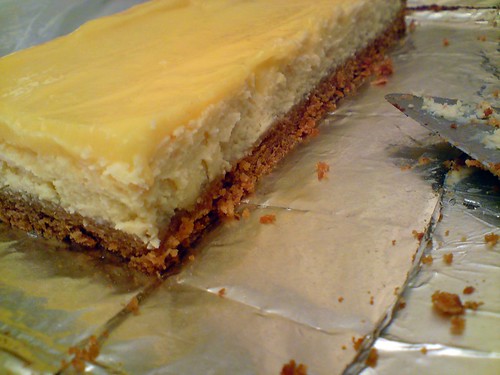
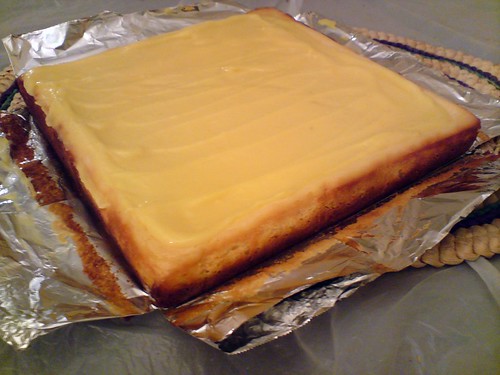
This week's TWD.. I haven't said that in a while! was perfect in time for the holidays. It wasn't very tall because I halved the recipe and baked it in a 9x9 square pan, but it was very creamy! Instead of using the springform, I used a 9x9 square pan so I could bake it in a waterbath without having leakage problems. I totally forgot about the waterbath though so that totally defeated the purpose of not using springform. I was in a huge rush to bake it and have it properly chilled because I decided the morning of Christmas eve that I would bring it over for dinner after seeing Nancy from the Dogs Eat the Crumbs do her informative post for TWD (I love how she looks for other sources when she bakes). Luckily, cheesecake isn't one of those desserts where I have to worry about the crumb changing from soft and fluffy to dense and dry within a couple or hours and can be just thrown in the fridge without messing up the texture. I've tried storing regular cakes wrapped in plastic on the counter overnight, fridge and freezer, but everytime it changes for the worse so I have to make cakes fresh unless if it's chocolate, which actually improves in flavour overtime without sacrificing texture. The whole 'crumb getting even tighter' in the freezer thing doesn't seem to work for me and neither does wrapping the cake before it is completely cool to seal in the texture because that just turns the cake wet and heavy.

Anyway, back to the cheesecake that my family raved about.. I was so excited! I replaced a block of cream cheese with the low fat kind because full fat cheesecake is a little too rich. Cheesecakes are the only kind of dessert that doesn't stress me out because they always turn out delicious no matter which recipe you use.. maybe except for hyper low fat variations. After making cheesecakes with a handmixer, stand mixer and the food processor, I would have to say that the food processor is the quickest and always ensures the smoothest texture. There's barely any scraping involved too! Originally, I wasn't going to make a topping and just serve it plain, the way cheesecakes should be in my opinion, but when I opened the oven door, it looked like something hit it.. badly because there were cracks (huge ones) everywhere! I decided to cover it up with lemon curd instead of whipped cream because we didn't exactly need anymore cream. I don't think I've had real lemon curd before because this was amazing! If this is what the filling is supposed to taste like in lemon meringue pie, then I might actually love it. I love how with each addition of fat (butter then heavy cream), it just gets yummier and more luscious!

cheesecakelemon (2)

Thanks to Anne of Anne Strawberry for choosing this recipe, which can be found on her blog and in Dorie Greenspan's Baking: From my Home to Yours. Don't forget to checkout the TWD Blogroll!

Lemon Curd
Cook's Illustrated

1/3 cup juice from 2 lemons
2 large eggs plus 1 large egg yolk
1/2 cup (3 1/2 ounces) sugar
2 tablespoons unsalted butter, cut into 1/2-inch cubes and chilled
1 tablespoon heavy cream
1/4 teaspoon vanilla extract
Pinch salt
(I added 1/2 tsp of lemon zest for extra lemon flavour)

FOR THE LEMON CURD: While cheesecake bakes, heat lemon juice in small nonreactive saucepan over medium heat until hot but not boiling. Whisk eggs and yolk in medium nonreactive bowl; gradually whisk in sugar. Whisking constantly, slowly pour hot lemon juice into eggs, then return mixture to saucepan and cook over medium heat, stirring constantly with wooden spoon, until mixture registers 170 degrees on instant-read thermometer and is thick enough to cling to spoon, about 3 minutes. Immediately remove pan from heat and stir in cold butter until incorporated; stir in cream, vanilla, and salt, then pour curd through fine-mesh strainer into small nonreactive bowl. Cover surface of curd directly with plastic wrap; refrigerate until needed.

LinkWithin

Related Posts with Thumbnails