Showing posts with label Bread. Show all posts

Tuesday, July 14, 2009

TWD: Brioche Nectarine Tart

yeastbrioche

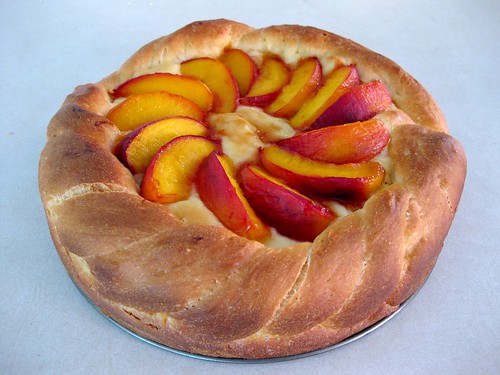
I was so excited for that this was the brioche plum tart and not just plum tart because brioche is so much yummier than tart crust! I didn't have a fancy fluted pan so I used my 9 inch springform. I substituted the plums with nectarines, used peach jam and omitted the nuts. I tried to keep it as simple as possible by not doing the slap down every 30 minutes of the refrigerated dough because I was worried I would ruin it with my inexperience with yeast. Instead, I let the dough rise at room temperature until doubled, shaped it into the pan and then let it rise a second time. I sort of had this great idea in my head to make a twist border, but as it is most of the time, imagining something doesn't always translate well when executed.
yeastbrioche (2)

I didn't expect to like this so much because it looked pretty flat going into the oven and I thought I was going to end up with a stone. Thankfully, it puffed up to double its size once it started to bake. Despite my sour nectarines (which was the result of omitting the sugar because I can't stand syrupy fruits) this was really good!

Thanks so much to Denise of Chez Us for choosing this recipe! You can find the recipe on her blog or in Dorie's book. Don't forget to check out the TWD blogroll!

Friday, June 5, 2009

Challah

breadchallah

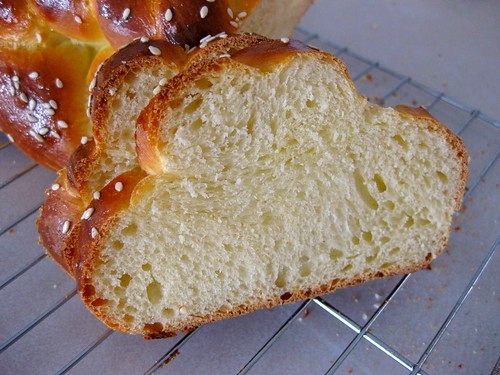
I made bread, something I haven't done in a long time! I never thought I would bake bread, but Audrey inspired me to after her email. The flavour was awesome, but unfortunately a little dry because I wasn't sure if the bread was ready to come out of the oven or not and decided that a little overdone was better than raw dough. I really liked the richness of this bread, but next time I'm want to try a traditional version made with oil. Dry or not, the bread was still really addicting. It was kind of scary when I realized that I ate 1/4th of the loaf myself because that's 3/4ths cup of flour! Bread making was a lot of fun once I got past the 'omg, why is the bread taking so long to rise' part and just let the yeast do its work without poking at the dough every so often. Unfortunately staring and poking does not make it rise faster. I'm getting a little curious about trying other kinds of bread now, but there are so many recipes and so many types of flour! I don't think I would be able to decide which recipe to try first.

breadchallah (2)

I was a little too lazy to type up the recipe, but here it is at Bridget's blog!

Tuesday, April 21, 2009

TWD: Four Star Chocolate Bread Pudding


Bread pudding isn't really my thing. Even when I try to upload my picture to blogger, it comes out rotated and I have no idea how to fix it. Whether its upright or not, it looks the same to me...not good. I made 1/6th of the recipe in a mini loaf pan and added less liquid after reading about the floating bread that some people were experiencing. I substituted cocoa powder for chocolate and used only milk instead of cream. So maybe cutting down on the richness doesn't make it 4 star anymore, but I'd rather save the calories for a cupcake! I really tried to like this, so much that I ate the entire top crust, but when it got to the soggy parts, I just had to stop. This is the first time I've had bread pudding so I'm not sure what the texture is supposed to be like or if I messed it up by using Dempster's bread, but I just can't get past the sogginess. I even made sure it was baked for a really long time, so long that the top was practically burnt and a toothpick inserted came out clean. It's a good thing that I only used 3 cups of liquid (1/2 cup for 1/6th of the recipe) or else I can't imagine what the pudding would look like...mush? I'm sure that this was a great recipe for those who enjoy bread pudding, but I'm not a bread pudding fan.

Thanks to Lauren of Upper East Side Chronicle for choosing this week's recipe, which can be found on her blog. Don't forget to visit the TWD blogroll!

Tuesday, November 11, 2008

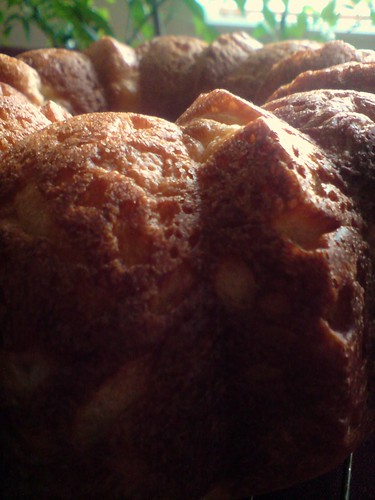
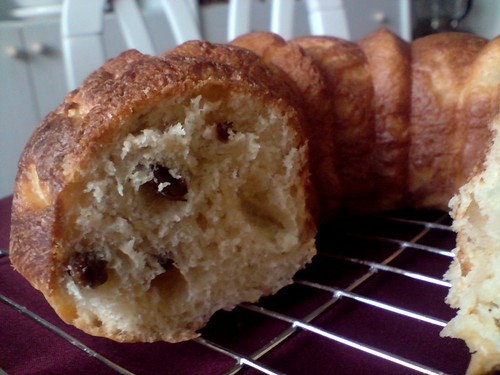
TWD: Kugelhopf

kugelhopf (2)

I love it when TWD challenges use equipment I don't already have because it gives me an excuse to buy a new pan or baking gadgets. The thing is, even if I wanted to buy a Kugelhopf pan, I'm pretty sure the stores around me don't carry one. I'm lucky if they carry stuff other than Wilton or Baker's Secret sometimes! Luckily, I had the time last weekend because the initial rise time was nowhere near 1.5 hours... it was more like 4 hours! Waiting for this thing to rise reminded me of when we used to take family trips and my brother and I would constantly ask if we were there yet.. except in this case, I was wondering, has this finally doubled in size yet.

The KA was making some pretty weird noises during the kneading process. I didn't even end up using the medium high speed and stopped the machine before the recommended times. If I ever broke the KA, I would probably cry! Instead of boiling water for the raisins, I just microwaved them in a cup with a splash of water to save time and clean up. I have a love-hate relationship with raisins... love them in oatmeal cookies and bread, not too crazy about them in quick breads and muffins. I think putting the Kugelhopf in the fridge was a bad decision because the dough never ended up rising as nicely as it did initally (and I was so proud when I saw it so puffy even though it took a long time). I had to put the pan on top of the heater in my room to get it to rise... 4 hours later it rose, well sort of. I was going turn the oven to 200F then off and throw the dough in there, but I wanted to keep it covered with saran wrap and a towel so it wouldn't dry out. After that foam fire I had last year in the oven, I wasn't going to leave plastic wrap and a towel into the oven even if it was shut off. A fellow TWDer suggested I put the pan ontop of the stove so I put the pan ontop of the toaster oven when I was warming up my bagel. The dough finally rose (8+ hours + refrigeration later)! It also solved my drying out issue and I didn't have to put things that don't belong in the oven, in the oven.

kugelhopf (5)

Overall, I didn't enjoy it as much as I thought I would considering all the time put into it. I guess that's not too suprising considering I don't really like croissants and these were croissant-tasting to me. I find croissants too flaky and buttery.. the very reason why people actually them.. haha. I'm glad this recipe was chosen though because it was quite the baking experience! I hope I can find my charger soon because taking these pics took forever!

Thanks to Yolanda of The all-purpose girl for choosing this recipe, which can be found on her blog and in Dorie Greenspan's Baking: From my Home to Yours. Don't forget to checkout the TWD Blogroll!

kugelhopf (4)

Sunday, June 22, 2008

Focaccia

breadfocaccia

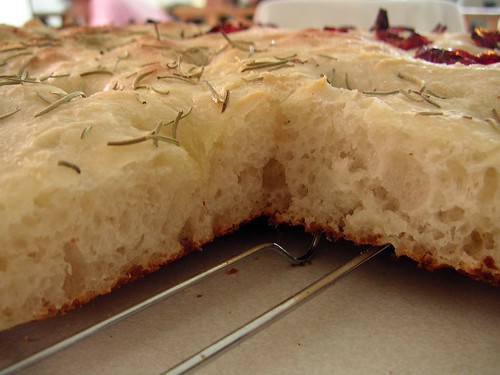
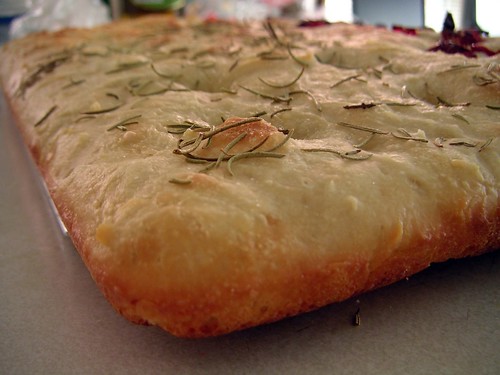
A week ago, before completing the cinnamon swirl bread, I definitely wouldn't have attempted making focaccia. It's not only because I'm a little intimidated by the whole bread making process, but it's just something I don't automatically think to make, but to buy. Once again, I chose the recipe from the always reliable Cook's Illustrated. I just love the way they test all the possible variations of ingredients, equipment, methods and baking temperatures so that the final product is the best possible version. The instructions, mixing times and speeds are very specific so that even the unsure or inexperienced baker can follow along. The most interesting ingredient in the recipe was probably the potato, which the authors claim adds moisture, softness and chewiness without density. Since I love testing flavour variations and the recipe made such a large piece of bread, I used rosemary + salt, sundried tomato + salt, rosemary + sundried tomato + salt, and finally parmesan cheese as toppings. Normally, I'm not that generous when it comes to greasing, but to achieve a crunchy crust, oil is a must. I only wish the picture above didn't have that spatula lying at the top and the bottom corners cut, but this was the only non blurry picture!

breadfocaccia (3)
breadfocaccia (4)

Here are 2 closeups I just had to post. It appears that the only pictures with clarity are the ones where I place my camera on the counter!

The end result was everything I could ask for - crunchy outside, soft and moist inside with a slight chew, but not overly chewy (and it wasn't overly greasy either!). This bread tastes great on its own and would probably work well as sandwich bread. I would love to make bagels next, but first I need to find hi gluten flour. After all that shaking and hopping of my KA around the counter, I should probably let it rest. It kills me when I have to baby my mixer for fear of the motor burning out or the gears stripping.

The recipe can be found here. Note, it only took 14 minutes in my oven and after 5 minutes at 425, the sundried tomatoes were starting to burn so I had to turn it down to 400. Unfortunately all ovens are different so be sure to keep an eye on it, especially since its baking at 425!

Tuesday, June 17, 2008

Cinnamon Swirl Bread


It literally almost took the entire day to bake one loaf of bread, but it was all worth it in the end. I've never made bread before and have been dying to try it, but being limited to all purpose and cake flour, it seemed that white bread was the way to go. Since I was going to make the cinnamon bread I saw at Closet Cooking anway, I decided to make cinnamon swirl bread rather than a quick bread. The experience was a litte nerve racking because it is so easy to mess up a loaf of bread given all the different steps. I didn't have instant yeast so I used traditional. Even though the bread called for 2 1/4 tsps, I only used 1 tsp because I was afraid of that yeasty bitter taste. The recipe calls for 3 1/4 to 3 3/4 cups of flour depending on the weather, but I'm sure I used at least 4 cups and the dough was still sticky. I think the most difficult part of this entire process was all the waiting. Even though the recipe said to wait 2 -2.5 hours for the first rise, I waited 4 hours to get a nicer rise. Rolling the dough was a little tricky because it was so sticky. Luckily I placed a sheet of saran wrap on my counter first or else it would have been one deformed looking loaf! The recipe said to wait 1-1.5 hours, but I waited 2 hours before the loaf was 1 inch above the rim. Finally it was ready for the oven.


I didn't know that the slit was facing the side instead of the bottom of the pan until it unravelling in the oven. This loaf grew so quickly in the oven! It was supposed to take 30-35 minutes, but I ended up leaving it in the oven for 40 minutes. The thermometer never reached 185 degrees, but the thermometer went in easily and came out clean. Luckily I pulled it out or it would have been too dry. Just because it is bread, it should follow the same 'if the toothpick (thermometer in this case) comes out clean, it is done!' as cake.. right?... well hopefuly!


Finally, after 2 hours of cooling it was time to eat! As usual, I didn't grease the pan and the bread slid out easily. I could have devoured half the loaf myself, but knowing that 4 cups of flour went into it, I wasn't going to eat 2 cups worth of flour at 8:30pm. I think I'm going to attempt to make cinnamon rolls soon, but first I need to find one that isn't so rich and won't leave me nauseas like those cinnabons, which are definitely delicious, but o so rich!

Cinnamon Swirl Bread
Cook's Illustrated

* I rarely grease and luckily nothing sticks or gets ruined, but for those who try this recipe, it is probably safer to grease.

Dough
1/2 cup milk
4 tbsp unsalted butter, cut into 1/2 inch pieces
1 package dry active yeast (2 1/4 tsp)(I used 1 tsp of traditional yeast)
1/2 cup warm water
1/3 cup sugar
2 large eggs
1 1/2 tsp salt
3 1/4 cups all-purpose flour, plus extra

Filling
1/4 cup sugar
5 tsp ground cinnamon
Milk for brushing

Glaze
1 large egg
2 tsp milk

1. Heat the milk and butter together in a small saucepan or microwave until butter melts. Cool to lukewarm.
2. Meanwhile, sprinkle yeast over warm water in a the bowl of a standing mixer fitted with the paddle (I did this with half the amount of warm water and waited until the yeast mixture foamed - took about 30 mins) Beat in the sugar, eggs and mix at low speed to blend. Add the salt, lukewarm milk mixture,(I added the other half of the warm water), and 2 cups of flour; mix at medium speed until thoroughly blended, about 1 minute. Switch to dough hook. Add 1 1/4 cups more flour and knead at medium low speed, adding more flour if the dough sticks to the sides of the bowl, until the dough is smooth and comes away from the sidesw of the bowl, about 10 minutes
3. Turn the dough onto a work surface. Squeeze the dough with a clean dry hand. If the dough is sticky, knead up to 1/2 cup more flour to form a smooth, soft, elastic dough. Transfer the dough to a very lightly oiled large bowl (I just floured a bowl, without oiling)Cover the bowl with plastic wrap and let the dough rise until doubled in size, 2 to 2 1/2 hours (4 hours for me)(the ideal rising temp is 75 degrees) After the rise, punch down the center of the dough once (The dough can be refrigerated, covered, for up to 18 hours). Make sure not to fold the dough, turn it onto an unfloured work surface (I lined the work surface with saran wrap to prevent sticking); let the dough rest about 10 minutes.
4. Grease the bottom and sides of a 9 by 5 inch loaf pan (I just floured without greasing) Mix the sugar and cinnamon in a small bowl.
5. Press dough into an evenly shaped 8 x 6 inch rectangle. With the short side of the dough facing you, roll the dough witha rolling pin into an evenly shaped 18 x 8 inch rectangle. Brush the dough liberally with milk. Sprinkle the filling evenly, leaving a 1/2 inch edge on the far side. Starting at the side closest to you, roll dough, pinching the dough gently with your fingertips to make sure it is tightly sealed. To keep the loaf from stretching beyond 9 inches, push the ends in occasionally with your hands as you roll the dough. Pinch the seam and both ends to seal the loaf.
6. Place the loaf seam side down in the prepared pan and lightly press to flatten. Cover the top of the pan loosely with plastic wrap and set aside to rise to 1 inch above the pan, about 1 1/2 hours (2 hours for me) Preheat oven to 350
7. Whisk the egg and milk together and gently brush the top of the loaf with the egg mixture.
8. Bake until the loaf is golden brown and an instant read thermometer inserted at an angle into the centre reaches 185-190, 30-35 minutes (40 for me). Remove the bread from the pan and cool on a wire rack before slicing, about 45 minutes.

For those who don't own a stand mixer, Two Fat Als gives instructions for kneading

LinkWithin

Related Posts with Thumbnails