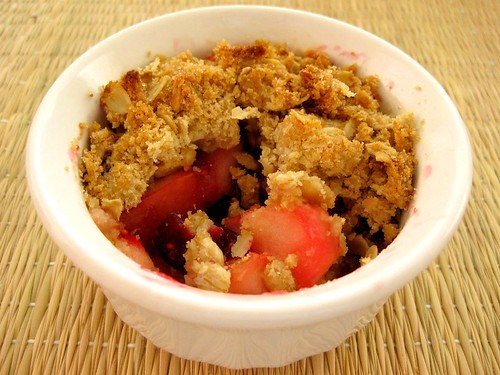
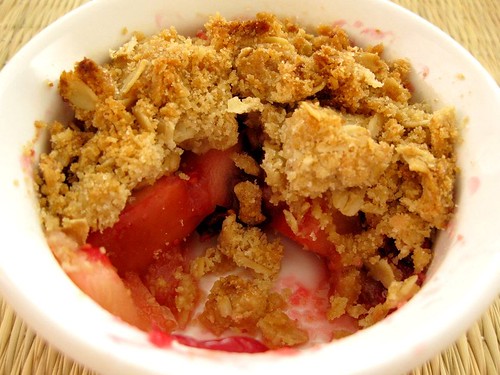
 I think it's obvious that I have no self control when it comes to crumbs and dug into this immediately. The apple cranberry crisp was the perfect version of a pie for the non crust lover in me. I absolutely loved the addition of ginger, which I think made this crisp extra special. The spicy ginger, sweet apples and tart cranberries complemented each other really well. Before baking, I cooked the cranberries and apples with the sugar until they released their juices so I wouldn't end up with soup because who likes soggy crumbs?! It also helps to cut down on baking time, which is a plus considering I used the toaster oven and the ramekin is so close to the coil. So far, there haven't been any explosions... I'm keeping my fingers crossed.
Thanks to Em of The Repressed Pastry Chef for choosing this week's recipe
10 more days til New Moon comes out!! Is anyone else excited?!?!
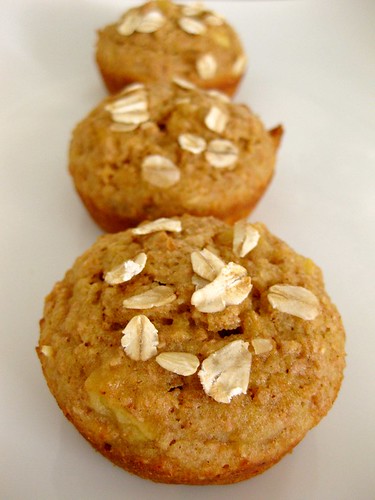 The concept of 'you're supposed to have a few lumps in the batter' was part of the reason I was never really into muffins. Even though it's the way it should be, it just never felt right. The problem is, I tend to view cake batter as the standard of what batters should be and most of the time, that is not how muffin batter looks like... unless of course it is a cupcake in disguise.
Anyway, not only did Steph of Steph Chows inspire me to bake muffins again, but she led me into the direction of the healthy variety. And yes, healthy muffins can actually taste good! I still have this fear that I'll end up with bricks if I bake with whole wheat flour so I found a recipe from my high school food and nutrition class that uses all purpose flour and wheat bran instead. I made half the recipe (which is the version I posted) and ended up with 11 squat muffins. Now that these are a keeper, I'll make the full recipe next time.
These were delicious and reminded me of apple pie, which was perfect for breakfast!
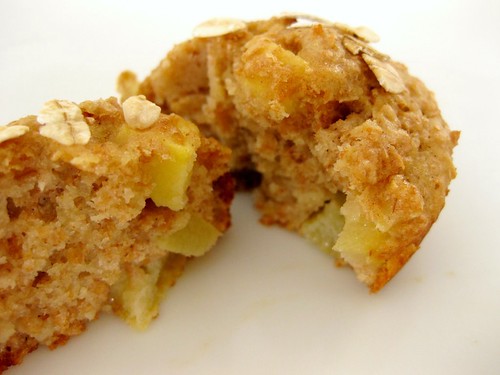
Apple Bran Muffins
3/4 cup flour
1/2 cup wheat bran
1 tsp baking powder
1/2 tsp cinnamon
1/4 tsp salt
1/2 cup unsweetened applesauce
1 egg
3 tbsp oil
1/3 cup brown sugar
1 cup of chopped apple
1. Preheat oven to 375, grease muffin tin
2. Mix flour, wheat bran, baking powder, cinnamon, salt in a bowl
3. Whisk applesauce, egg, oil, brown sugar until combined
4. Add chopped apples into wet mixture
5. Add wet mixture into dry mixture and fold until combined
6. Bake for 18-22 minutes or until a toothpick inserted the center comes out clean.
7. Let the muffins cool in the tin for 5 minutes before removing to cool on an oven rack.
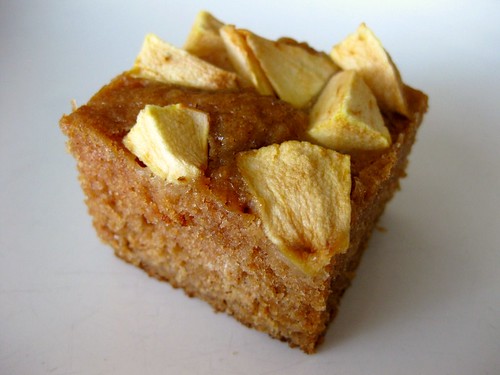 This week's recipe was a simple one bowl recipe.. the kind that always gives me the most stress because I can't just dump ingredients in a bowl. Unlike the creaming recipes where there is always a set sequence of cream the butter with sugar, adding the eggs one at a time... there are just so many ways to mix a one bowler. Should the sugar be whisked with the wet or the dry? Should the egg be whisked with the sugar first? Or could all the wet ingredients be whisked together at the same time? What really produces the best texture? That is why I tend to avoid one bowlers because as much as I would love to try all the different techniques, I'm not really up for trying 5 different versions of the same recipe.
Anyway...I made half the recipe, baked in a loaf pan to get more height and used brown sugar (2/3 cup instead of 1 to cut down on sweetness) instead of white. Since I don't usually like sugar glazes, I added the apples on top for a little decoration and to make it a little easier to photograph (because I can't make brown bars look pretty). These were more cake-like that bar-like and because of the medley of spices, no one would eat more than a piece. I thought it was ok, but needed more apple flavour. I don't know if adding more apple sauce would work though because that might just make things too gummy.
Thanks to Karen of Something Sweet by Karen for choosing this week's recipe! You can find the recipe on her blog or in Dorie's book. Don't forget to check out the TWD blogroll!
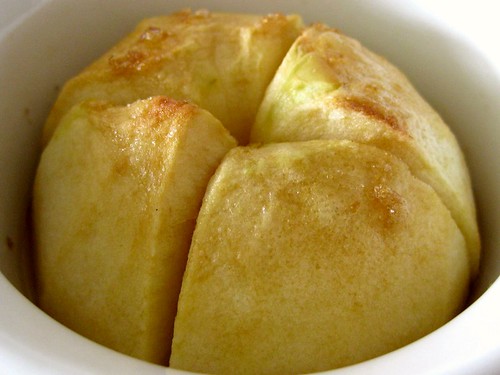 Without the crust, I was left with a baked apple, probably not what the parisan apple tarlet should have been like. Even the brown sugar that I sprinkled on top seemed to have disappeared during the baking process. I used the toaster oven for my single ramekin dessert. Sometimes I get worried about putting ramekins in the toaster oven because I think they're going to explode. Maybe it's because the coils are so close to the bowl... I don't know... but I always end up putting them in a pan of water. I'm not sure if that even does anything or if I do that because that's how we creme brulees are made. Anyway...
Thanks so much to Jessica of My Baking Heart for choosing this recipe! You can find the recipe on her blog or in Dorie's book. Don't forget to check out the TWD blogroll!
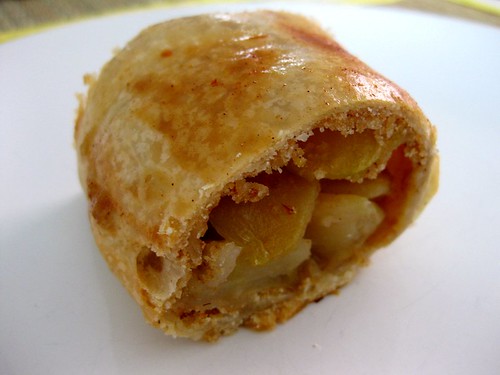 I don't know if I should even call my apple strudel a strudel because it was more like 'tough and chewy crust wrapped apples'. This was definitely the hardest DB challenge I've participated in, but it was so much fun! It took me an really long time to gently stretch the dough and try to maintain its rectangular shape. It was a little frustrating to see one end of the dough stretch out so much and the other side not having enough dough to stretch, but it felt so good to be concentrated and focused. I was so proud of myself for getting the dough to stretch to 60x60 cm. If I could have somehow transferred some of the extra dough on one side over to the other, maybe I would have been able to stretch to 90. Hopefully next time I can get those nice layers!
The May Daring Bakers’ challenge was hosted by Linda of make life sweeter! and Courtney of Coco Cooks. They chose Apple Strudel from the recipe book Kaffeehaus: Exquisite Desserts from the Classic Cafés of Vienna, Budapest and Prague by Rick Rodgers.
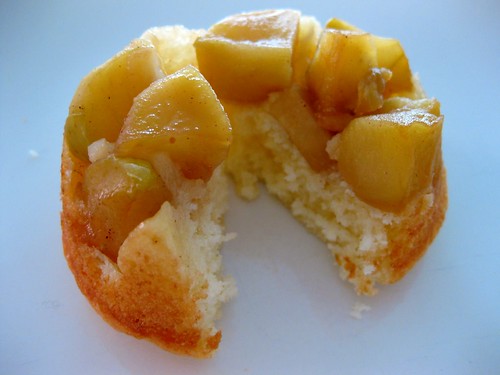 I was having an apple cake craving on my bus ride home from school.. yes.. that's right school in the summer..fun right?. I got home and the first thing I did was chop up apples. The thing with last minute cravings is that sometimes you don't always have all the ingredients you need and have to improvise. Umm I don't exactly like to do that because sour cream and yogurt aren't really the same.. right? Since many bakers have substituted yogurt for sour cream with sucess, I decided to give it a try. The substitutions didn't end there because I only had one container of yogurt left so I topped the rest off with milk. I also omitted the extra egg yolk because I didn't feel like accumulating extra stuff in my freezer. Then I assembled everything in my muffin pan instead of a 9 inch and crossed my fingers that this would still taste good after all these changes. I like to use muffin pans to reduce baking time and for faster turnover because having to take a knife out proves to be too much work for my family.
Edit. I forgot to add that these were a bigger hit with my family than me. The topping was really good with the cinnamon, nutmeg, apples and brown sugar and the cake part had a nice tang with the yogurt. I thought the texture was good just when they were completely cool, but a few hours later, the fluffiness disappeared and it was denser. I'm not sure if it's because of the moisture from the apples or the yogurt itself..hmm.. I think I'm going to try baking with yogurt more often.
Original recipe here
Adapted recipe (since I made so many changes, I thought it would be neater to just post the adapted recipe)
Apple Cake
Ingredients
Apples:
2 tablespoons butter
2 tbsp dark brown sugar (I reduced it significantly)
Pinch cinnamon
Pinch nutmeg
4 medium-large apples, cut into chunks
Cake:
1/4 cup yogurt + 1/4 cup milk
1 egg
1/2 teaspoon vanilla
1 1/4 cup all-purpose flour
3/4 cup sugar
1/2 teaspoon baking powder
1/4 teaspoon baking soda
1/4 teaspoon salt
6 tablespoons butter
1. Heat the oven to 350 degrees and adjust a rack to the center position. Butter a muffin tin well so that the apples won't stick
2. For the apples: Place the butter, sugar, cinnamon, nutmeg and apples in a large heavy-duty skillet over medium heat. Cook, stirring often, until the apples have softened slightly and the juices are thickened and syrupy, about 5 to 7 minutes. Remove from heat and divide evenly in muffin pan.
For the cake:
1. Combine flour, baking powder, baking soda, salt
2. Combine yogurt and milk in a measuring cup
3. Cream butter and sugar until light and fluffy, about 4 minutes
4. Add egg and continue creaming until well combined
5. Alternately add flour and liquid mixture on low speed until flour disappears
6. Divide batter evenly ontop of apples and spread out evenly
7. Bake 18-20 minutes until a toothpick inserted comes out clean
8. Cool on a baking rack for 10 minutes
9. Loosen the sides of the muffins using a knife and place a jelly roll pan on top of the muffin pan and invert so that all 12 muffins flip over at the same time.
10. Transfer cakes to cooling rack to cool completely.
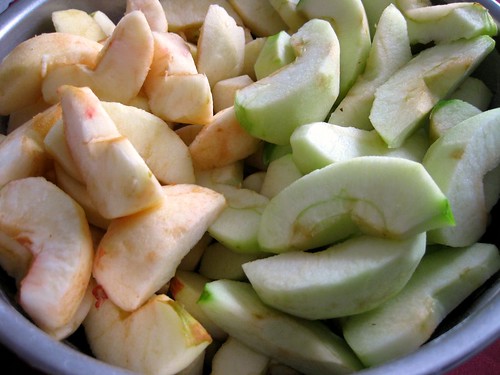
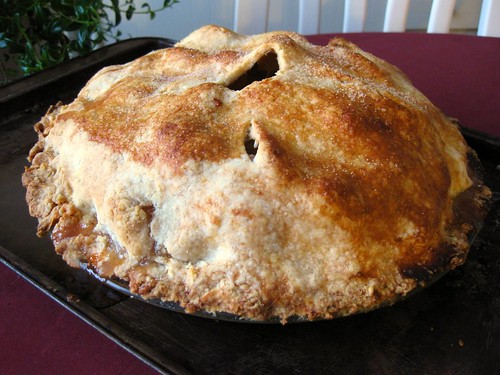 My mom was craving apple pie, so I decided to make her one.. plus, I could brush up on my pie pastry skills. The first time I ever made a pie crust, it was better than I anticipated. This time, however, it didn't turn out so well because the crust was hard and tough. I guess I must have overprocessed the dough in the food processor. That sure feels like a waste because anything with that much fat in it should taste good, right?! The purpose of this apple pie recipe was to let the apple flavour come out without going crazy with the cinnamon and nutmeg. I'll admit that this was a very clean tasting pie, but next time I'll add a touch more cinnamon. Normally, I'm don't post progress pictures because the counter is way too cluttered when I'm baking and I don't really want to ruin my camera. Plus, if I wait too long, I'm scared the baking powder and baking soda will wear off when I bake cakes! I'm so impresssed by people are able to get shots of caramel, considering how quickly to turns from clear to amber to burnt. Anyway, I just had to take a picture of the apples I peeled and sliced because it felt like an eternity! A little embarassing, but I didn't even really know how to use a knife until my grade 10 food and nutrition class when we made vegatable soup. I still remember when I was singled out because apparently I was being a little too dangerous when chopping up celery. On the right, I used the CI recommended Granny Smith apples and on the left was a bunch random ones I found.
I'm still not a crazy crust person so next time I'm definitely trying out a crumb/streusal topping. It would probably help prevent that huge gap I had under the crust. Don't let the height of the pie fool you because underneath it all, the layer of apple was pretty small. It was still really yummy with a huge scoop of vanilla icecream!
Pie Crust
Cook's Illustrated
One double-crust 9 inch or 10 inch pie
2 1/2 cups all purpose flour
1 teaspoon salt
2 Tablespoons sugar
3/4 cup (a stick and a half) unsalted butter, chilled, cut into 1/4 inch cubes
1/2 cup of all-vegetable shortening (8 Tbsp)
6-8 Tablespoons ice water
1 Process flour, salt, and sugar in a food processor until combined. Add shortening and process untl the mixture has the texture of coarse sand, about 10 seconds. Scatter the butter pieces over the flour mixture; cut the butter pices over the flour until the mixture is pale yellow and resembles coarse crumbs, with butter bits no larger than small peas, about 10 1 second pulses. Turn the mixture into a mixing bowl.
2 Sprinkle 6 tablespoons of ice water over flour mixture. With a rubber spatula, press down on the dough, using a folding motion, until the dough sticks together. Add up to 2 more tablespoons of ice water if the dough will not come together. Divide the dough into 2 balls and flatten each into 4 inch wide disks. Dust the disks lightly with flour, wrap each in plastic, and refrigerate for at least 30 minutes, or up to 2 days before rolling out.
Apple Pie
Cook's Illustrated
1/2 pounds Granny Smith apples (about 3 medium)
2 pounds McIntosh apples (about 4 large)
1 tablespoon juice and 1 teaspoon zest from 1 lemon
3/4 cups (5.25 ounces) plus 1 tablespoon sugar
2 tablespoons all-purpose flour
1/4 teaspoon salt
1 teaspoon cinnamon
1/4 teaspoon ground nutmeg
1/4 teaspoon ground allspice
1 egg white, beaten lightly
1. Adjust oven rack to lowest position and heat rimmed baking sheet and oven to 500 degrees. Remove one piece of dough from refrigerator (if refrigerated longer than 1 hour, let stand at room temperature until malleable).
2. Roll dough on lightly floured work surface or between two large sheets of parchment or plastic wrap to 12-inch disk. Transfer dough to pie plate by rolling dough around rolling pin and unrolling over 9 1/2-inch pie plate. Working around circumference of pie plate, ease dough into pan corners by gently lifting dough edges with one hand while pressing around pan bottom with other hand. Leave dough that overhangs lip of plate in place; refrigerate dough-lined pie plate.
3. Peel, core and cut apples in half, and in half again width-wise; cut quarters into 1/4-inch slices and toss with lemon juice and zest. In a medium bowl, mix 3/4 cup sugar, flour, salt and spices. Toss dry ingredients with apples. Turn fruit mixture, including juices, into chilled pie shell and mound slightly in center.
4. Roll out second piece of dough to 12-inch disk and place over filling. Trim top and bottom edges to 1/2-inch beyond pan lip. Tuck this rim of dough underneath itself so that folded edge is flush with pan lip. Flute edging or press with fork tines to seal. Cut four slits on dough top. If pie dough is very soft, place in freezer for 10 minutes. Brush egg white onto top of crust and sprinkle evenly with remaining 1 tablespoon sugar.
5. Place pie on baking sheet and lower oven temperature to 425 degrees. Bake until top crust is golden, about 25 minutes. Rotate pie and reduce oven temperature to 375 degrees; continue baking until juices bubble and crust is deep golden brown, 30-35 minutes longer.
6. Transfer pie to wire rack; cool to room temperature, at least 4 hours.
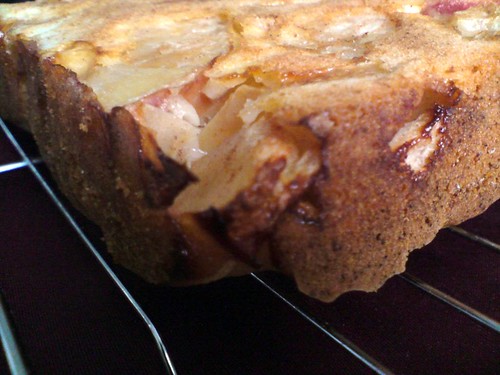 Sorry, no TWD this week. I love pumpkin, but even with scaling down and everything, I would be the only person in my family to eat it the pie. Plus, our thanksgiving already passed so instead I have something I've been dying to try since I saw it at Smitten Kitchen. It was only a matter of time before I knew I would make this. It just looked too good and how could I not make something loaded with apples! We actually had a whole bag of over ripe apples (which wouldn't ever happen at my house) that my aunt gave us. Whenever neighbours or family members ever have overripe apples or bananas, they get sent over to our house for apple pie or banana bread! If they're going to get wasted, we may as well make something good out of it! For some reason, when I read pour half the batter, I ended up pouring half the apples instead of the batter so the apples ended up on the bottom. It must have been those insanely gorgeous photos Deb from Smitten Kitchen takes. All I could think about was that apple topping, only except I envisioned that it was on the bottom instead.

I only made half the recipe, since it's the first time I've ever made apple cake. It also doesn't help when the only high capacity pan you have is a bundt. Muffin tins or 9 inch pans are my favourite to use because baking time is sped up by a lot. Who really wants to wait 1 hour for something to bake? I probably wouldn't be able to concentrate during the long baking time! This cake was really good and moist. Next time I'm definitely adding more apples though because mine did not look as apple-y.
This will be my final installment of pictures taken with the cell phone! I found my charger a while ago and these are the last of the cell phone pics! Speaking of electronics, I've noticed how dirty my laptop has gotten from all my baking. The other day in class, I was a little embarassed when I opened it up and I noticed some flour scattered on the screen, sugar in the keyboard and random stains. Normally, I take really good care of my stuff.. you should see my recipe books. Dorie's is always far from the baking site on a stool when I complete my TWD challenges, but my laptop on the other hand takes center spot, surrounded by ingredients. A book can be replaced, a computer.. well, not so easily.
Smitten Kitchen
Mom’s Apple Cake
6 apples, Mom uses McIntosh apples
1 tablespoon cinnamon
5 tablespoons sugar
2 3/4 cups flour, sifted
1 tablespoon baking powder
1 teaspoon salt
1 cup vegetable oil
2 cups sugar (I used 1.5 cups)
1/4 cup orange juice
2 1/2 teaspoons vanilla
4 eggs
1 cup walnuts, chopped (optional)
Preheat oven to 350 degrees. Grease a tube pan. Peel, core and chop apples into chunks. Toss with cinnamon and sugar and set aside.
Stir together flour, baking powder and salt in a large mixing bowl. In a separate bowl, whisk together oil, orange juice, sugar and vanilla. Mix wet ingredients into the dry ones, then add eggs, one at a time. Scrape down the bowl to ensure all ingredients are incorporated.
Pour half of batter into prepared pan. Spread half of apples over it. Pour the remaining batter over the apples and arrange the remaining apples on top. Bake for about 1 1/2 hours, or until a tester comes out clean.
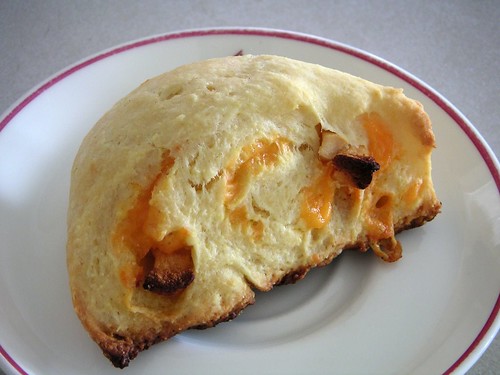 I was so excited when Dorie's book finally arrived so I could participate in my first TWD baking event. To be honest, I wasn't overly excited about this recipe because I've never really liked scones. I was even tempted to make only half the recipe in case nobody would eat them, but decided to just stick to the original. My experiences with them have usually been tough, hard and a little crumbly. These on the other hand were really tender and soft! I really liked the addition of cornmeal because it added just enough crunch without being rough. I wasn't too sure about the apple + cheddar combination so I made half the batch with apples only and the second batch with apple + cheese. Next time I make these, I think I'll load them up with more dried apples + cheese and maybe 1/2 tsp more salt. Sweet and salty is quite the delicious combination!
The dough was so sticky I wasn't exactly sure how to knead it, but it all came together nicely after a very generous dusting. There was actually a little sticking so I used the edge of my Chinese rectangular knife to scrap the dough off the counter. I must get myself a pastry scraper, those food network chefs make it look so much fun whenever they're scrapping away at their counter. Anway, after 10 minutes in the oven, there was significant browning on the bottom and pale tops. There was also some smoke coming out (my fault for using old parchment) so I finished the rest of the baking at 350. Next time I'm going to use my insulated cookie sheets, since those always manage to leave my chocolate chip cookies nice and pale.. haha. Overall, making scones was kind of fun because of its simplicity and of course, all the squishing of butter into flour with your fingers. Luckily I didn't freeze any because the scones disappeared quicker than I expected. 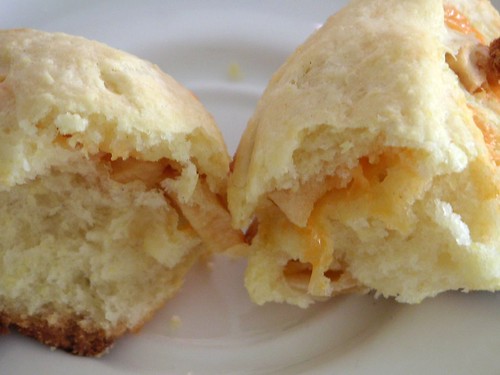
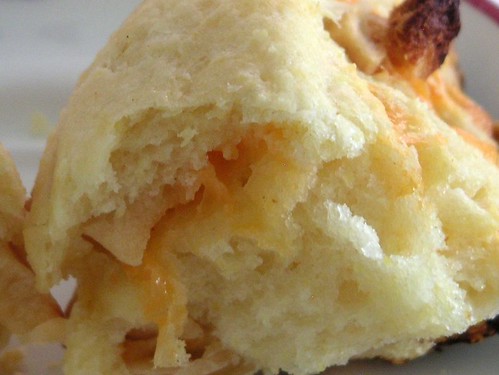 Thanks to Karina of The Floured Apron for choosing this recipe, which can be found in Dorie Greenspan's Baking: From my Home to Yours. Don't forget to checkout the TWD Blogroll!
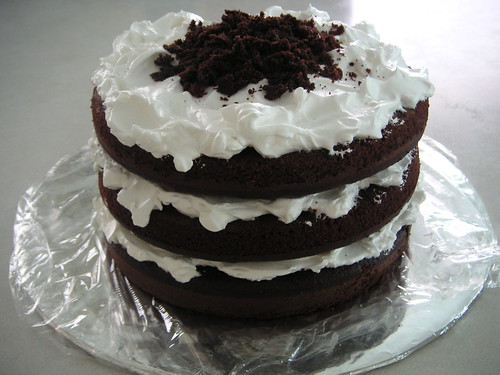
By the way, the devil's food white-out cake was such a hit that I was asked to make another one for a birthday party. I love Dorie's recipes!!