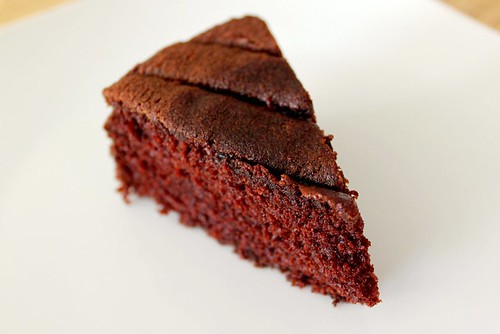
 Simple and unadorned, that's how I like to enjoy my cakes. I made this recipe from before, but had to try it again. You see, I have this problem accepting that something as simple to make Hershey's chocolate cake always comes out so perfectly. Shouldn't the cake that requires 10 different steps and a bunch of messy bowls come out better, not the one where you throw everything into the mixing bowl and whip for 2 minutes?
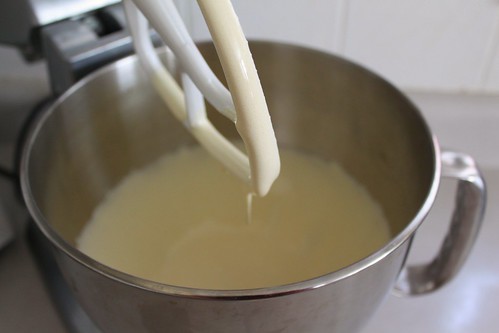
Whip the eggs and sugar until they become thickened and pale. I'm lazy and hate cleaning the whisk so I just use the paddle.
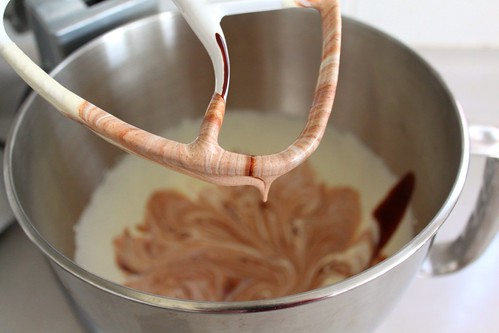
Add melted chocolate mixture. Isn't the marbelled effect pretty?
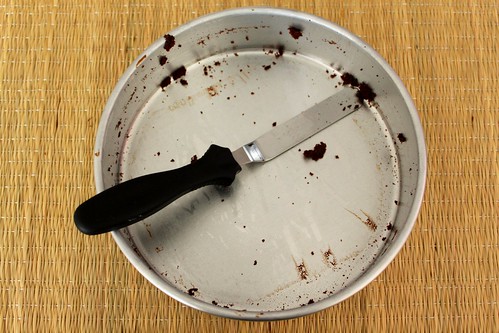
This is going to sound really stupid considering I've been baking for so long, but I finally understand the importance of greasing now that I stopped using nonstick pans. I used to think people went crazy with PAM only because it was fun to use the spray can. It was not easy prying this cake out even though I lined with parchment.
Was this cake really worth all the extra effort of whipping, melting, more whipping and an extra dirty bowl? Probably not. Although the crumb was slightly more velvety compared to Hershey's perfectly chocolate chocolate cake, the difference is pretty small. When you take into account that this uses butter, chocolate and all the extra steps, I would rather have something lower in fat and easy to make if the cakes are fairly comparable. Don't get me wrong, this was still really delicious and I would never sacrifice taste for ease, ie. microwave cake in a mug... no thanks!
Here is the whole recipe. I only made the cake portion.
Cook's Illustrated Old Fashioned Chocolate Cake
Cake
12 tablespoons unsalted butter (1 1/2 sticks), very soft, plus extra for greasing pans
1 3/4 cups unbleached all-purpose flour (8 3/4 ounces), plus extra for dusting pans
4 ounces unsweetened chocolate , coarsely chopped
1/4 cup Dutch-processed cocoa (3/4 ounce)
1/2 cup hot water
1 3/4 cups sugar (12 1/4 ounces) ; 1/2 cup, 1 1/4 cup
1 1/2 teaspoons baking soda
1 teaspoon table salt
1 cup buttermilk
2 teaspoons vanilla extract
4 large eggs
2 large egg yolks
Frosting
16 ounces semisweet chocolate , finely chopped
8 tablespoons unsalted butter (1 stick)
1/3 cup sugar
2 tablespoons corn syrup
2 teaspoons vanilla extract
1/4 teaspoon table salt
1 1/4 cups heavy cream (cold)
1. FOR THE CAKE: Adjust oven rack to middle position; heat oven to 350 degrees. Grease two 9-inch-round by 2-inch-high cake pans with softened butter; dust pans with flour and knock out excess. Combine chocolate, cocoa powder, and hot water in medium heatproof bowl; set bowl over saucepan containing 1 inch of simmering water and stir with rubber spatula until chocolate is melted, about 2 minutes. Add 1/2 cup sugar to chocolate mixture and stir until thick and glossy, 1 to 2 minutes. Remove bowl from heat and set aside to cool.
2. Whisk flour, baking soda, and salt in medium bowl. Combine buttermilk and vanilla in small bowl. In bowl of standing mixer fitted with whisk attachment, whisk eggs and yolks on medium-low speed until combined, about 10 seconds. Add remaining 1 1/4 cups sugar, increase speed to high, and whisk until fluffy and lightened in color, 2 to 3 minutes. Replace whisk with paddle attachment. Add cooled chocolate mixture to egg/sugar mixture and mix on medium speed until thoroughly incorporated, 30 to 45 seconds, pausing to scrape down sides of bowl with rubber spatula as needed. Add softened butter one tablespoon at a time, mixing about 10 seconds after each addition. Add about one-third of flour mixture followed by half of buttermilk mixture, mixing until incorporated after each addition (about 15 seconds). Repeat using half of remaining flour mixture and all of remaining buttermilk mixture (batter may appear separated). Scrape down sides of bowl and add remaining flour mixture; mix at medium-low speed until batter is thoroughly combined, about 15 seconds. Remove bowl from mixer and fold batter once or twice with rubber spatula to incorporate any remaining flour. Divide batter evenly between prepared cake pans; smooth batter to edges of pan with spatula.
3. Bake cakes until toothpick inserted into center comes out with a few crumbs attached, 25 to 30 minutes. Cool cakes in pans 15 minutes, then invert onto wire rack. Cool cakes to room temperature before frosting, 45 to 60 minutes.
4. TO MAKE FROSTING: Melt chocolate in heatproof bowl set over saucepan containing 1 inch of barely simmering water, stirring occasionally until smooth. Remove from heat and set aside. Meanwhile, heat butter in small saucepan over medium-low heat until melted. Increase heat to medium; add sugar, corn syrup, vanilla, and salt and stir with heatproof rubber spatula until sugar is dissolved, 4 to 5 minutes. Add melted chocolate, butter mixture, and cream to clean bowl of standing mixer and stir to thoroughly combine.
5. Place mixer bowl over ice bath and stir mixture constantly with rubber spatula until frosting is thick and just beginning to harden against sides of bowl, 1 to 2 minutes (frosting should be 70 degrees). Place bowl on standing mixer fitted with paddle attachment and beat on medium-high speed until frosting is light and fluffy, 1 to 2 minutes. Stir with rubber spatula until completely smooth.
6. TO FROST CAKE: Place one cake layer on serving platter or cardboard round. Spread 1 1/2 cups frosting evenly across top of cake with spatula. Place second cake layer on top, then spread remaining frosting evenly over top and sides of cake. Cut into slices and serve.
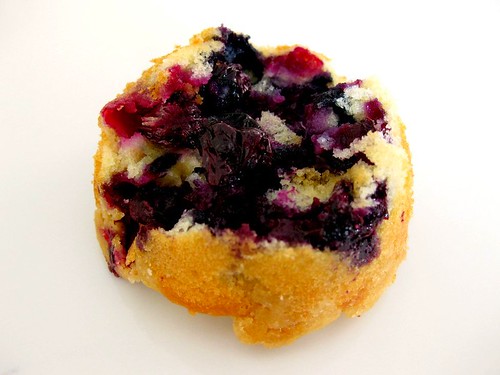 This wasn't what I envisioned for my blueberry cakes. When most of the berries sunk to the bottom and the cake wouldn't even support itself, I had to flip them upside down.
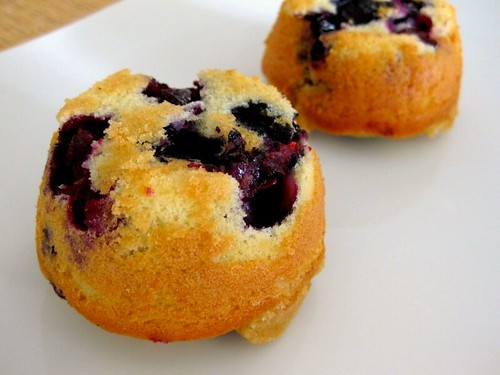
These were some of the better looking ones and the sinkage might even pass as intentional for decoration purposes.
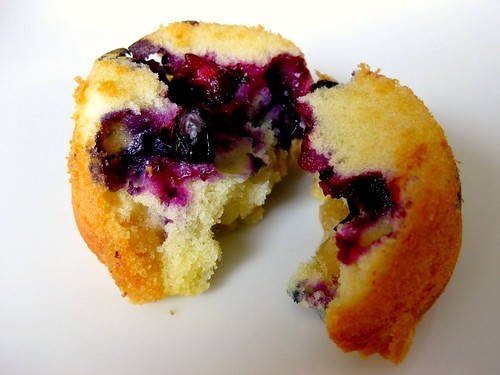
Since I'm obsessed with texture shots, this is the best one I could get after splitting through 3 and only seeing an explosion of blueberries. Maybe I went a teeny tiny overboard with the addins.
Despite their appearance, these were amazing! I loved the tight crumb and light and fluffy texture. The blueberries added a really nice burst of flavour with each bite. I'm definitely going to give this recipe a try again as cupcakes. Blueberries add a lot of moisture and these cakes weren't soggy at all so I hope that the cake only version won't end up dry.
I used the cake part of the New York style crumb cake from CI
New York Style Crumb Cake
Cooks Illustrated
Crumb Topping
1/3 cup granulated sugar (2 2/3 ounces)
1/3 cup dark brown sugar (2 2/3 ounces)
3/4 teaspoon ground cinnamon
1/8 teaspoon table salt
8 tablespoons unsalted butter (1 stick), melted and still warm
1 3/4 cups cake flour (7 ounces)
Cake
1 1/4 cups cake flour (5 ounces)
1/2 cup granulated sugar (3 1/2 ounces)
1/4 teaspoon baking soda
1/4 teaspoon table salt
6 tablespoons unsalted butter (3/4 stick), cut into 6 pieces, softened but still cool
1 large egg
1 large egg yolk
1 teaspoon vanilla extract
1/3 cup buttermilk
Confectioners' sugar for dusting
1. FOR THE TOPPING: Whisk sugars, cinnamon, salt, and butter in medium bowl to combine. Add flour and stir with rubber spatula or wooden spoon until mixture resembles thick, cohesive dough; set aside to cool to room temperature, 10 to 15 minutes.
2. FOR THE CAKE: Adjust oven rack to upper-middle position and heat oven to 325 degrees. Cut 16-inch length parchment paper or aluminum foil and fold lengthwise to 7-inch width. Spray 8-inch square baking dish with nonstick cooking spray and fit parchment into dish, pushing it into corners and up sides; allow excess to overhang edges of dish.
3. In bowl of standing mixer fitted with paddle attachment, mix flour, sugar, baking soda, and salt on low speed to combine. With mixer running at low speed, add butter one piece at a time; continue beating until mixture resembles moist crumbs, with no visible butter chunks remaining, 1 to 2 minutes. Add egg, yolk, vanilla, and buttermilk; beat on medium-high speed until light and fluffy, about 1 minute, scraping once if necessary.
4. Transfer batter to baking pan; using rubber spatula, spread batter into even layer. Following photos below, break apart crumb topping into large pea-sized pieces and spread in even layer over batter, beginning with edges and then working toward center. Bake until crumbs are golden and wooden skewer inserted into center of cake comes out clean, 35 to 40 minutes. Cool on wire rack at least 30 minutes. Remove cake from pan by lifting parchment overhang. Dust with confectioners' sugar just before serving.
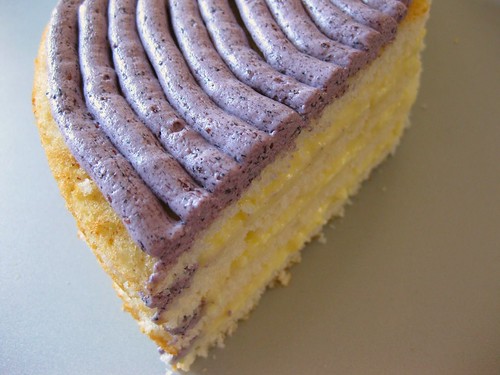 I was so excited for this cake because last summer, this was the recipe I used to bake my first ever layer cake. Thanks to the DBers who raved about this enough that I had to give it a try. It was the first time I realized that cakes could be made from scratch! Since many of the experienced DBers had problems with flat layers, I decided to make a triple layer cake with 3 8 inch pans (I needed all the help I could get).
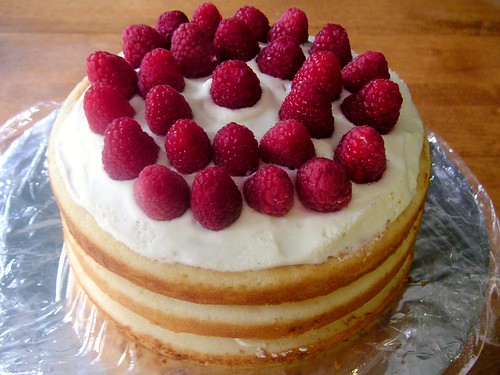
One year later I wanted to try it with 9 inch pans, since Dorie posted helpful tips to fix the height issues and because my 8 inch ones aren't the greatest in quality. I used all purpose flour and 2% milk. I omitted the 2 minute beating at the end because I didn't want to risk overbeating. 2 minutes of beating with all purpose flour... I don't even want to imagine what would happen to the cake! The layers aren't as tall as Dorie's, but I was really happy with the overall result.
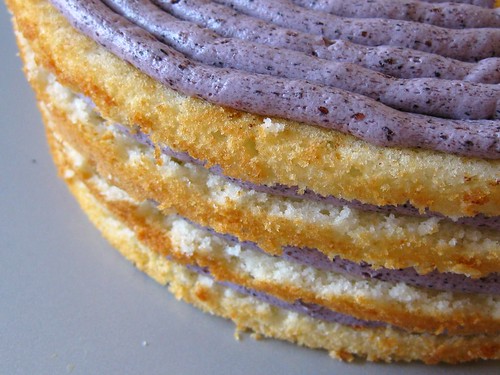
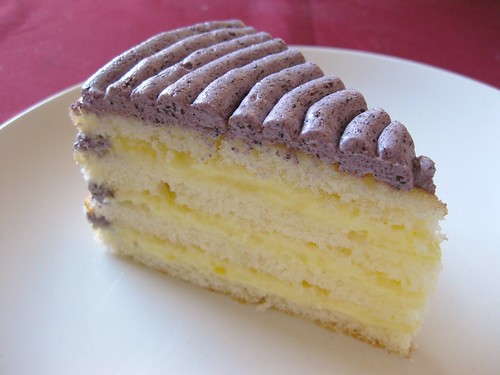
The way I frost layer cakes hasn't really changed. I like to keep the outside bare because I'm not a huge frosting lover, but if there's one butter based frosting to make, it's definitely Cassie's SMBC. I can't say enough about it because it's that good! Creamy and perfectly sweetened without tasting like a stick of butter unlike most meringue based buttercreams. I used her SMBC instead of Dorie's and added some blueberry puree. I couldn't really taste the blueberry and will use jam next time for a more concentrated flavour. Even though SMBC is my favourite kind of buttercream, 4 layers of it can be hard to stomach. Instead, I made a lightened version of CI's pastry cream by omitting the butter and using milk instead of cream. I love how soft this cake was even with all purpose flour. I really liked it, although I can't really say the same for for the rest of my family. It can be so frustrating to bake for them because everything is either too buttery, too sweet, too rich, too moist (?!). I'm starting to get the feeling that what they really want is sandwich bread (and it better be Wonder bread since it's like biting into air) lightly sweetened with sugar.
Thanks so much to Carol of mix, mix... stir, stir for choosing this recipe! You can find the recipe on her blog or in Dorie's book. Don't forget to check out the TWD blogroll!
Pastry Cream, adapted from CI
1 cup milk
2 tbsp sugar
2.5 egg yolks
1.5 tbsp cornstarch
Whisk sugar, eggs and cornstarch together until incorporated
On medium high heat, heat milk.
Pour milk in egg mixture to temper the eggs
Pour mixture back into pot, whisking until thickened and bubbles appear on the side.
Remove from heat and pour into another bowl to stop cooking.
Place plastic wrap on surface and refrigerate until cool and ready to use.
Swiss Meringue Buttercream
Adapted from Cassie's How to eat a Cupcake
Ingredients
2 large egg whites
1/2 cups sugar
1/2 cup (1 sticks) unsalted butter, at room temp
1/4 blueberry puree
Directions
Put egg whites and sugar into the top of a double boiler over a pan of simmering water. Whisking constantly, cook until sugar has dissolved and mixture is warm (about 160 degrees).
Pour heated egg whites into the bowl of an electric mixer fitted with the whisk attachment. Beat egg white mixture on high speed until it forms stiff (but not dry) peaks. Continue beating until fluffy and cooled, about 7 minutes.
Switch to the paddle attachment. With mixer on medium-low, add butter two tablespoons at a time, beating well after each addition. Increase speed to medium-high; continue beating until frosting appears thick, about 3 minutes. Reduce speed to low; add blueberry puree and raise speed to medium and beat until incorporated.
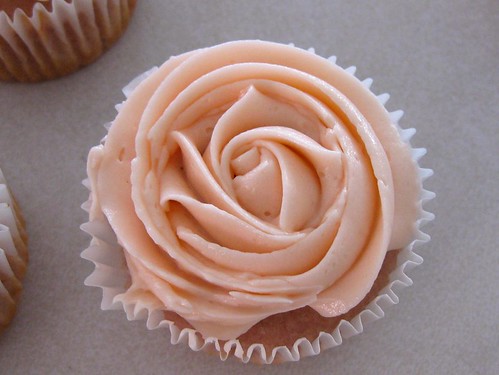
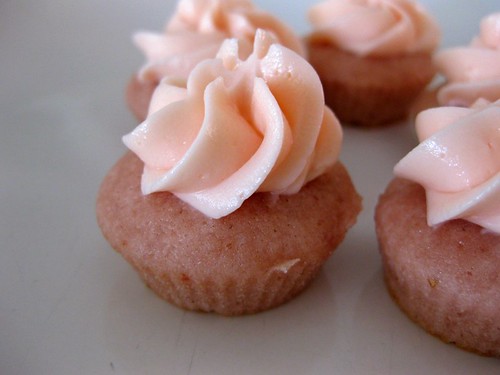 Is it just me or is anyone else starting to feel like they're on dessert overload? Lately I've been feeling a little sick of sweets, but not the baking part so that makes it really difficult to make something new when the desserts are piling up. That's why I love getting together with family because it gives me an excuse to bake, and a full recipe too (no annoying egg splitting or creaming 3 tbsps of butter!). Oh.. and catching up is fun too. Since it's the summer and strawberries are everywhere, I finally decided to give Sprinkle's strawberry cupcakes a try. It seemed like the perfect summer dessert for Father's Day. My family seems to be on a health kick nowadays with everyone splitting a cookie or taking out knives to cut a cupcake in half. I thought I would make it easier on them by making mini cupcakes and test out my new mini silicone baking cups. I never thought I would use silicone just because I have this weird belief that whatever is baking in them will not cook. I don't know why.. maybe it's because the cups don't feel hot like metal does. The batter was delicious and tasted like strawberry icecream! I'm not usually a batter licker because the raw flour grosses me out, but I couldn't help dipping my fingers one too many times. Too bad I didn't love it when they were baked. They weren't horrible, but I didn't love the texture. I even made regular sized cupcakes in a metal pan because I didn't want to judge a recipe I've never tried before baked at 1/4th of its original size. I think I'm going to try adding strawberry puree to a butter cake recipe next time, but I have the feeling it's not as easy as replacing some of the milk with strawberry. Fruits do weird things to batter.
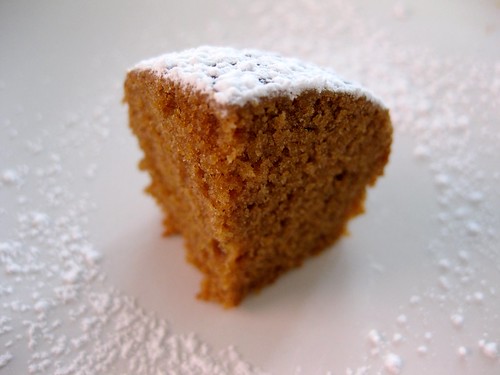 I've been craving for gingerbread for a while now and after reading Mary's post, I immediately went to the kitchen to measure out the ingredients. I used Dorie's recipe from TWD, but omitted the chocolate and baked in a muffin tin. I can't remember how the chocolate version tasted exactly, since we made it 6 months ago (in January..where has time gone?!), but I think I like it better without the chocolate. Next time I'm adding freshly grated ginger for extra heat. Unfortunately, this wasn't a family favourite except for me. I had a hard time getting them to try this and told them it was chocolate cake. Too bad the smell of ginger, molasses and cinnamon gave it all away. Oh well, this is usually what happens when I bake with spices. I used to be like that too, but thanks to TWD, I started to love cinnamon in desserts other than apple pie. It shouldn't be too difficult to eat 12 cakes though, I only had 3 the first day!
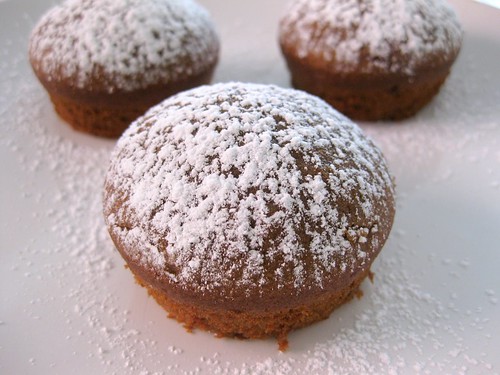
Recipe here at Sherry Trifle
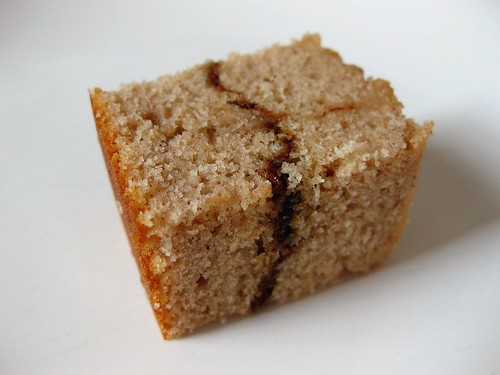 These squares were absolutely delicious, which surprised me since I'm not usually a crazy cinnamon fan. I think this would have to rank up there as one of my favourite Dorie recipes. I enjoyed the texture and the loved the combination of cinnamon and coffee. This is a flavour combination that I will have to use again. I made these a little differently than instructed though because I didn't want to risk over mixing by folding the butter at the end. Instead of melting the butter, I decided to cream it by hand just because I saw Bob of Cooking Stuff do it and couldn't wait to give it a try. Look at what a gorgeous batter he creates with a wooden spoon! Plus, think about all the extra squares I could eat after that workout (no seriously.. I should've waited for the butter to get to room temperature because it's not fun to cream cold butter). I still love my KA more than anything, but doing everything by hand feels like I'm baking for real if that makes sense and a lot of fun! I omitted the frosting and chips in that batter.. part of my efforts to cut calories where I can so I continue baking with TWD without outgrowing all my clothes!
Thanks so much to Tracey of My Culinary Adventures for choosing this recipe! You can find the recipe on her blog or in Dorie's book. Don't forget to check out the TWD blogroll!
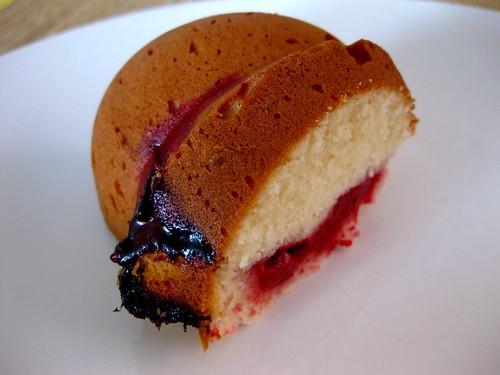 I wasn't expecting to bake a cream cheese pound cake. This actually started off as frosting that I made for fun and didn't want to waste. I'm starting to find that the process part of baking is more fun than the eating part, which usually means that sometimes I make desserts randomly. Lately, it's been frosting, especially ones made with powdered sugar because it's always nice to have a quick and easy recipe for emergencies. With so many similar recipes out there, it is very difficult to try them all and not literally eat a stick of butter. The recipe from the Whimsical Bakehouse looked interesting because the sugar is dissolved first in boiling water and it claims to be non-crusting! I liked that it wasn't super sweet, but so mad that I messed it up. It was not a pretty frosting, looking like it was on the verge of separating. It's probably my fault for overwhipping/underwhipping (I don't know) and substituting the butter for shortening, since the liquid in this recipe is water. I read a lot of great reviews for this recipe so I'm going to give it another try! Since I ruined this batch, I thought it would be fun to throw in some cream cheese to see what would happen. Instead of patiently waiting for my cream cheese to come to room temperature, I just threw half a block that I softened with my hands. That obviously was not a good idea because there were mini cream cheese chunks galore! I turned up the speed, but that only turned my thick, but chunky mixture into soup.
For some reason, I didn't want to give this up and wanted to throw more ingredients into my mixing bowl and hope that something edible would turn out. So far, I had 9 tbsps of butter, 4 oz cream cheese, 1 cup of powdered sugar and 1/6th cup of water. Don't those sound like basic ingredients for cake?! Cream cheese pound cake fit the best so I used the recipe from Deb of Smitten Kitchen as a guide. I was a little worried that the powdered sugar and water would mess this up, but the pound cake turned out to be delicious.. phew! My favourite is still the whipping cream pound cake because of it's velvety and melt in your mouth texture, but this one was good in its own way. It had a nice crust and the combination of sweetness, tanginess and burst of raspberries was really good!
I'm not sure if anyone actually wants the recipe, since it started off as being frosting, the mixing sequence might be weird and it wasn't very tall since the recipe is kind of small.
Raspberry Cream Cheese Pound Cake
1 cup powdered sugar
1/6th cup boiling water
9 tbsp butter
4 oz cream cheese
1/2 granulated sugar
2 eggs
1.5 cup (6.75 oz) sifted all purpose flour
1/4 tsp salt
3/4 cup (or more or less depending on preferences) of raspberries
1. Preheat oven to 350F. Grease a bundt pan
2. Combine flour and salt in a bowl
3. Beat powdered sugar and boiling water in a mixer until smooth and cool
4. Add butter and cream until smooth and fluffy on medium high.
5. Add cream cheese and cream until smooth and fluffy on medium high.
6. Add granulated sugar and cream until smooth and fluffy on medium high
7. Add eggs, one at a time until fluffy and well incorporated
8. On low speed, add flour until incorporated.
9. Add half the batter and spread evenly using a spatula.
10. Scatter raspberries on top
11. Add the rest of the batter on top and smooth with a spatula
12. Bake 30-40 minutes until a toothpick inserted in the center comes out clean.
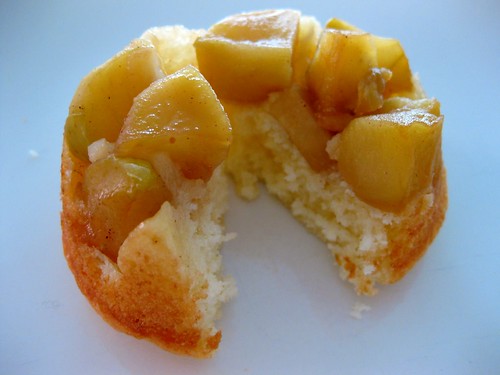 I was having an apple cake craving on my bus ride home from school.. yes.. that's right school in the summer..fun right?. I got home and the first thing I did was chop up apples. The thing with last minute cravings is that sometimes you don't always have all the ingredients you need and have to improvise. Umm I don't exactly like to do that because sour cream and yogurt aren't really the same.. right? Since many bakers have substituted yogurt for sour cream with sucess, I decided to give it a try. The substitutions didn't end there because I only had one container of yogurt left so I topped the rest off with milk. I also omitted the extra egg yolk because I didn't feel like accumulating extra stuff in my freezer. Then I assembled everything in my muffin pan instead of a 9 inch and crossed my fingers that this would still taste good after all these changes. I like to use muffin pans to reduce baking time and for faster turnover because having to take a knife out proves to be too much work for my family.
Edit. I forgot to add that these were a bigger hit with my family than me. The topping was really good with the cinnamon, nutmeg, apples and brown sugar and the cake part had a nice tang with the yogurt. I thought the texture was good just when they were completely cool, but a few hours later, the fluffiness disappeared and it was denser. I'm not sure if it's because of the moisture from the apples or the yogurt itself..hmm.. I think I'm going to try baking with yogurt more often.
Original recipe here
Adapted recipe (since I made so many changes, I thought it would be neater to just post the adapted recipe)
Apple Cake
Ingredients
Apples:
2 tablespoons butter
2 tbsp dark brown sugar (I reduced it significantly)
Pinch cinnamon
Pinch nutmeg
4 medium-large apples, cut into chunks
Cake:
1/4 cup yogurt + 1/4 cup milk
1 egg
1/2 teaspoon vanilla
1 1/4 cup all-purpose flour
3/4 cup sugar
1/2 teaspoon baking powder
1/4 teaspoon baking soda
1/4 teaspoon salt
6 tablespoons butter
1. Heat the oven to 350 degrees and adjust a rack to the center position. Butter a muffin tin well so that the apples won't stick
2. For the apples: Place the butter, sugar, cinnamon, nutmeg and apples in a large heavy-duty skillet over medium heat. Cook, stirring often, until the apples have softened slightly and the juices are thickened and syrupy, about 5 to 7 minutes. Remove from heat and divide evenly in muffin pan.
For the cake:
1. Combine flour, baking powder, baking soda, salt
2. Combine yogurt and milk in a measuring cup
3. Cream butter and sugar until light and fluffy, about 4 minutes
4. Add egg and continue creaming until well combined
5. Alternately add flour and liquid mixture on low speed until flour disappears
6. Divide batter evenly ontop of apples and spread out evenly
7. Bake 18-20 minutes until a toothpick inserted comes out clean
8. Cool on a baking rack for 10 minutes
9. Loosen the sides of the muffins using a knife and place a jelly roll pan on top of the muffin pan and invert so that all 12 muffins flip over at the same time.
10. Transfer cakes to cooling rack to cool completely.
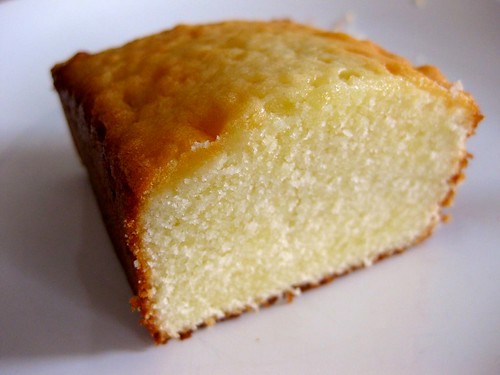 This was one delicious pound cake! I have nothing to compare it to because I've never made a pound cake before, but this one reminded me of a Sara Lee minus the chemicals. If I didn't have a carton of whipping cream that was about to expire, I probably wouldn't have made this. The texture of this was everything I ever wanted in a pound cake. Dense and compact, but very tender and melt in your mouth. I don't think I've eaten a softer cake..I guess it makes sense when there's a cup each of butter and heavy cream! Of course, I just couldn't make this recipe without wondering why the batter had to be mixed 5 mins after everything was added! What a way to make me all paranoid about overmixing. I read a lot of reviews, secretly hoping that someone would say the 5 mins of the mixer running on medium high speed was wrong. Instead, most people just raved about this cake so I decided to see for myself the difference between making this the way it was written and the way we're generally used to by stopping the mixer after everything was incorporated.
I made 2/3rds of the recipe because I had a feeling I didn't have enough mini pans. I didn't want to bake leftover batter in a muffin tin either because that would mean having to open the oven door during baking. I also made a few modifications, reducing the egg to 6 to make the recipe easier to divide, the sugar from 3 cups to 2 because many reviewers complained about it being too sweet and upped the salt to 1 tsp because 3/4 tsp seemed too little for a cake with that much sugar and flour. Since there is no leavener in this cake, the butter, sugar and eggs have to be beaten until they're really fluffy and well incorporated or else it won't rise properly. After all the ingredients were added, the flour disappeared and the batter looked homogenous I stopped the machine and filled my first two minipans with 4 1/4 cup scoops each. Next (for the remaining batter) I turned the mixer on medium high for a very long 5 minutes. When all the beating was done, I filled my next two pans with 4 1/4 cup scoops each and put all 4 pans in a cold oven.

Left: beating for 5 minutes on medium high; Right: beating until flour disappeared and batter looked homogeneous
The cake that was whipped for 5 minutes had a nicer exterior and rose higher, but when it came to the texture, the cake that I mixed just until the flour disappeared was more delicate and tender. It also didn't have the occasional tunnel that was found in the loaves whipped for 5 minutes. I guess when they say don't overmix, you really shouldn't over mix.. even when the recipe says the secret is overmixing! Next time I make this I'm going to try it with a preheated oven or maybe a little bit of baking powder for a better lift (I can't decide which yet). Despite it's melt in your mouth and very tender crumb it was the slightest bit too dense the next day. I also want to try Cook's Illustrated's pound cake, which doesn't have any cream...but a lot of butter! Since I made changes, it wouldn't be fair for me to review the original recipe. I was really just trying to see the difference in the 5 minute beating at the end. Also, 2/3rds of the recipe fit perfectly in 4 mini loaf pans using a 1/4 cup icecream scoop.
Elvis Presley's Whipping Cream Pound Cake
Epicurious
Ingredients
2 sticks (1 cup) unsalted butter, softened, plus additional for buttering pan
3 cups sifted cake flour (not self-rising; sift before measuring) plus additional for dusting
3/4 teaspoon salt (I used 1 tsp)
3 cups sugar (I used 2 cups)
7 large eggs, at room temperature 30 minutes (I used 6 eggs)
2 teaspoons vanilla
1 cup heavy cream
Special equipment: a 10-inch tube pan (4 1/2 inches deep; not with a removable bottom) or a 10-inch bundt pan (3 1/4 inches deep; 3-qt capacity) (I used 4 mini loaf pans for 2/3rds of the recipe)
Put oven rack in middle position, but do not preheat oven.
Generously butter pan and dust with flour, knocking out excess flour.
Sift together sifted flour (3 cups) and salt into a bowl. Repeat sifting into another bowl (flour will have been sifted 3 times total).
Beat together butter (2 sticks) and sugar in a large bowl with an electric mixer at medium-high speed until pale and fluffy, about 5 minutes in a stand mixer fitted with paddle attachment or 6 to 8 minutes with a handheld mixer. Add eggs 1 at a time, beating well after each addition, then beat in vanilla. (Make sure the eggs are beaten in very well) Reduce speed to low and add half of flour, then all of cream, then remaining flour, mixing well after each addition (I did this in 3 additions starting with flour - cream - flour - cream - flour). Scrape down side of bowl, then beat at medium-high speed 5 minutes (I prefer to stop the machine after the flour is incorporated and the batter looks homogenous). Batter will become creamier and satiny.
Spoon batter into pan and rap pan against work surface once or twice to eliminate air bubbles. Place pan in (cold) oven and turn oven temperature to 350°F. Bake until golden and a wooden pick or skewer inserted in middle of cake comes out with a few crumbs adhering, 1 to 1 1/4 hours. Cool cake in pan on a rack 30 minutes (I only cooled in the pan for 10 minutes). Run a thin knife around inner and outer edges of cake, then invert rack over pan and invert cake onto rack to cool completely.
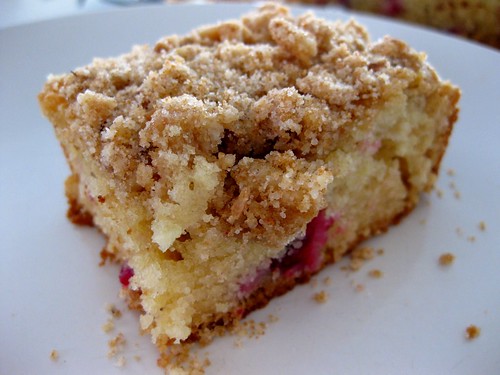 I was so excited when this recipe was chosen because it finally gave me the excuse to make a crumb cake! I've bookmarked so many, but never got to making any of them because there was always something else I had to try instead. Plus, I was a little worried about the crumb topping turning all soggy on me. I was kind of rushed when I was making this and somehow I poured 3/4 cup of buttermilk after reading 1/2 cup. Luckily the batter was so thick and it all worked out in the end! Also, cranberries have less moisture than blueberries so I guess the extra liquid was ok. I omitted the spices and added 1/4 tsp of almond extract. The combination of cranberries and almond was really nice and next time I'm going to add more of each, since you can't even tell I added cranberries along with a dash of cinnamon. The sourness of the cranberries helped to cut some of the sweetness in the topping, which was a really nice contrast! I loved making this because I love cake batter, not uncooked though, just looking at how incredibly smooth and creamy it is. Umm the truth is.. I'm not a batter licker and it's not because of the raw eggs, but the raw flour. Maybe it just brings back childhood nightmares about oatmeal or cream of wheat..haha. I threw all the crumb ingredients together (minus 2 tablespoons of butter and brown sugar, which I added at the end because I forgot) in the stand mixer and mixed it using the paddle attachment because I was too lazy to clean the food processor. The only problem was I was left with something that looked more like wet sand than coarse crumbs. I had a feeling my sand would just melt into the batter so I squeezed a handful of it and dropped it on top to form as many large clumps as possible. The crumb topping was a hit and dangerously addicting!
Thanks to Sihan of Befuddlement for choosing this recipe! The recipe can be found on her blog and here. Don't forget to visit the TWD Blogroll!
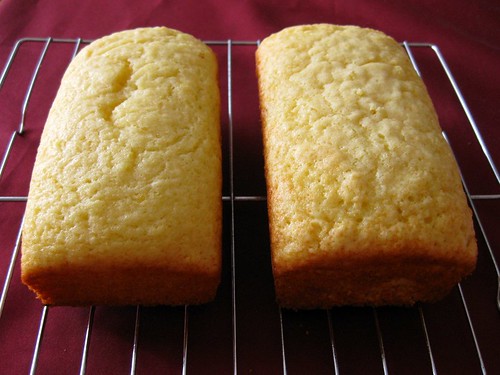 I've wanted to bake a French yogurt cake for the longest time, but never got to it because I couldn't decide which recipe to choose (how typical...haha). Every recipe I found called for folding in the oil in the last step, which seemed kind of different from most cake recipes (non yogurt). Could it be a crucial step to making yogurt cakes and provide some improvement in texture that can benefit other oil based cakes as well? I just couldn't resist making this cake the way it was written (loaf #1) as well as whisking the eggs and sugar and then whisking in the oil until they were completely combined (loaf #2) to see if there would be a difference. Luckily, this recipe was easy to divide in 3's so I made 1/3rd of the recipe for each mini loaf pan and weighed everything to be as fair as possible.
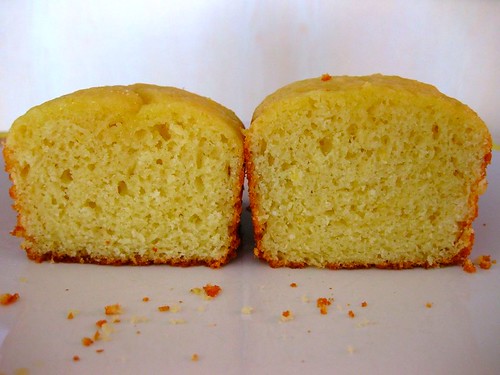
Left: folding in oil at end; Right: whisking in oil with eggs and sugar
Loaf #2 rose slightly higher and was more pebbly on the surface than loaf #1. Loaf #1 was also denser, chewier and greasier (almost like a Costco muffin kind of way) while loaf #2 was slightly more tender and ligher. Judging by the P&Q, I think I'm in the minority with this one because I wasn't too crazy about the French yogurt cake. It was a little too springy, dense and low fat tasting for me. I'll probably make the glaze next time to get the full effect and use the method for loaf #2 (whisk the oil in beforehand with the eggs and sugar). That way, we won't have to worry about overmixing or greasiness. I actually liked the cake a little better the next day flavourwise, however, the differences were even more noticeable and loaf #1 was drier and became even denser. I think it's so cool how the same amount of fat, but added differently can affect moistness and texture.
Thanks to Liliana of My Cookbook Addiction for choosing this recipe. The recipe can be found on her site and here. Don't forget to visit the TWD Blogroll!
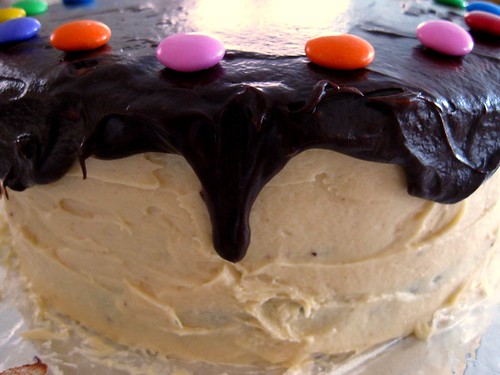 Making this cake was a lot harder than I expected. The baking part was easy, trying to decide which chocolate recipe to use...well... that was more difficult than it should've been. Originally, I was going to make the Chocolate Peanut Butter Cake after seeing it on Smitten Kitchen. The only problem was, after I scanned through the recipe, I noticed that there was only 1/2 cup of cocoa for 2 cups of flour and a lot of liquid. I can't stand it when there's only a hint of chocolate flavour in chocolate cakes. Deb also said in her comments section that this cake wasn't as chocolatey compared to others. Still, the pairing of peanut butter cream cheese frosting + chocolate was too good too pass so I searched for another cake recipe. The only problem was that everyone claimed to have the 'best' version. I narrowed it down to only butter based because I find that the crumb seems finer than oil based cakes, which are coarser. I also prefer cakes made with both cocoa and chocolate because without the actual chocolate, it seems like that extra decadence and depth of flavour is missing. At the same time I had to make sure I didn't cross into brownie territory with the richness.
I decided to make the chocolate cake from CI's chocolate blackout cake. This is a cocoa based recipe, but I wanted to try it because it was a little different. The cocoa was heated and everything was done in one pot with a whisk. I've never made a 'one bowl' cake recipe because I've always been sceptical about them. There has to be a reason why we have to cream butter and sugar or ribbon eggs and sugar together...right? Plus, what if I'm not a good whisker!! Being a huge peanut butter lover, I was a little disappointed when I didn't like the frosting. There was just a little too much going on for me with the tanginess, saltiness and sweetness. The cake was moist and a little fudgy + dense, although that's not suprising because the butter was melted and everything was whisked by hand. I think it might have benefitted from some melted chocolate, although heating the cocoa defintely brought out more flavour. Overall, the cake part was good, but not the best chocolate cake I've eaten.

Chocolate Blackout Cake
Cook's Country
8 tablespoons unsalted butter (1 stick), plus extra for greasing pans
1 1/2 cups all-purpose flour , plus extra for dusting pans
2 teaspoons baking powder
1/2 teaspoon baking soda
1/2 teaspoon Table salt
3/4 cup Dutch-processed cocoa powder
1 cup strong black coffee
1 cup buttermilk
1 cup packed light brown sugar (I used 3/4 cup)
1 cup granulated sugar (I used 3/4 cup)
2 large eggs
1 teaspoon vanilla extract
Instructions
1. For the cake layers: Adjust oven rack to middle position and heat oven to 325 degrees. Butter and flour two 8-inch cake pans (I used 3 8 inch pans because I didn't not crumble one layer). Whisk flour, baking powder, baking soda, and salt in bowl.
2. Melt butter in large saucepan over medium heat. Stir in cocoa and cook until fragrant, about 1 minute. Off heat, whisk in coffee, buttermilk, and sugars until dissolved. Whisk in eggs and vanilla, then slowly whisk in flour mixture.
3. Divide batter evenly between prepared pans and bake until toothpick inserted in center comes out clean, 30 to 35 minutes. Cool layers in pans 15 minutes, then invert onto wire rack. Cool to room temperature, at least 1 hour.
(This cake is originally written to be a chocolate blackout cake, so that's why 2 8 inch pans were used to get 4 layers. I didn't crumble one layer for my cake so I divided the batter into 3 8 inch pans to get 3 layers)
Peanut Butter Frosting
Makes about 5 cups
10 ounces cream cheese, at room temperature
1 stick (4 ounces) unsalted butter, at room temperature
5 cups confectioners’ sugar, sifted
2/3 cup smooth peanut butter, preferably a commercial brand (because oil doesn’t separate out)
1. In a large bowl with an electric mixer, beat the cream cheese and butter until light and fluffy. Gradually add the confectioners’ sugar 1 cup at a time, mixing thoroughly after each addition and scraping down the sides of the bowl often. Continue to beat on medium speed until light and fluffy, 3 to 4 minutes.
2. Add the peanut butter and beat until thoroughly blended.
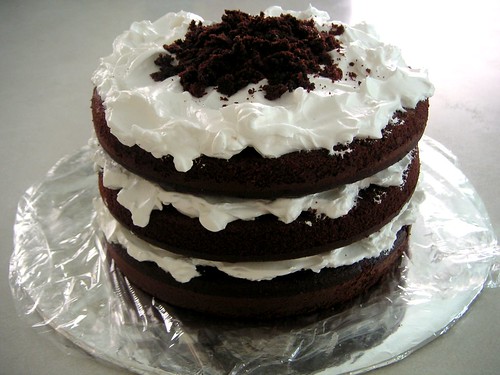 This was the first recipe I made out of Dorie's book just before I joined TWD. The cake on the cover looked so good, I just couldn't wait for someone to choose it! The frosting was a little tricky, but I really liked it because of how light tasting it was. Best of all, it wasn't cloyingly sweet like other 7 minute frostings. I baked this cake in 3 8 inch pans and used the scraps from leveling each layer for the crumb topping. This is actually the cake I made from a few months ago. I was planning on baking this, but I made way too many batches of cupcakes (4 batches in 4 days!) and my family and I are all caked out. I'm just grateful that they're not annoyed with me after I forced them to try the same recipe 4 times with only a single ingredient modified. If someone could please share a moist, fine crumbed and soft vanilla cupcake recipe, I would be really thankful!
Thanks to Stephanie of Confessions of a City Eater for choosing this recipe, which can be found on her blog and here. Don't forget to visit the TWD Blogroll!
 This was the recipe I was most excited about for this month's round of TWD. Ever since I was finally able to sucessfully bake a chiffon cake, all I can think about is trying a foam-like cake again.. in case the first time was a fluke! Dorie had some pretty intimidating instructions for making this cake and it seemed like a lot of TWDers had problems with the rise/sinking. Since the method I used last time for my chiffon cake worked so well, I decided to just stick with it. Plus, the difference between this recipe and the recipe I used before is the use of all purpose instead of cake flour. This would be an excellent opportunity to compare textural differences between those two types of flour, since I was using the exact same mixing method. I didn't want to make the full recipe, but if I made half the recipe, 2 egg whites wouldn't beat up properly in the stand mixer. In the end I decided to make 3/4th of the original recipe, which actually converted perfectly to 3 eggs without weird half/quarter egg divisions and baked in a 9 inch springform. The other change I made was subbing in oil for the butter because the chiffon cake I made the first time used oil and I wanted to keep the recipes as consistent as possible to minimize possible flops and for a better comparison.
Similar to my first chiffon cake, I separated the eggs because my other experiences with trying to incorporate flour into a whole egg foam was diasterous! It's more foolproof for me to fold in egg whites and even that can be tricky! First, I whipped the egg whites to stiff peaks then I mixed all the dry ingredients in one bowl and all the wet in another and whisked them both quickly. Next I folded 1/3 of the egg whites to lighten the batter and then folded the rest of the whites. The texture was just as soft (so I guess the first time wasn't a fluke!), but there was more sinking with this cake compared to my other chiffon. I think I may have overfolded a little (but luckily not enough to affect the overall texture) or maybe I should have cooled the cake upside down, since this was a foam cake to keep the air pockets stretched. Anyway, I'm just glad that all purpose flour worked and actually tasted better because it felt like I was biting into cake vs air with the cake flour (although cake flour is a touch softer).
I didn't exactly have a suprise under the top layer of yummy filling with berries and I also changed the genoise to a chiffon, but this was a lot of fun to make. Next time I'm trying a whole egg foam, maybe that will give me those tiny holes..or if I could somehow get my hands on some sponge cake stabilizer. This is what I want to bake.
Thanks for choosing this recipe and allowing us to challenge our baking skills Mary Ann!! The recipe can be found at her wonderful blog Meet Me in the Kitchen and in Dorie Greenspan's Baking: From my Home to Yours. Don't forget to checkout the TWD Blogroll!
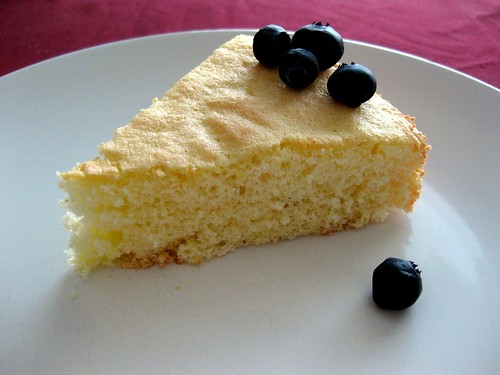 What is your favourite kind of cake? I like mine light as a feather, fluffy, soft, not too sweet and moist. Basically, I love the texture of boxed mixes without all the funny tasting chemicals. Actually, I didn't know that boxed mixes had a funny taste until I went to a birthday party where they served my favourite (or so I thought) Betty Crocker rainbow mix with canned frosting. Many scratch cakes later, I was still not able to get that light texture. I tried creaming, reverse creaming, recipes with both whole eggs and egg whites, different quantities of milk until it hit me that maybe all this time I've just been baking the wrong cake. I've been avoiding sponges and chiffons ever since my horrible angel food cake experience where the cake was raw yet dry.. hmm.. weird, but it happened. I still wasn't sure about the folding egg white thing so off to youtube for a refresher on folding! I stumbled on an episode of Alton Brown's Good Eats and decided to give his recipe a try after many failed attempts with CI's chiffon cake recipe. The CI versions were such failures I didn't even bother to take a picture of the gooey, wet, mess (yes, I'm still talking about a cake)
Alton's recipe had the perfect texture, but needs a little more sweetness. I can't imagine how many more butter cake recipes and tweaking I would've made if I didn't give the chiffon a try! To be honest, now I kind of miss the butter flavour. I'll have to try this recipe with melted butter and more sugar next time (it better work!). The non frosting eater in me decided to go healthy with decorating this cake and found whatever surviving (nonscriveled) blueberries in my fridge..haha.
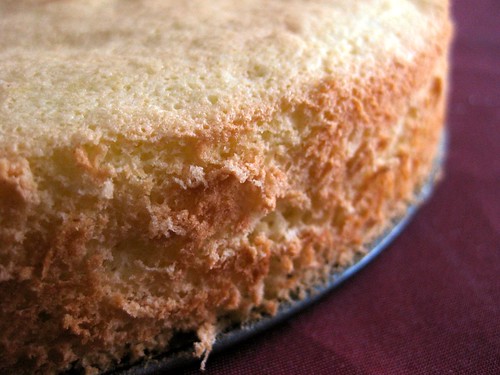
I don't have a tube pan so I halved the recipe and baked in a springform.
Chiffon Cake recipe by Alton Brown
*this is important or you'll end up with a salty cake! I used 1/2 tsp of salt. Anymore and this probably won't be something you'll want to eat. Next time I would up the sugar too!
I actually used Alton's recipe, but with CI's procedure for making this cake. This was to prevent overmixing on my part. First I mixed all the dry ingredients in one bowl and all the wet (except for egg whites) in another bowl and then combined wet and dry. Next I whipped the egg whites + cream of tartar to stiff peaks and folded them into the mixture. I find it harder to incorporated flour into a ribboned egg + sugar mixture and also harder to fold egg whites when there's sugar beaten in them. I'm definitely making this recipe again following Alton's instructions to see if there's a difference. Alton also uses a handmixer, which I never use for cakes because they've always turned them tough and chewy. Maybe it's my Sunbeam.. I guess I do need a new kitchen aid hand mixer!
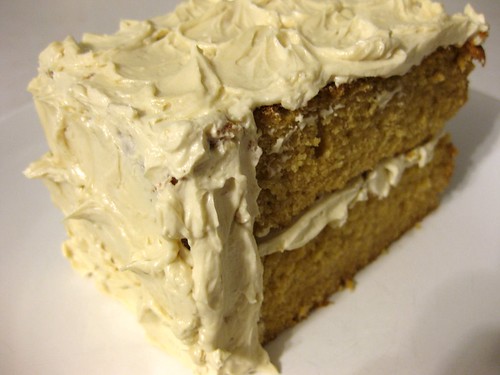 I went into this month's DB challenge a little nervous (suprising?). We were basically making a white cake (with caramel).. something that has never turned out right for me! Either I'm looking for all the wrong things, I can't bake vanilla cakes or something is seriously wrong with every recipe I've tried. It annoys me insanely everytime I waste a perfectly gorgeous butter/sugar/egg emulsion. Luckily, this recipe was a little more forgiving and I was able to get away with even a not so pretty batter. That was such a relief considering the streak of caramel I had on the top of some cupcakes. Actually, it was more like a streak of caramel sugar crystals. Since I made the caramel sauce in advance, I had to microwave it to get it flowing again. The only problem is when the ever so slightly warm caramel hits the cool butter, you get melting butter and sugar crystals! Luckily, it all came together after the eggs were added, even though there were streaks of crystalized caramel.
Now for the tricky part, alternating dry and wet. If there's anything that's emphasized in virtually all recipes it is 'don't overmix'. To me, that translates into don't mix at all, or something close to that. To give you an idea of what I do, I add the flour at stir and stop the machine immediately so I can start pouring the milk, then I start the machine to add the next batch of flour and stop the machine to dump the rest of the milk followed by the rest of the flour. As I'm typing this out, I'm starting to realize how silly it sounds.. between the 10 seconds the machine is actually stiring, no wonder why I have patches of flour in some areas and puddles of liquid in others. Yet, I still get the feeling that if I let the machine run, I'm overmixing!
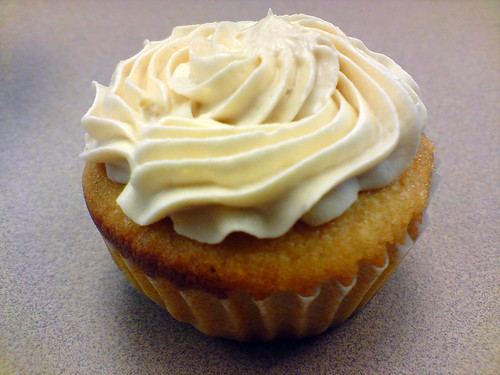
As for the frosting, as soon as I saw powdered sugar, it was already a warning for me. It's hard enough for me to eat frosting, but when there's powdered sugar involved, that's a signal for pasty, grainy or it may be a stretch to say this, but uncooked flour. How can I explain this better.. you know the taste and feel of a sauce or pie with added flour that isn't cooked through, well the raw flour taste is what I'm talking about. I wish there was a way to cook the cornstarch in powdered sugar, maybe then it will be less pasty.. but who knows I could be totally wrong with that theory I have! I started off slowly and gradually added the sugar starting with 1 cup and stopping when I got to 1.5 cups (how could this possibly take 4 cups of sugar!). There was no way I could handle any more sweetness, but the frosting was so liquidy, I was left with an icing. I decided to make a half batch of SMBC to frost the cupcakes I was serving to people and use this icing for the challenge. I ended up combining the two frostings and made a powdered-SMBC frosting duo. It was nowhere near as melt in your mouth as SMBC, but it covered up the pastiness of the icing. Everyone seemed to love the frosting, but I was really happy about the cake. It was really moist even the next day and suprisingly soft considering that all purpose flour was used. I can't wait for next month's challege.. I hope it's something sweet!
Thanks to Dolores of Chronicals in Culinary Curosity and her co hosts Alex of Blondie and Brownie and Jenny of Foray into Food for this month's SWEET DB challenge!
Here's a link to the original recipe Caramel Cake by Shuna Fish Lydon
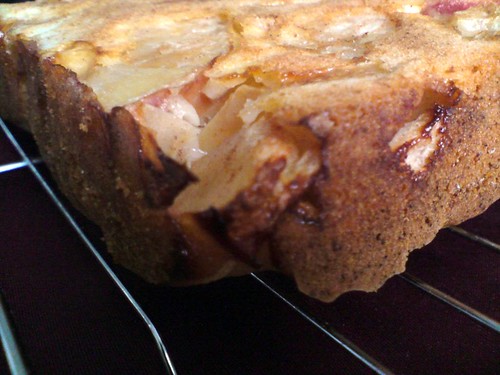 Sorry, no TWD this week. I love pumpkin, but even with scaling down and everything, I would be the only person in my family to eat it the pie. Plus, our thanksgiving already passed so instead I have something I've been dying to try since I saw it at Smitten Kitchen. It was only a matter of time before I knew I would make this. It just looked too good and how could I not make something loaded with apples! We actually had a whole bag of over ripe apples (which wouldn't ever happen at my house) that my aunt gave us. Whenever neighbours or family members ever have overripe apples or bananas, they get sent over to our house for apple pie or banana bread! If they're going to get wasted, we may as well make something good out of it! For some reason, when I read pour half the batter, I ended up pouring half the apples instead of the batter so the apples ended up on the bottom. It must have been those insanely gorgeous photos Deb from Smitten Kitchen takes. All I could think about was that apple topping, only except I envisioned that it was on the bottom instead.

I only made half the recipe, since it's the first time I've ever made apple cake. It also doesn't help when the only high capacity pan you have is a bundt. Muffin tins or 9 inch pans are my favourite to use because baking time is sped up by a lot. Who really wants to wait 1 hour for something to bake? I probably wouldn't be able to concentrate during the long baking time! This cake was really good and moist. Next time I'm definitely adding more apples though because mine did not look as apple-y.
This will be my final installment of pictures taken with the cell phone! I found my charger a while ago and these are the last of the cell phone pics! Speaking of electronics, I've noticed how dirty my laptop has gotten from all my baking. The other day in class, I was a little embarassed when I opened it up and I noticed some flour scattered on the screen, sugar in the keyboard and random stains. Normally, I take really good care of my stuff.. you should see my recipe books. Dorie's is always far from the baking site on a stool when I complete my TWD challenges, but my laptop on the other hand takes center spot, surrounded by ingredients. A book can be replaced, a computer.. well, not so easily.
Smitten Kitchen
Mom’s Apple Cake
6 apples, Mom uses McIntosh apples
1 tablespoon cinnamon
5 tablespoons sugar
2 3/4 cups flour, sifted
1 tablespoon baking powder
1 teaspoon salt
1 cup vegetable oil
2 cups sugar (I used 1.5 cups)
1/4 cup orange juice
2 1/2 teaspoons vanilla
4 eggs
1 cup walnuts, chopped (optional)
Preheat oven to 350 degrees. Grease a tube pan. Peel, core and chop apples into chunks. Toss with cinnamon and sugar and set aside.
Stir together flour, baking powder and salt in a large mixing bowl. In a separate bowl, whisk together oil, orange juice, sugar and vanilla. Mix wet ingredients into the dry ones, then add eggs, one at a time. Scrape down the bowl to ensure all ingredients are incorporated.
Pour half of batter into prepared pan. Spread half of apples over it. Pour the remaining batter over the apples and arrange the remaining apples on top. Bake for about 1 1/2 hours, or until a tester comes out clean.
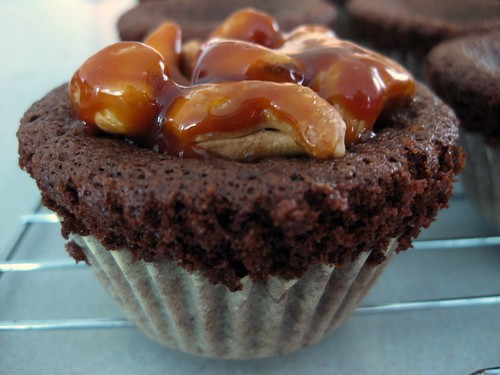 I've decided to make the most of my Monday and Wednesday mornings before classes and spend it baking. Not only do I get to start the day with something yummy, but also with something I love doing! Instead of waiting until the last minute like last week, I started on the caramel topped peanut cake on Wednesday morning so I could bring it to school. This was really exciting because I'm always talking about my baking, but never actually shared (other than to family or neighbours) because I am afraid it's not good enough and would like to be spared the embarassment. After several rounds of TWD, I would have to say that my confidence has definitely improved.
I didn't have peanuts, so I stirred in cashews into my first non-soupy caramal sauce. I made a cupcake style version of the full recipe (that's right, I actually made the full recipe) and was anticipating with great excitment as I watched the cake rise in the oven (yes, I actually do that). Something about seeing the batter transform from a liquidy smooth batter into an actual cake makes me feel good. Anyway, despite my high hopes, something must have gone terribly wrong because these did not taste right. First, the texture was weird (springy and chewier than my ususal chocolate cakes) and the flavour was off. It had the slightest soapy aftertaste and no chocolate flavour. Could it be that I've been so used to halving my recipes that I halved the chocolate without knowing? I have no idea what went wrong, but with the clock ticking and batter still left in the bowl, I had to either bake and pray (secretly hoping that somehow only the batter on the top was messed up) or dump it out.
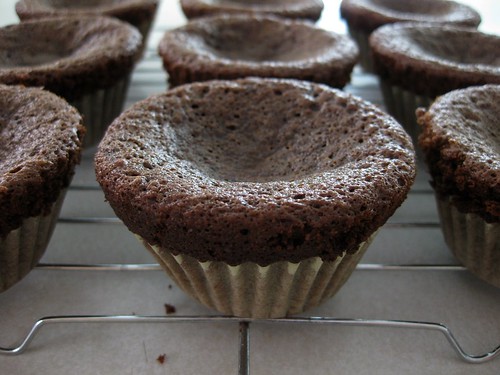
So what do you do when you're left with a chocolate batter that tastes like a regular cake with a hint of chocolate flavour? You add cocoa powder. There was no way I could incorporate cocoa without over mixing so I decided to turn the brownie cake into a cookie. Cookies seem to be a little more forgiving to overmixing. Plus, if anyone askes, these are supposed to be chewy cookies! Suprisingly, the cookie version turned out a lot better, but instead of leaving it there, I decided to turn them into whoppie pies! By the time I was all finished, it was running late so I had to leave without taking pictures of my completed cookie sandwiches. I got home and was left with nothing, not even a half whoppie pie to snap at! Overall, a not so good TWD turned out to be a lot of fun especially with the tranformation of the original brownie cake turned cookie turned whoppie pie.
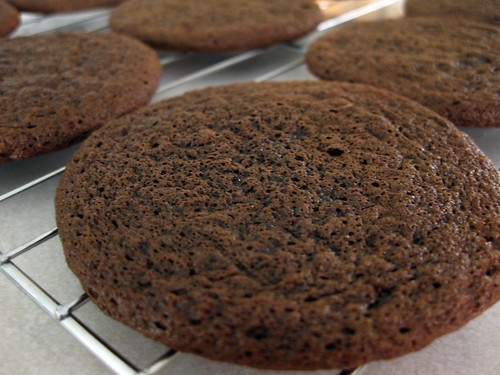
So these didn't exactly have the height of a normal whoppie pie with the extreme flattness of them.
Thanks to Tammy of Wee treats by Tammy for choosing this recipe, which can be found on her blog and in Dorie Greenspan's Baking: From my Home to Yours. Don't forget to checkout the TWD Blogroll!
 This week's TWD was actually perfect, just in time for my mom's birthday! Like me, she isn't too into frostings unless of course it's whipped cream. I actually loved making this cake because of how satiny smooth the whipped butter, sugar, egg and oil mixture came together. It was so pretty I almost didn't want to add the flour. Instead of plums, I decided to use peaches since last time the pluots were a little sour for my liking. Before adding the peaches, I followed CI's advice to cook them in a pan first to release some of the juices and ensure that the fruit is properly cooked through. Even though I overbaked this by mistake, I enjoyed this version better than CI's flavourwise and texturally. The rustic plum cake was more cookie like whereas this was more coffee cake like.

I couldn't believe the difference orange zest can make in a baked good and I think I'm going to start adding more of it whenever I bake. This was so delicious, I kind of wish I didn't halve the recipe. My mom and I could have eaten the entire loaf ourselves, but it was late so I put it away before we could devour the entire thing. Plus, I always like to leave some for the next day because I'm curious to see how the texture changes. Sorry for the weird colour of my cake, but we just couldn't wait until the morning to slice into it. Stupid yellow light bulbs and no natural lighting!
Thanks to Michelle of Bake-En for choosing this recipe, which can be found on her blog and in Dorie Greenspan's Baking: From my Home to Yours. Don't forget to checkout the TWD Blogroll!
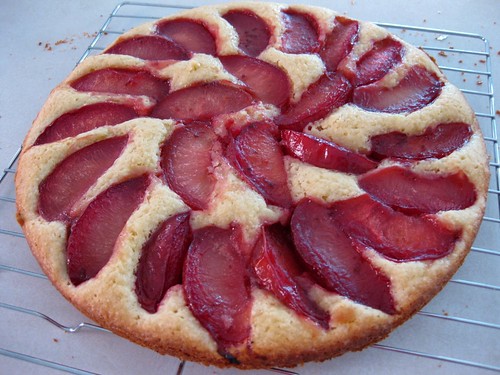 I've been dying to bake an unside down pineapple cake or an upside down any-fruit cake for the longest time because they look so pretty on their own undecorated. With an always growing list of things to bake, I never got to it and eventually pineapples were out of season. Now that plums are everywhere, I was not going to let a chance like this pass again so I decided to bake Cook's Illustrated rustic plum cake. Unlike the pineapple version, this type of cake isn't exactly baked upside down. Great... I was really hoping to get a suprise from unmoulding the springform. Regardless, I baked this cake because we had a lot of pluots (not that that would be a problem since fruits are like candy to me!) If you're wondering, I did say pluots. I had no idea what they were except that they looked like plums with a light patchy coloured skin. After a quick google search, I found out they're actually a cross between a PLUm and an apricOT. Don't you just love it when they cross different fruits.. it makes everything so much more interesting.
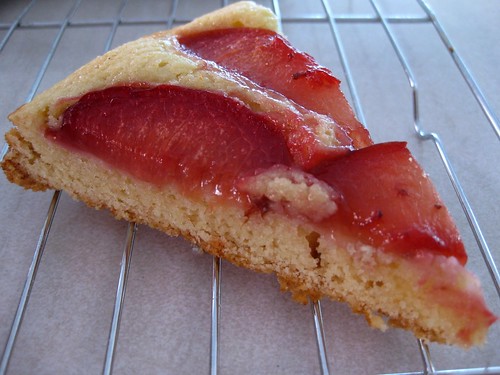
The batter came together in no time especially since it was all done in the food processor and boy was it thick! I loved the use of almonds because it added a nice nutty flavour to the cake and provided extra structure for the plums or pluots. The best part about this cake is you don't have to worry about overbaking because of all the moisture coming from the fruit. Suprisingly there wasn't any sogginess either and thank god because I have a huge problem with all things soggy. That's why I can't eat cooked oatmeal, cereal with milk or bread pudding even when it looks totally irrestible.. at least not the bottom part. If you've never made a plum cake before, definitely make this one because it has the perfect balance of moisture and flavour. Plus, the food processor makes it really easy and quick. So anyway, I made this way before I knew Dorie's dimply plum cake would be part of September's TWD baking list. I guess this is a great opportunity for comparison, since they use 2 totally different mixing methods.. how exciting!
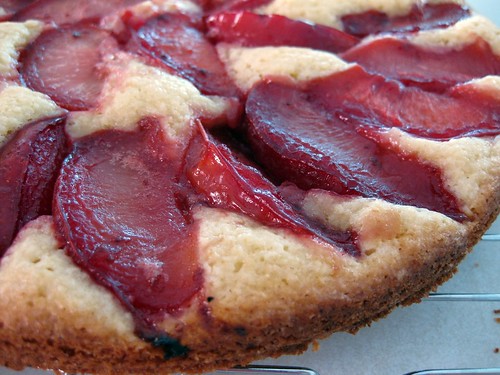
Is it me or does my plum cake look more like a tomato cake?
Rustic Plum Cake Recipe

