Lately, I've been feeling a little lazy. I bake, eat, but never photograph and so I never end up blogging. Ever since I bought a new camera, I can't stop taking pictures... of walls, random things on the table and of course, food. I don't usually do progress pics, but I couldn't help it.
These cookies were inspired from someone at work. Normally, I wouldn't bake cinnamon oatmeal raisin cookies because I'm not the hugest fan of cinnamon or raisins, but these actually turned out really well. They had crispy edges with a chewy centre and crispy edges that actually stayed crispy for a good period of time. It drives me crazy when my cookies turn uniformly chewy because the best part for me are those crispy edges.
My favourite part, creaming the butter and sugar

The dry
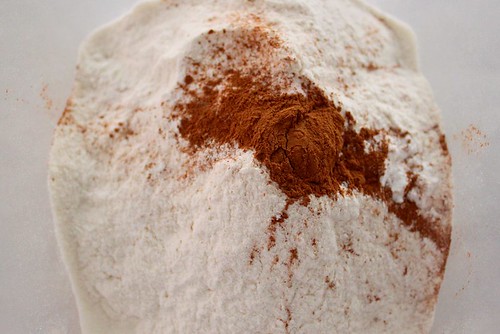
I find that oatmeal cookies never spread no matter how much butter is added so I always press them down or else I end up with oatmeal mounds.

12 minutes later...
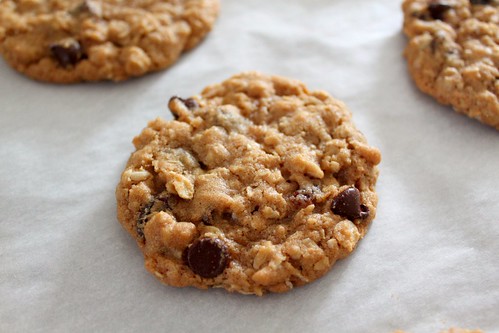
This recipe is really a merge of different recipes until I was happy with the amount of oatmeal, chew and crisp.
Oatmeal Raisin Chocolate Chip Cookies
1 cup + 2 tbsp all purpose flour
1/2 tsp cinnamon
1/2 tsp baking powder
1/2 tsp baking soda
1/2 tsp salt
1 1/2 old fashioned rolled oats
1/2 cup raisins
1/2 cup chocolate chips
10 tbsp butter
1 cup packed brown sugar
1 large egg
1/2 tsp vanilla extract
Preheat the oven to 335 degrees.
In one bowl, whisk together the flour, cinnamon baking powder, baking soda, and salt. In another bowl, mix raisins, chocolate chips and oats.
In the bowl of a stand mixer or with a hand mixer beat the butter on medium speed until fluffy. Add the brown sugar and continue beating. Add the egg and vanilla and beat until thoroughly mixed. On low speed, add the flour mixture until just combined. Then add the oats mixture and continue to beat on low until everything is evenly distributed.
Using a medium cookie scoop, divide the dough into 24 portions. Press the dough down about 1 inch thick. Bake for 12 minutes. Allow cookies to cool before transferring on a wired rack
Makes 24 cookies.
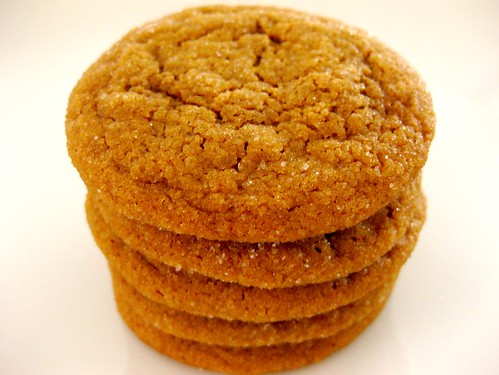 Pamela, thank you so, so much for choosing these!! I would have never tried them on my own seeing as they contain my favourite (not) spices, allspice and cloves. If cinnamon is sometimes too overpowering for me, then there's no question that the other two are way too strong. I was brave this time and didn't reduce the spices... I'm so proud of myself...haha. My cookies aren't as dark because I ran out of brown sugar and had to use half granulated sugar, but they were still delicious. I wanted these to be chewy rather than crisp, but may have underbaked these a little too much because the centre was soft with an almost, but not quite raw dough quality to them. Another 30s-1 minute and these would have been perfect. Next time I'm baking these until they're crisp so I won't have to obsess over getting that perfect chewy texture. I'm surprised I had enough dough to form cookies because this has to be one of the yummiest cookie doughs ever (and I don't generally like cookie dough)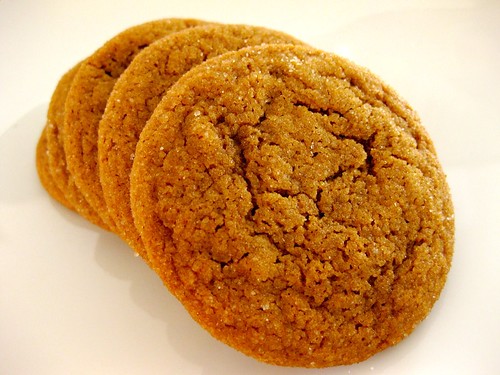
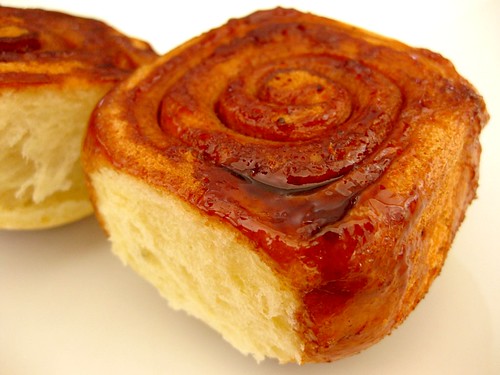 I waited way too long to finally give cinnamon rolls a try. These were fantastic!! They were sticky, sweet, cinnamony, fluffy and very addicting. If I didn't have a little more self control, I probably would have fallen into a sugar coma after devouring one too many. I was supposed to make a caramel glaze and pecan topping, but I skipped it because I didn't want these to be sickly sweet. These could have benefited from a little more goo so next time I'll make half the glaze.
It's so satisfying for me to see the transformation of cinnamon rolls...skinny to fat. If you ever make cinnamon rolls, don't forget to line the pan. I almost did and that would have been such a pain to scrub away after all that sugar caramelization.
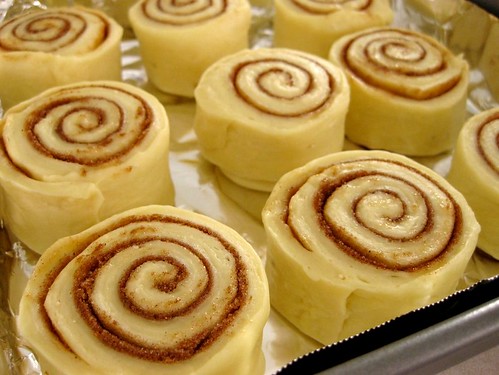
These were so tempting, I almost couldn't resist digging into the ones I was photographing too. I like to unravel my cinnamon roll, how do you like to eat yours?
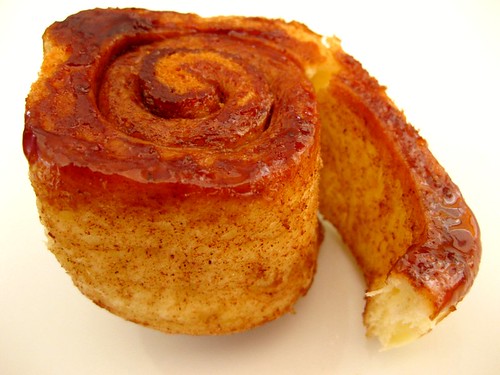
Sticky Buns with Pecans for Freezing (I baked the buns right away instead of freezing them. It took me 25 minutes to bake in total).
Cook's Illustrated
Makes twelve 3 1/2-inch buns.
This recipe has four components: the dough that is shaped into buns, the filling that creates the swirl in the shaped buns, the caramel glaze that bakes in the bottom of the baking dish along with the buns, and the pecan topping that garnishes the buns once baked. Although the ingredient list may look long, note that many ingredients are repeated.
Ingredients
Dough
3 large eggs at room temperature
3/4 cup buttermilk at room temperature
1/4 cup granulated sugar
1 1/4 teaspoons table salt
2 1/4 teaspoons instant yeast
4 1/4 cups unbleached all-purpose flour (21 1/4 ounces), plus additional for dusting work surface
6 tablespoons unsalted butter , melted and cooled until warm
Caramel Glaze
6 tablespoons unsalted butter
3/4 cup packed light brown sugar (5 1/4 ounces)
3 tablespoons corn syrup , light or dark
2 tablespoons heavy cream
Pinch table salt
Cinnamon-Sugar Filling
3/4 cup packed light brown sugar (5 1/4 ounces)
2 teaspoons ground cinnamon
1/4 teaspoon ground cloves
Pinch table salt
1 tablespoon unsalted butter , melted
Pecan Topping
3 tablespoons unsalted butter
1/4 cup packed light brown sugar (1 3/4 ounces)
3 tablespoons corn syrup , light or dark
Pinch table salt
1 teaspoon vanilla extract
3/4 cup pecans (3 ounces), toasted in a skillet over medium heat until fragrant and browned, about 5 minutes, then cooled and coarsely chopped
Instructions
1. For the dough: In bowl of standing mixer, whisk eggs to combine; add buttermilk and whisk to combine. Whisk in sugar, salt, and yeast. Add about 2 cups flour and butter; stir with wooden spoon or rubber spatula until evenly moistened and combined. Add all but about 1/4 cup remaining flour and knead with dough hook at low speed 5 minutes. Check consistency of dough (dough should feel soft and moist but should not be wet and sticky; add more flour, if necessary); knead at low speed 5 minutes longer (dough should clear sides of bowl but stick to bottom). Turn dough out onto lightly floured work surface; knead by hand about 1 minute to ensure that dough is uniform (dough should not stick to work surface during hand kneading; if it does stick, knead in additional flour 1 tablespoon at a time).
2. Lightly spray large bowl or plastic container with nonstick cooking spray. Transfer dough to bowl, spray dough lightly with cooking spray, then cover bowl tightly with plastic wrap and set in warm, draft free spot until doubled in volume, 2 to 2 1/2 hours.
3. For the glaze: Meanwhile, combine all ingredients for glaze in small saucepan; cook over medium heat, whisking occasionally, until butter is melted and mixture is thoroughly combined. Pour mixture into nonstick metal 13- by 9-inch baking dish; using rubber spatula, spread mixture to cover surface of baking dish. Set baking dish aside.
4. To assemble, store, and reheat buns: For filling, combine brown sugar, cinnamon, cloves, and salt in small bowl and mix until thoroughly combined, using fingers to break up sugar lumps; set aside. Turn dough out onto lightly floured work surface. Gently shape dough into rough rectangle with long side nearest you. Lightly flour dough and roll to 16 by 12-inch rectangle. Brush dough with 1 tablespoon melted butter, leaving 1/2-inch border along top edge; with butter remaining on brush, brush sides of baking dish. Sprinkle filling mixture over dough, leaving 3/4-inch border along top edge; smooth filling in even layer with hand, then gently press mixture into dough to adhere. Beginning with long edge nearest you, roll dough into taut cylinder. Firmly pinch seam to seal and roll cylinder seam side down. Very gently stretch to cylinder of even diameter and 18-inch length; push ends in to create even thickness. Using serrated knife and gentle sawing motion, slice cylinder in half, then slice each half in half again to create evenly sized quarters. Slice each quarter evenly into thirds, yielding 12 buns (end pieces may be slightly smaller).
5. Arrange buns cut side down in prepared baking dish; cover tightly with plastic wrap and set in warm, draft-free spot until puffy and pressed against one another, about 1 1/2 hours. Place baking dish in freezer; store for up to 1 month.
6. To bake, adjust oven rack to middle position and heat oven to 350 degrees. Remove buns from freezer, remove plastic wrap, wrap dish tightly with foil, and set on baking sheet. Bake buns for 30 minutes, then remove foil and continue to bake until golden brown and center of dough registers about 180 degrees on instant-read thermometer, about 20 minutes longer. Cool on wire rack 10 minutes; invert onto rimmed baking sheet, large rectangular platter, or cutting board. With rubber spatula, scrape any glaze remaining in baking dish onto buns; let cool while making pecan topping.
7. For the topping: Combine butter, brown sugar, corn syrup, and salt in small saucepan and bring to simmer over medium heat, whisking occasionally to thoroughly combine. Off heat, stir in vanilla and pecans until pecans are evenly coated. Using soupspoon, spoon heaping tablespoon nuts and topping over center of each sticky bun. Continue to cool until sticky buns are warm, 15 to 20 minutes. Pull apart or use serrated knife to cut apart sticky buns; serve.
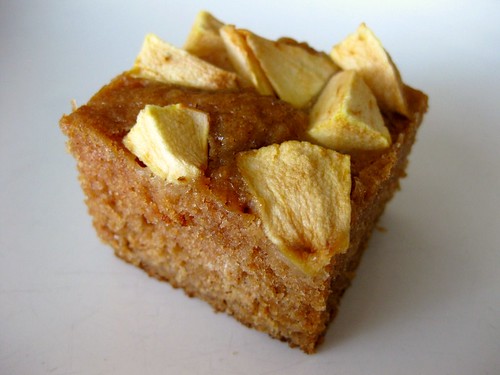 This week's recipe was a simple one bowl recipe.. the kind that always gives me the most stress because I can't just dump ingredients in a bowl. Unlike the creaming recipes where there is always a set sequence of cream the butter with sugar, adding the eggs one at a time... there are just so many ways to mix a one bowler. Should the sugar be whisked with the wet or the dry? Should the egg be whisked with the sugar first? Or could all the wet ingredients be whisked together at the same time? What really produces the best texture? That is why I tend to avoid one bowlers because as much as I would love to try all the different techniques, I'm not really up for trying 5 different versions of the same recipe.
Anyway...I made half the recipe, baked in a loaf pan to get more height and used brown sugar (2/3 cup instead of 1 to cut down on sweetness) instead of white. Since I don't usually like sugar glazes, I added the apples on top for a little decoration and to make it a little easier to photograph (because I can't make brown bars look pretty). These were more cake-like that bar-like and because of the medley of spices, no one would eat more than a piece. I thought it was ok, but needed more apple flavour. I don't know if adding more apple sauce would work though because that might just make things too gummy.
Thanks to Karen of Something Sweet by Karen for choosing this week's recipe! You can find the recipe on her blog or in Dorie's book. Don't forget to check out the TWD blogroll!
 This was inspired by Wendy of Pinkstripes. After seeing her BBA post, I knew I had to make it right away. I omitted the walnuts, but added a cinnamon swirl and reduced the raisins to 1 cup. She's right, this bread is very addicting! I had a hard time taking photos without reaching out for a slice. I didn't even get a picture of the uncut loaf or wait the hour for it to cool because I was too anxious to dig into it. The only thing that bothers me when I bake bread are the large and irregular holes. Is it from not punching the dough down after the first rise? I have this fear that if I handle the dough too much, I'm going to kill the yeast and it won't rise the second time. This reminds me when I had my bouts of undermixing cake batter from fear of overmixing during my 'throwing out more than I was eating' phase. For the bread experts out there, can you please help me. The unevenness of my crumb is driving me crazy!
Cinnamon Raisin Bread Recipe
Peter Reinhart
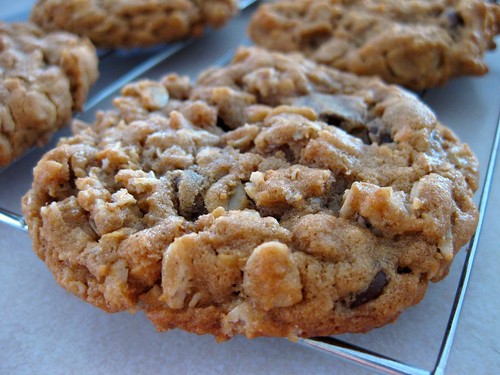 I rarely make the same recipe twice. Ok, that's not entirely true, I've only made banana bread a gazillion times and many variations of CI's thick and chewy CCCs hoping that one day I will find the best version. Dorie's chunky peanut butter and oatmeal chocolate chipsters are one of my favourite cookies. I love them so much that I waited almost an entire year to make them again because I didn't want to eat the whole tray. I reduced the butter from 2 sticks to 1. Yes, it sounds like a huge drop, but when you think about it, 1 stick of butter + 1 cup of PB should be plenty of fat for 1 cup of flour and 3 cups of oats. I also reduced the cinnamon in half and used all brown sugar. Although resting dough for 36 hours seems to do wonders to CCCs, I don't like to refrigerate oatmeal cookies for an extended period of time. I think it softens the oats too much, which some people like, but I love the sharp, jagged edges of oatmeal. My cookies didn't spread at all, which might have been due to the reduction of butter, but also from the use of peanut butter. No peanut butter cookie I've ever made has spread. I guess it's a good thing because there is no debating whether 'to flatten or not' in case the cookies might rise up like a scone or flatten like CDs. Instead, I simply flatten these as much as I would like my baked cookies to look.
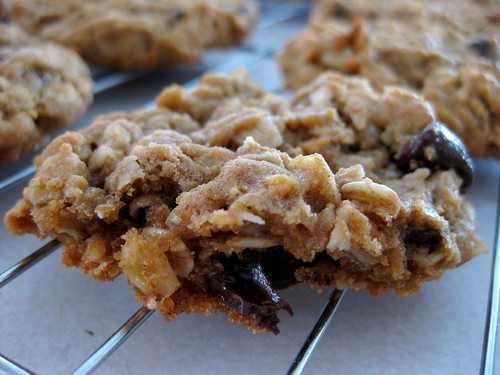
When's a better time to eat a cookie than when the chocolate chips are still gooey?
Chunky Peanut Butter and Oatmeal Chocolate Chipsters
Dorie Greenspan: Baking, From My Home to Yours
3 cups old fashioned oats
1 cup all purpose flour
1 tsp baking soda
2 tsp ground cinnamon (I used 1 tsp)
1/4 tsp freshly ground nutmeg (I omitted)
1/4 tsp salt (I used 1/2 tsp)
2 sticks (8 ounces) unsalted butter, at room temperature (I used 1 stick)
1 cup peanut butter--chunky (my choice) or smooth (but not natural)
1 cup sugar (I omitted)
1 cup (packed) light brown sugar (I used 1 1/2 cup)
2 large eggs
1 tsp pure vanilla extract
9 ounces bittersweet chocolate, chopped into chunks, or 1 1/2 cups store-bought chocolate chips or chunks
Getting Ready:
Position the racks to divide the oven into thirds and preheat the oven to 350 degrees F. Line two baking sheets with parchment or silicone mats.
Whisk together the oats, flour, baking soda, spices and salt.
Working with a stand mixer, preferably fitted with a paddle attachment, or with a hand mixer in a large bowl, beat the butter, peanut butter, sugar and brown sugar on medium speed until smooth and creamy. Add the eggs one at a time, beating for 1 minute after each addition, then beat in the vanilla. Reduce the mixer speed to low and slowly add the dry ingredients, beating only until blended. Mix in the chips. If you have the time, cover and chill the dough for about 2 hours or for up to one day. (Chilling the dough will give you more evenly shaped cookies.)
If the dough is not chilled, drop rounded tablespoonfuls 2 inches apart onto the baking sheets. If the dough is chilled, scoop up rounded tablespoons, roll the balls between your palms and place them 2 inches apart on the sheets. Press the chilled balls gently with the heel of your hand until they are about 1/2 inch thick.
Bake for 13 to 15 minutes, rotating the sheets from top to bottom and front to back after 7 minutes. The cookies should be golden and just firm around the edges. Lift the cookies onto cooling racks with a wide metal spatula - they'll firm as they cool.
Repeat with the remaining dough, cooling the baking sheets between batches.
Serving: I can't remember when I actually served these. They're more often plucked from a cookie jar than picked from a platter.
Storing: Wrapped airtight or piled into a cookie jar, the cookies will keep at room temperature for about 4 days. Wrapped and frozen, they'll be good for 2 months.
Playing Around: You can substitute soft, moist raisins for the chocolate chunks or just stir in some raisins along with them. If you're really looking for crunch, toss in chopped peanuts too (salted or not). With or without the chocolate chunks, raisins, and nuts, these cookies are great with ice cream or around ice cream - think about them the next time you want a chipwich-ish ice cream sandwich.
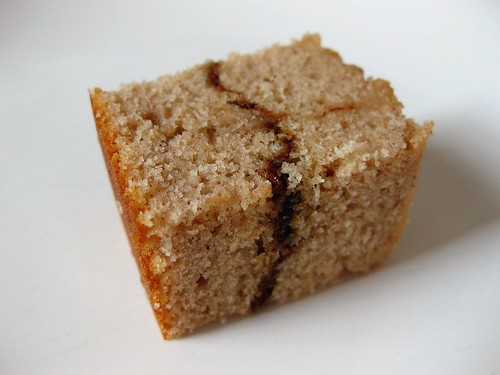 These squares were absolutely delicious, which surprised me since I'm not usually a crazy cinnamon fan. I think this would have to rank up there as one of my favourite Dorie recipes. I enjoyed the texture and the loved the combination of cinnamon and coffee. This is a flavour combination that I will have to use again. I made these a little differently than instructed though because I didn't want to risk over mixing by folding the butter at the end. Instead of melting the butter, I decided to cream it by hand just because I saw Bob of Cooking Stuff do it and couldn't wait to give it a try. Look at what a gorgeous batter he creates with a wooden spoon! Plus, think about all the extra squares I could eat after that workout (no seriously.. I should've waited for the butter to get to room temperature because it's not fun to cream cold butter). I still love my KA more than anything, but doing everything by hand feels like I'm baking for real if that makes sense and a lot of fun! I omitted the frosting and chips in that batter.. part of my efforts to cut calories where I can so I continue baking with TWD without outgrowing all my clothes!
Thanks so much to Tracey of My Culinary Adventures for choosing this recipe! You can find the recipe on her blog or in Dorie's book. Don't forget to check out the TWD blogroll!
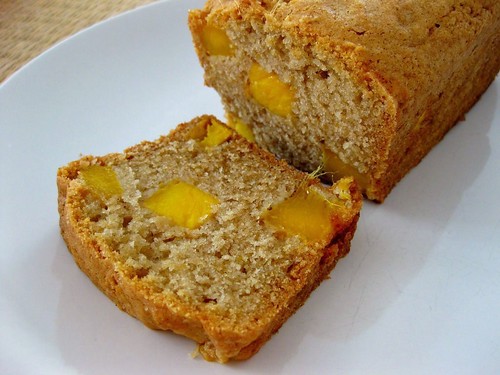 I thought I was going to have to skip this week's TWD, but then my mom came home with a case of Ataulfo mangoes. I'm not sure how long this case will last us because we inhale mangoes at our house! I made 1/3rd of the recipe even though I ended up with a little less than 1 cup of mangoes and baked in a mini loaf pan. The more mango the better, right?! I halved all the spices after I thirded them so the mangoes wouldn't get overpowered by ginger and cinnamon. I was surprised that I enjoyed this so much considering there was no butter and all the folding it took to distribute the mango in this thick batter. I thought for sure this would end up tough and chewy, but it was actually tender, dense and very moist. Maybe I was just being overly paranoid about the overmixing as usual! I love how I'm discovering that it's not always about trying to get the fluffiest cake. The only thing I wasn't crazy about was the cooked mangoes because they seemed to have lost their fresh mango flavour and was a little mushy.
Thanks to Kelly of Baking with the Boys for choosing this recipe, which can be found on her blog and here. Don't forget to visit the TWD Blogroll!
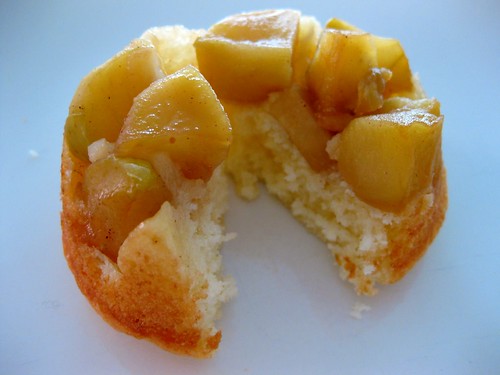 I was having an apple cake craving on my bus ride home from school.. yes.. that's right school in the summer..fun right?. I got home and the first thing I did was chop up apples. The thing with last minute cravings is that sometimes you don't always have all the ingredients you need and have to improvise. Umm I don't exactly like to do that because sour cream and yogurt aren't really the same.. right? Since many bakers have substituted yogurt for sour cream with sucess, I decided to give it a try. The substitutions didn't end there because I only had one container of yogurt left so I topped the rest off with milk. I also omitted the extra egg yolk because I didn't feel like accumulating extra stuff in my freezer. Then I assembled everything in my muffin pan instead of a 9 inch and crossed my fingers that this would still taste good after all these changes. I like to use muffin pans to reduce baking time and for faster turnover because having to take a knife out proves to be too much work for my family.
Edit. I forgot to add that these were a bigger hit with my family than me. The topping was really good with the cinnamon, nutmeg, apples and brown sugar and the cake part had a nice tang with the yogurt. I thought the texture was good just when they were completely cool, but a few hours later, the fluffiness disappeared and it was denser. I'm not sure if it's because of the moisture from the apples or the yogurt itself..hmm.. I think I'm going to try baking with yogurt more often.
Original recipe here
Adapted recipe (since I made so many changes, I thought it would be neater to just post the adapted recipe)
Apple Cake
Ingredients
Apples:
2 tablespoons butter
2 tbsp dark brown sugar (I reduced it significantly)
Pinch cinnamon
Pinch nutmeg
4 medium-large apples, cut into chunks
Cake:
1/4 cup yogurt + 1/4 cup milk
1 egg
1/2 teaspoon vanilla
1 1/4 cup all-purpose flour
3/4 cup sugar
1/2 teaspoon baking powder
1/4 teaspoon baking soda
1/4 teaspoon salt
6 tablespoons butter
1. Heat the oven to 350 degrees and adjust a rack to the center position. Butter a muffin tin well so that the apples won't stick
2. For the apples: Place the butter, sugar, cinnamon, nutmeg and apples in a large heavy-duty skillet over medium heat. Cook, stirring often, until the apples have softened slightly and the juices are thickened and syrupy, about 5 to 7 minutes. Remove from heat and divide evenly in muffin pan.
For the cake:
1. Combine flour, baking powder, baking soda, salt
2. Combine yogurt and milk in a measuring cup
3. Cream butter and sugar until light and fluffy, about 4 minutes
4. Add egg and continue creaming until well combined
5. Alternately add flour and liquid mixture on low speed until flour disappears
6. Divide batter evenly ontop of apples and spread out evenly
7. Bake 18-20 minutes until a toothpick inserted comes out clean
8. Cool on a baking rack for 10 minutes
9. Loosen the sides of the muffins using a knife and place a jelly roll pan on top of the muffin pan and invert so that all 12 muffins flip over at the same time.
10. Transfer cakes to cooling rack to cool completely.
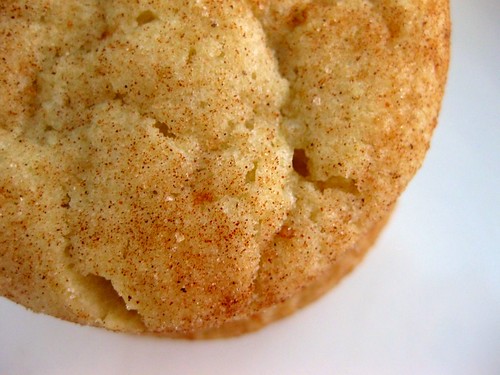 To be honest, I never thought I would like snickerdoodles. It seemed like just another sugar cookie with cinnamon sugar. And it is really a sugar cookie covered in cinnamon sugar, except that.. wow.. cinnamon and cream of tartar makes a huge difference. I'm guessing it's the cream of tartar that gives these a distinctive chew because my sugar cookies never end up with that kind of texture and the recipes are very similar. To be honest, these were a little bit on the cakey side and if I didn't flatten the cookies first, I probably would have ended up with snickerdoodle cake bites. I can't wait to try another recipe...maybe one with more butter (that should do the trick). Here's the recipe if you're interested.
Chewy Snickerdoodles
Cook's Illustrated
3 cups all purpose flour
3/4 teaspoon baking soda
1/4 teaspoon cream of tartar
1/2 teaspoon salt
1/2 teaspoon ground nutmeg (optional)
10 tablespoons unsalted butter at cool room temperature
1 1/2 cups plus 3 tablespoons sugar
2 large eggs
1 teaspoon vanilla extract
1 tablespoon ground cinnamon
1. Heat the oven to 350 degrees and adjust a rack to the center position. Line two cookie sheets with parchment paper. Whisk together the flour, baking soda, cream of tartar, salt, and optional nutmeg in a medium bowl. Set aside.
2. Beat the butter and one and one half cups sugar in the bowl of an electric mixer until light and fluffy, about 3 minutes. Add the eggs and vanilla and beat until well incorporated, about 30 seconds. Add the dry ingredients and beat on the lowest speed until the moistened, increase to medium and beat 30 seconds.
3. Mix together in a small bowl the remaining three tablespoons sugar and ground cinnamon. Shape the dough into walnut sized balls (approximately two tablespoons each), dip in cinnamon sugar, and place on prepared cookie sheet three inches apart. (You can use a small ice cream scoop to portion out the cookies.) Bake one sheet at a time until the cookies are very lightly colored around the edges, the tops have cracked and the cookies have puffed and started to deflate, about 12 minutes. Cool on a rack. Serve slightly warm or at room temperature.
Makes about 24 cookies.
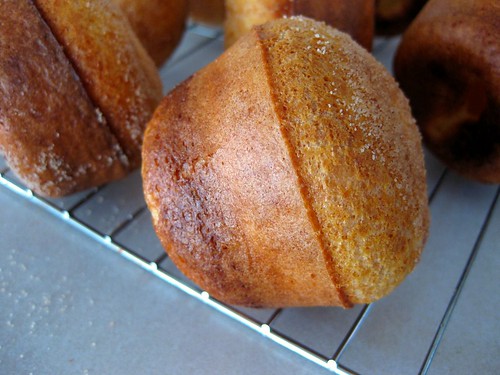 I was debating between cinnamon sugared puffs or cinnamon sugar muffins and it was hard to choose, since both sound amazing. Even though my puffs are supposed to look like this, they ended up looking like muffins... These were addicting, just as Kelly said they would be. When you bite into them, you get a nice contrast between a crisp and soft center. I felt that they were a too chewy, but I may have overwhisked when I did it by hand instead of using the food processor (aka the most annoying thing to clean). There are only 2 tbsps in the batter, but 4 tbsps for brushing on top. Was I really going to let myself consume almost an entire stick of butter myself in one day because I know how addicting these cinnamony-sugary puffs are? No. Instead, I just dunked them into a bowl of cinnamon sugar one at a time while they were still piping hot so the sugar would actualy stick..except that it didn't..haha. A little butter next time would probably be helpful. The recipe says to leave them to cool in the pan for a few minutes, but I removed them right after I took them out of the oven to retain as much crispness on the outside. It is, that amazing contrast between crisp and plushiness that makes these so good and I didn't want to lose it.

Sugar Puffs taken from Kelly of Eat, Make, Read
Recipe by David Lebovitz
For the puffs:
Softened unsalted butter, for greasing the pan
2 tablespoons butter, melted
3 large eggs, at room temperature
1 cup whole milk
1 teaspoon salt (1 used 1/2 tsp)
1 1/2 teaspoons sugar
1 cup flour
For the sugar coating:
2/3 cup sugar
1 teaspoon ground cinnamon
4 tablespoons butter, melted.
1. Preheat the oven to 400 degrees. Liberally grease a nonstick popover pan, or a muffin pan with 1/2-cup indentations, with softened butter.
2. For the puffs, put the 2 tablespoons melted butter, eggs, milk, salt and sugar in a blender and whiz for a few seconds.
3. Add the flour and whiz for 5 to 8 seconds, just until smooth.
4. Divide the batter among 9 greased molds, filling each 1/2 to 2/3 full. (I got 12)
5. Bake for 35 minutes, until the puffs are deep brown. (After 20 mins, I reduced the temperature to 350 because they were really starting to brown)
6. Remove from the oven, wait a few minutes until cool enough to handle, then remove the puffs from the pans. You may need a small knife to help pry them out. (I took them out right away instead of waiting)
7. Mix the sugar and cinnamon in a medium bowl. Thoroughly brush each puff all over with melted butter, then dredge in sugar and cinnamon mixture to coat completely. Let cool on a baking rack. Makes 9 puffs (I got 12).
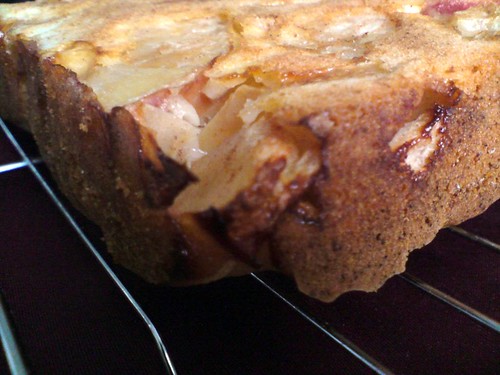 Sorry, no TWD this week. I love pumpkin, but even with scaling down and everything, I would be the only person in my family to eat it the pie. Plus, our thanksgiving already passed so instead I have something I've been dying to try since I saw it at Smitten Kitchen. It was only a matter of time before I knew I would make this. It just looked too good and how could I not make something loaded with apples! We actually had a whole bag of over ripe apples (which wouldn't ever happen at my house) that my aunt gave us. Whenever neighbours or family members ever have overripe apples or bananas, they get sent over to our house for apple pie or banana bread! If they're going to get wasted, we may as well make something good out of it! For some reason, when I read pour half the batter, I ended up pouring half the apples instead of the batter so the apples ended up on the bottom. It must have been those insanely gorgeous photos Deb from Smitten Kitchen takes. All I could think about was that apple topping, only except I envisioned that it was on the bottom instead.

I only made half the recipe, since it's the first time I've ever made apple cake. It also doesn't help when the only high capacity pan you have is a bundt. Muffin tins or 9 inch pans are my favourite to use because baking time is sped up by a lot. Who really wants to wait 1 hour for something to bake? I probably wouldn't be able to concentrate during the long baking time! This cake was really good and moist. Next time I'm definitely adding more apples though because mine did not look as apple-y.
This will be my final installment of pictures taken with the cell phone! I found my charger a while ago and these are the last of the cell phone pics! Speaking of electronics, I've noticed how dirty my laptop has gotten from all my baking. The other day in class, I was a little embarassed when I opened it up and I noticed some flour scattered on the screen, sugar in the keyboard and random stains. Normally, I take really good care of my stuff.. you should see my recipe books. Dorie's is always far from the baking site on a stool when I complete my TWD challenges, but my laptop on the other hand takes center spot, surrounded by ingredients. A book can be replaced, a computer.. well, not so easily.
Smitten Kitchen
Mom’s Apple Cake
6 apples, Mom uses McIntosh apples
1 tablespoon cinnamon
5 tablespoons sugar
2 3/4 cups flour, sifted
1 tablespoon baking powder
1 teaspoon salt
1 cup vegetable oil
2 cups sugar (I used 1.5 cups)
1/4 cup orange juice
2 1/2 teaspoons vanilla
4 eggs
1 cup walnuts, chopped (optional)
Preheat oven to 350 degrees. Grease a tube pan. Peel, core and chop apples into chunks. Toss with cinnamon and sugar and set aside.
Stir together flour, baking powder and salt in a large mixing bowl. In a separate bowl, whisk together oil, orange juice, sugar and vanilla. Mix wet ingredients into the dry ones, then add eggs, one at a time. Scrape down the bowl to ensure all ingredients are incorporated.
Pour half of batter into prepared pan. Spread half of apples over it. Pour the remaining batter over the apples and arrange the remaining apples on top. Bake for about 1 1/2 hours, or until a tester comes out clean.
 It literally almost took the entire day to bake one loaf of bread, but it was all worth it in the end. I've never made bread before and have been dying to try it, but being limited to all purpose and cake flour, it seemed that white bread was the way to go. Since I was going to make the cinnamon bread I saw at Closet Cooking anway, I decided to make cinnamon swirl bread rather than a quick bread. The experience was a litte nerve racking because it is so easy to mess up a loaf of bread given all the different steps. I didn't have instant yeast so I used traditional. Even though the bread called for 2 1/4 tsps, I only used 1 tsp because I was afraid of that yeasty bitter taste. The recipe calls for 3 1/4 to 3 3/4 cups of flour depending on the weather, but I'm sure I used at least 4 cups and the dough was still sticky. I think the most difficult part of this entire process was all the waiting. Even though the recipe said to wait 2 -2.5 hours for the first rise, I waited 4 hours to get a nicer rise. Rolling the dough was a little tricky because it was so sticky. Luckily I placed a sheet of saran wrap on my counter first or else it would have been one deformed looking loaf! The recipe said to wait 1-1.5 hours, but I waited 2 hours before the loaf was 1 inch above the rim. Finally it was ready for the oven.
.JPG)
.JPG) I didn't know that the slit was facing the side instead of the bottom of the pan until it unravelling in the oven. This loaf grew so quickly in the oven! It was supposed to take 30-35 minutes, but I ended up leaving it in the oven for 40 minutes. The thermometer never reached 185 degrees, but the thermometer went in easily and came out clean. Luckily I pulled it out or it would have been too dry. Just because it is bread, it should follow the same 'if the toothpick (thermometer in this case) comes out clean, it is done!' as cake.. right?... well hopefuly!
I didn't know that the slit was facing the side instead of the bottom of the pan until it unravelling in the oven. This loaf grew so quickly in the oven! It was supposed to take 30-35 minutes, but I ended up leaving it in the oven for 40 minutes. The thermometer never reached 185 degrees, but the thermometer went in easily and came out clean. Luckily I pulled it out or it would have been too dry. Just because it is bread, it should follow the same 'if the toothpick (thermometer in this case) comes out clean, it is done!' as cake.. right?... well hopefuly!

Finally, after 2 hours of cooling it was time to eat! As usual, I didn't grease the pan and the bread slid out easily. I could have devoured half the loaf myself, but knowing that 4 cups of flour went into it, I wasn't going to eat 2 cups worth of flour at 8:30pm. I think I'm going to attempt to make cinnamon rolls soon, but first I need to find one that isn't so rich and won't leave me nauseas like those cinnabons, which are definitely delicious, but o so rich!
Cinnamon Swirl Bread
Cook's Illustrated
* I rarely grease and luckily nothing sticks or gets ruined, but for those who try this recipe, it is probably safer to grease.
Dough
1/2 cup milk
4 tbsp unsalted butter, cut into 1/2 inch pieces
1 package dry active yeast (2 1/4 tsp)(I used 1 tsp of traditional yeast)
1/2 cup warm water
1/3 cup sugar
2 large eggs
1 1/2 tsp salt
3 1/4 cups all-purpose flour, plus extra
Filling
1/4 cup sugar
5 tsp ground cinnamon
Milk for brushing
Glaze
1 large egg
2 tsp milk
1. Heat the milk and butter together in a small saucepan or microwave until butter melts. Cool to lukewarm.
2. Meanwhile, sprinkle yeast over warm water in a the bowl of a standing mixer fitted with the paddle (I did this with half the amount of warm water and waited until the yeast mixture foamed - took about 30 mins) Beat in the sugar, eggs and mix at low speed to blend. Add the salt, lukewarm milk mixture,(I added the other half of the warm water), and 2 cups of flour; mix at medium speed until thoroughly blended, about 1 minute. Switch to dough hook. Add 1 1/4 cups more flour and knead at medium low speed, adding more flour if the dough sticks to the sides of the bowl, until the dough is smooth and comes away from the sidesw of the bowl, about 10 minutes
3. Turn the dough onto a work surface. Squeeze the dough with a clean dry hand. If the dough is sticky, knead up to 1/2 cup more flour to form a smooth, soft, elastic dough. Transfer the dough to a very lightly oiled large bowl (I just floured a bowl, without oiling)Cover the bowl with plastic wrap and let the dough rise until doubled in size, 2 to 2 1/2 hours (4 hours for me)(the ideal rising temp is 75 degrees) After the rise, punch down the center of the dough once (The dough can be refrigerated, covered, for up to 18 hours). Make sure not to fold the dough, turn it onto an unfloured work surface (I lined the work surface with saran wrap to prevent sticking); let the dough rest about 10 minutes.
4. Grease the bottom and sides of a 9 by 5 inch loaf pan (I just floured without greasing) Mix the sugar and cinnamon in a small bowl.
5. Press dough into an evenly shaped 8 x 6 inch rectangle. With the short side of the dough facing you, roll the dough witha rolling pin into an evenly shaped 18 x 8 inch rectangle. Brush the dough liberally with milk. Sprinkle the filling evenly, leaving a 1/2 inch edge on the far side. Starting at the side closest to you, roll dough, pinching the dough gently with your fingertips to make sure it is tightly sealed. To keep the loaf from stretching beyond 9 inches, push the ends in occasionally with your hands as you roll the dough. Pinch the seam and both ends to seal the loaf.
6. Place the loaf seam side down in the prepared pan and lightly press to flatten. Cover the top of the pan loosely with plastic wrap and set aside to rise to 1 inch above the pan, about 1 1/2 hours (2 hours for me) Preheat oven to 350
7. Whisk the egg and milk together and gently brush the top of the loaf with the egg mixture.
8. Bake until the loaf is golden brown and an instant read thermometer inserted at an angle into the centre reaches 185-190, 30-35 minutes (40 for me). Remove the bread from the pan and cool on a wire rack before slicing, about 45 minutes.
For those who don't own a stand mixer, Two Fat Als gives instructions for kneading


.JPG)
.JPG)

