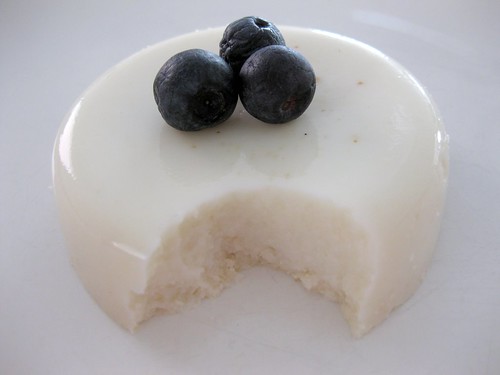
 As much as I love cream, I tend to make substitutions or remove heavy cream entirely when I can (pastry creams, curds and sauces). If I'm eating cream, it's going to be in whipped cream frosting or icecream and maybe a tiny sliver of whipping cream pound cake or else I feel kind of guilty. When I decided to substitute the cream for milk, I knew it wouldn't be as decadent or rich and that I've possibly converted it from blanc-manger to milk jello, but I did save a lot of calories from saturated fat! Surprisingly the milk jello wasn't so bad...ok, that's what I wish was true. I really didn't like the crumbliness of the ground almonds, but maybe it would have been different if I used cream. I don't think this even counts as a TWD anymore and I wasn't even going to blog about it, but I was too proud of how it didn't fall apart from unmolding because I forgot to grease.
Thanks so much to Susan of Sticky, Gooey, Creamy, Chewy for choosing this recipe! You can find the recipe on her blog or in Dorie's book. Don't forget to check out the TWD blogroll!
 "What is this? Is it Wilton?"
"No"
"What is it??"
"Umm..."
"What is it? Did you make this? Marshmallows?"
"Umm... yes"
"Well then, that's why. Feel yours and feel hers. See the difference? That's why I said to use Wilton fondant instead of making your own because I would rather have something that always works instead of making batches that fail half the time."
"Yes, that's right, even though I covered the cake with no tears, it still failed." - I wish I was brave enough to say that.
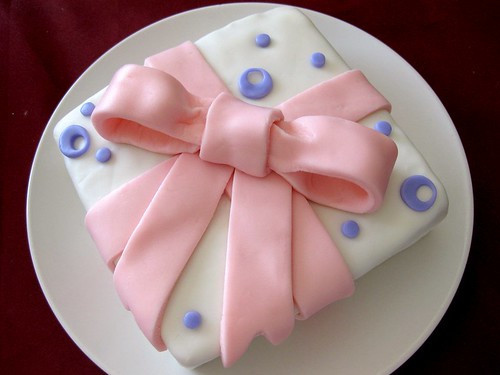
O boy, now that was pretty embarrassing in front of the entire class. I also happened to be standing up too... talk about being at the centre of attention. Embarrassment wasn't the only thing I was feeling after being confronted like that with 9 pairs of eyes staring at me. I was so stunned at the time, I couldn't even think of anything to say except for feeling like I did something really bad by not buying the fondant. The worst part was after I successfully covered the cake with no tears, it still felt bad because oh wait, this isn't store bought. That's like saying we shouldn't bake scratch cakes, pie crusts or yeast breads because they're not always bound to turn out. I totally understand that the classes are designed so that we use the products, but to be humiliated in front of everyone like that felt really unfair. It's not like I was parading around my homemade fondant to encourage others to make their own. I have to be honest and say that I'm not completely satisfied with my cake (being a little bumpier than I would like), but I think it has to do more with my decorating skills (poor frosting job and rolling out the fondant way too thin) than the MMF because I've seen so many amazing MMF cakes.
Making the marshmallow fondant was a lot easier and less messy than I expected, but you have to make sure everything is properly greased (bowls, spoons, anything that comes in contact with the marshmallows). Most recipes do the kneading on the table, but I wanted to keep cleaning to a minimum. Instead, I greased a large metal bowl so that I wouldn't have to scrub shortening off the counter (a huge pain!). Also, no matter how much I clean the counter beforehand, it still feels dirty to me. Anyway, the MMF came together pretty quickly and tasted like marshmallows except doughier. I can't imagine snacking on the entire ribbon/bow, but I can definitely see the appeal of fondant when it comes to decorating. Just in case you are interested in making your own marshmallow fondant (but beware.. there is a 50% failure rate..haha), I got it from What's Cooking America
Marshmallow Fondant Recipe from Here
16 ounces white mini-marshmallows (use a good quality brand)
2 to 5 tablespoons water (I used 2 tbsp)
2 pounds icing sugar (I didn't use all of the sugar)
1/2 cup Crisco shortening (you will be digging into it so place in a very easily accessed bowl)
Make sure you grease every bowl and spoon/spatula the marshmallows come in contact with first. I also find that if you stir in the sugar with a spoon/spatula until it doesn't seem so liquidy before kneading it with your hands, it's less sticky and hot.
Melt marshmallows and 2 tablespoons of water in a microwave or double boiler. Put the bowl in the microwave for 30 seconds, open microwave and stir, back in microwave for 30 seconds more, open microwave and stir again, and continue doing this until melted. Place 3/4 of the powdered sugar on the top of the melted marshmallow mix.
Now grease your hands GENEROUSLY (palms, backs, and in between fingers), then heavily grease the counter you will be using and dump the bowl of marshmallow/sugar mixture in the middle. (I did all this in a large bowl that I greased)
Start kneading like you would bread dough. You will immediately see why you have greased your hands.
Keep kneading, this stuff is sticky at this stage! Add the rest of the powdered sugar and knead some more. Re-grease your hands and counter when the fondant starts sticking. If the mix is tearing easily, it is to dry, so add water (about 1/2 tablespoon at a time and then knead it in). It usually takes me about 8 minutes to get a firm smooth elastic ball so that it will stretch without tearing when you apply it to the cake.
It is best if you can let it sit, double wrapped, overnight (but you can use it right away if there are no tiny bits of dry powdered sugar). If you do see them, you will need to knead and maybe add a few more drops of water.
Prepare the fondant for storing by coating it with a good layer of Crisco shortening, wrap in a plastic-type wrap product and then put it in a re-sealable or Ziploc bag. Squeeze out as much air as possible.
MM Fondant will hold very well in the refrigerator for weeks. If I know that I have a cake to decorate, I usually make two (2) batches on a free night during the week so it is ready when I need it. Take advantage of the fact that this fondant can be prepared well in advance.
 I was so excited for that this was the brioche plum tart and not just plum tart because brioche is so much yummier than tart crust! I didn't have a fancy fluted pan so I used my 9 inch springform. I substituted the plums with nectarines, used peach jam and omitted the nuts. I tried to keep it as simple as possible by not doing the slap down every 30 minutes of the refrigerated dough because I was worried I would ruin it with my inexperience with yeast. Instead, I let the dough rise at room temperature until doubled, shaped it into the pan and then let it rise a second time. I sort of had this great idea in my head to make a twist border, but as it is most of the time, imagining something doesn't always translate well when executed.
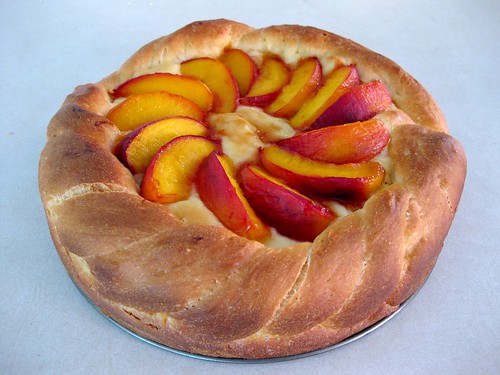
I didn't expect to like this so much because it looked pretty flat going into the oven and I thought I was going to end up with a stone. Thankfully, it puffed up to double its size once it started to bake. Despite my sour nectarines (which was the result of omitting the sugar because I can't stand syrupy fruits) this was really good!
Thanks so much to Denise of Chez Us for choosing this recipe! You can find the recipe on her blog or in Dorie's book. Don't forget to check out the TWD blogroll!
 These were supposed to be cupcakes until I tasted my blueberry puree and found it a little bland. I was pretty sure baking wouldn't magically release more blueberry flavour so I decided to make muffins instead, since additional fruit is added. I made Cook's Country's low fat blueberry muffins, although I don't know if I would call these low in fat because there was still 1 tsp of butter per muffin. Maybe if compared to a Costco muffin then sure, but then again, those are gigantic! I wasn't actually planning on making a low fat recipe. All I wanted was something that wasn't overly rich and used milk/buttermilk as their liquid so I could substitute the blueberry puree for some of it. Too bad it led to a greyish batter, but other than that, these were really good! I also creamed the butter and sugar for a lighter texture because that's how I like them. You can always melt the butter for a quicker and denser muffin.
Cook's Country Low-Fat Blueberry Muffins
1 cup blueberries (I used 1 & 1/4 cups)
2 cups plus 1 Tbl. all-purpose flour
2 teaspoons baking powder
1/4 teaspoon baking soda
1/2 teaspoon salt
2 large eggs
3/4 cup packed light brown sugar
4 Tbls. unsalted butter, melted and cooled
3/4 cup nonfat buttermilk
1 teaspoon grated zest and 2 teaspoons juice 1 lemon
1 teaspoon vanilla extract
Adjust oven rack to middle position and heat oven to 375 degrees. Spray 12-cup muffin tin with nonstick cooking spray.
Whisk 2 cups flour, baking powder, baking soda and salt together in a large bowl. Whisk eggs and brown sugar together in medium bowl until thoroughly combined. Gradually whisk in melted butter, then buttermilk, lemon zest, lemon juice and vanilla until well blended. Fold into dry mixture with rubber spatula (a few streaks of flour should remain).
Toss blueberries with remaining tablespoon flour in small bowl. Gently fold blueberries into batter, being careful not to break berries.
Distribute batter in muffin tin and bake until light golden brown and toothpick or skewer inserted into center of muffin comes out clean, 25 minutes, rotating pan halfway through baking.

 This was my final cake for Wilton Course 2. I was so proud of my basketweave and rope, but the entire cake? Not so much. The flowers and birds make it look so umm.. dated? Simple and elegant.. definitely not here. Not suprisingly, I just stared at my cake for the longest time not knowing where to start. It wasn't until my instructor started putting random flowers on for me when I finally got going. She thinks I have commitment issues. I agree.
The part I hate about these courses is all the wastage that comes with it. I can't stand wasting food, but I can't eat the shortening frosting either because the greasy film that's left on the roof of my mouth and plastic tasting qualities grosses me out. Also, it just feels dirty to be eating something that has been played around with that much (piping, scooping it back into the bag and repiping) in the middle of a Michael's store. To minimize waste, I just use a cake mix + water so it doesn't feel nearly as bad as throwing out butter and eggs. Next week I'm starting course 3: fondant and we'll be needing 2 cakes + Wilton fondant. This cake is already in the freezer so no wasting or turning on the hot oven for me! My instructor who found out about my homemade royal icing (and wasn't too pleased about) told me to buy the Wilton fondant, but I'm making my own. The whole class will probably hear about it and it will probably be embarrassing, but honestly, I would rather buy myself a new pan than something that even she says tastes gross.
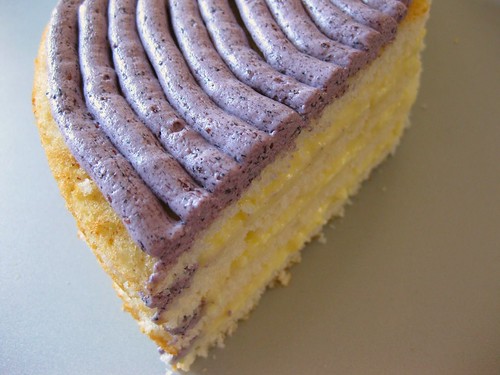 I was so excited for this cake because last summer, this was the recipe I used to bake my first ever layer cake. Thanks to the DBers who raved about this enough that I had to give it a try. It was the first time I realized that cakes could be made from scratch! Since many of the experienced DBers had problems with flat layers, I decided to make a triple layer cake with 3 8 inch pans (I needed all the help I could get).
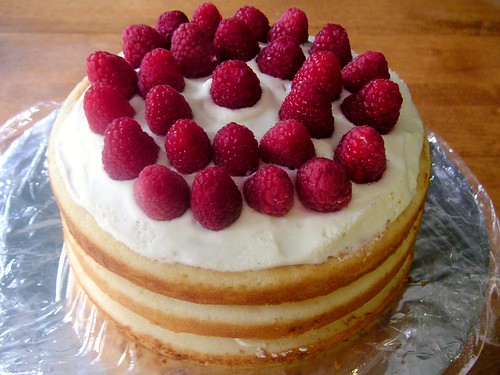
One year later I wanted to try it with 9 inch pans, since Dorie posted helpful tips to fix the height issues and because my 8 inch ones aren't the greatest in quality. I used all purpose flour and 2% milk. I omitted the 2 minute beating at the end because I didn't want to risk overbeating. 2 minutes of beating with all purpose flour... I don't even want to imagine what would happen to the cake! The layers aren't as tall as Dorie's, but I was really happy with the overall result.
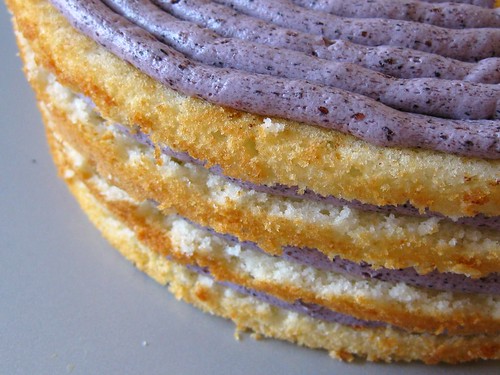
The way I frost layer cakes hasn't really changed. I like to keep the outside bare because I'm not a huge frosting lover, but if there's one butter based frosting to make, it's definitely Cassie's SMBC. I can't say enough about it because it's that good! Creamy and perfectly sweetened without tasting like a stick of butter unlike most meringue based buttercreams. I used her SMBC instead of Dorie's and added some blueberry puree. I couldn't really taste the blueberry and will use jam next time for a more concentrated flavour. Even though SMBC is my favourite kind of buttercream, 4 layers of it can be hard to stomach. Instead, I made a lightened version of CI's pastry cream by omitting the butter and using milk instead of cream. I love how soft this cake was even with all purpose flour. I really liked it, although I can't really say the same for for the rest of my family. It can be so frustrating to bake for them because everything is either too buttery, too sweet, too rich, too moist (?!). I'm starting to get the feeling that what they really want is sandwich bread (and it better be Wonder bread since it's like biting into air) lightly sweetened with sugar.
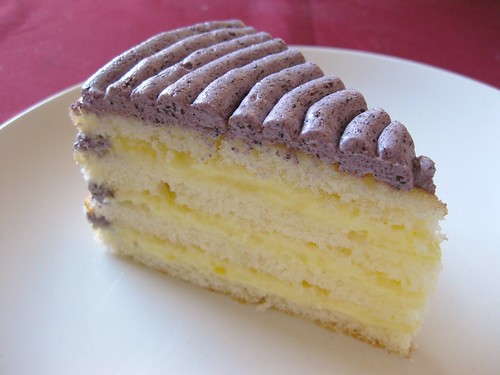
Thanks so much to Carol of mix, mix... stir, stir for choosing this recipe! You can find the recipe on her blog or in Dorie's book. Don't forget to check out the TWD blogroll!
Pastry Cream, adapted from CI
1 cup milk
2 tbsp sugar
2.5 egg yolks
1.5 tbsp cornstarch
Whisk sugar, eggs and cornstarch together until incorporated
On medium high heat, heat milk.
Pour milk in egg mixture to temper the eggs
Pour mixture back into pot, whisking until thickened and bubbles appear on the side.
Remove from heat and pour into another bowl to stop cooking.
Place plastic wrap on surface and refrigerate until cool and ready to use.
Swiss Meringue Buttercream
Adapted from Cassie's How to eat a Cupcake
Ingredients
2 large egg whites
1/2 cups sugar
1/2 cup (1 sticks) unsalted butter, at room temp
1/4 blueberry puree
Directions
Put egg whites and sugar into the top of a double boiler over a pan of simmering water. Whisking constantly, cook until sugar has dissolved and mixture is warm (about 160 degrees).
Pour heated egg whites into the bowl of an electric mixer fitted with the whisk attachment. Beat egg white mixture on high speed until it forms stiff (but not dry) peaks. Continue beating until fluffy and cooled, about 7 minutes.
Switch to the paddle attachment. With mixer on medium-low, add butter two tablespoons at a time, beating well after each addition. Increase speed to medium-high; continue beating until frosting appears thick, about 3 minutes. Reduce speed to low; add blueberry puree and raise speed to medium and beat until incorporated.
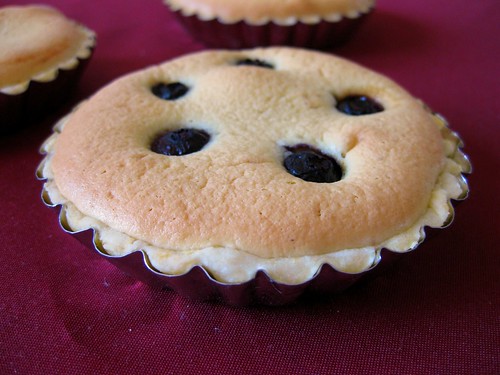 The June Daring Bakers' challenge was hosted by Jasmine of Confessions of a Cardamom Addict and Annemarie of Ambrosia and Nectar. They chose a Traditional (UK) Bakewell Tart... er... pudding that was inspired by a rich baking history dating back to the 1800's in England.
I'm not a huge fan of crusts or tarts in general so I quartered the crust and thirded the frangipane. Luckily, I had the right amount of everything because it gets kind of annoying when the small containers start to take over the fridge. I used strawberry jam for 2 tarts and left it plain for one tart because I wasn't sure how much I would like the strawberry and almond together. I remember making frangipane with TWD and really enjoyed the almond filling. Instead of creaming, I used a mini attachment for my handmixer that works like a food processor since there was so little filling and I didn't want the ingredients to stir around the bottom of the mixer bowl. This is how Dorie makes it and it's great because there is no curdling. You're left with a nicely emulsified thick almond cream. The bakewell tart didn't really change my mind about tarts, but I'm more of a cake and cookie girl.


