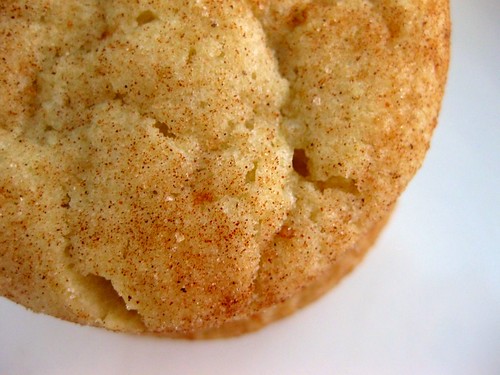
 To be honest, I never thought I would like snickerdoodles. It seemed like just another sugar cookie with cinnamon sugar. And it is really a sugar cookie covered in cinnamon sugar, except that.. wow.. cinnamon and cream of tartar makes a huge difference. I'm guessing it's the cream of tartar that gives these a distinctive chew because my sugar cookies never end up with that kind of texture and the recipes are very similar. To be honest, these were a little bit on the cakey side and if I didn't flatten the cookies first, I probably would have ended up with snickerdoodle cake bites. I can't wait to try another recipe...maybe one with more butter (that should do the trick). Here's the recipe if you're interested.
Chewy Snickerdoodles
Cook's Illustrated
3 cups all purpose flour
3/4 teaspoon baking soda
1/4 teaspoon cream of tartar
1/2 teaspoon salt
1/2 teaspoon ground nutmeg (optional)
10 tablespoons unsalted butter at cool room temperature
1 1/2 cups plus 3 tablespoons sugar
2 large eggs
1 teaspoon vanilla extract
1 tablespoon ground cinnamon
1. Heat the oven to 350 degrees and adjust a rack to the center position. Line two cookie sheets with parchment paper. Whisk together the flour, baking soda, cream of tartar, salt, and optional nutmeg in a medium bowl. Set aside.
2. Beat the butter and one and one half cups sugar in the bowl of an electric mixer until light and fluffy, about 3 minutes. Add the eggs and vanilla and beat until well incorporated, about 30 seconds. Add the dry ingredients and beat on the lowest speed until the moistened, increase to medium and beat 30 seconds.
3. Mix together in a small bowl the remaining three tablespoons sugar and ground cinnamon. Shape the dough into walnut sized balls (approximately two tablespoons each), dip in cinnamon sugar, and place on prepared cookie sheet three inches apart. (You can use a small ice cream scoop to portion out the cookies.) Bake one sheet at a time until the cookies are very lightly colored around the edges, the tops have cracked and the cookies have puffed and started to deflate, about 12 minutes. Cool on a rack. Serve slightly warm or at room temperature.
Makes about 24 cookies.
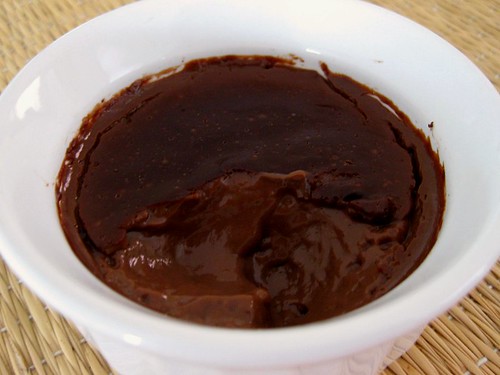 Yet another ramekinized version of TWD. I tweaked the recipe a little to cut the fat down by omitting the pie crust, the butter and substituted cocoa powder for chocolate. Strangely, when it comes to fillings, I can't add butter without having the thought that I'm eating a chunk of cold butter straight from the fridge...literally. I only made 1/4th of the recipe so I wouldn't end up with a bunch of whites or have to pressure my brother to help me finish it up..haha. My favourite part of this dessert was the pudding skin, which I scooped off and then handed my brother the rest. There was no pressuring this time!
Thanks to Kim of Scrumptious Photography for choosing this recipe, which can be found on her blog and here. Don't forget to visit the TWD Blogroll!
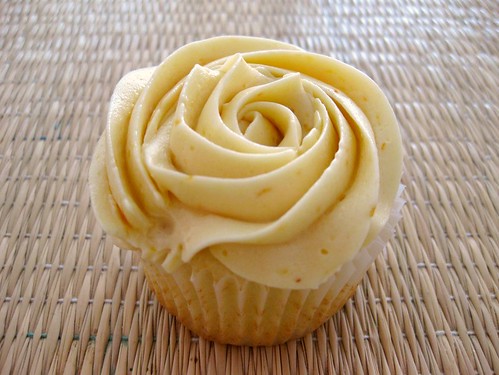 Not only am I obsessed with finding the perfect cupcake recipe, but I'm now obsessed with the 1M tip. All I want to do is make cupcakes and frosting! When I finally got the beater blade, the first thing I baked were Amy Sedaris' cupcake recipe so I could make a batch of SMBC. The beater blade is so cool. It definitely makes creaming a lot more efficient and seems to incorporate more air. Seeing how the butter, sugar and eggs were being creamed so intensely, I was afraid of was overmixing so I switched back to the regular paddle to add the flour and milk. I'll have to try using it next time the whole way through to see how it compares with the regular paddle in cake texture although I have a feeling that I'll just use it for pre-flour purposes..haha. I can't help that I'm paranoid about overmixing! Thanks for recommending such a great recipe Cassie! I love how this cupcake wasn't overly dense or tasted like butter and egg overload like most cupcake recipes I've tried.
Amy Sedaris' Cupcakes
24 cupcakes
Ingredients
1 1/2 stick (12 tbsp) unsalted butter
1 3/4 cup sugar (I used 1 1/2 cup sugar)
2 large eggs
2 teaspoons vanilla
1/2 teaspoon salt
2 1/2 teaspoons baking powder
2 1/2 cups flour (I used all purpose, but I guess you could use either all purpose or cake flour)
1 1/4 cup milk
Directions
1. Preheat over to 350 degrees (Amy uses 375, but I think that's too high).
2. In a bowl, whisk flour, baking powder, salt together
3. Cream butter and sugar until light and fluffy.
4. Beat in eggs, one at a time making sure it's well incorporated
5. Beat in vanilla
6. Add flour mixture in 3 batches, alternating with milk. Do not overbeat.
7. Divide batter evenly. Bake for 16 to 20 minutes and toothpick inserted into center comes out with a few moist crumbs attached.
9. Cool on wire rack for 5-10 minutes then transfer cupcakes to cool completely
Swiss Meringue Buttercream Frosting
Adapted from How to eat a cupcake
Ingredients
2 large egg whites
1/2 cup sugar
1/2 cup (1 stick) unsalted butter, at room temp
1/2 cup peach jam (could barely taste it, will add more)
Directions
Put egg whites and sugar into the top of a double boiler over a pan of simmering water. Whisking constantly, cook until sugar has dissolved and mixture is warm (about 160 degrees).
Pour heated egg whites into the bowl of an electric mixer fitted with the whisk attachment. Beat egg white mixture on high speed until it forms stiff (but not dry) peaks. Continue beating until fluffy and cooled, about 7 minutes.
Switch to the paddle attachment. With mixer on medium-low, add butter two tablespoons at a time, beating well after each addition. Increase speed to medium-high; continue beating until frosting appears thick, about 3 minutes.
Press jam through a strainer to get rid of lumps and beat into frosting. Beat until frosting is smooth and creamy. Continue beating for 2 minutes on low speed to eliminate air bubbles
 Bread pudding isn't really my thing. Even when I try to upload my picture to blogger, it comes out rotated and I have no idea how to fix it. Whether its upright or not, it looks the same to me...not good. I made 1/6th of the recipe in a mini loaf pan and added less liquid after reading about the floating bread that some people were experiencing. I substituted cocoa powder for chocolate and used only milk instead of cream. So maybe cutting down on the richness doesn't make it 4 star anymore, but I'd rather save the calories for a cupcake! I really tried to like this, so much that I ate the entire top crust, but when it got to the soggy parts, I just had to stop. This is the first time I've had bread pudding so I'm not sure what the texture is supposed to be like or if I messed it up by using Dempster's bread, but I just can't get past the sogginess. I even made sure it was baked for a really long time, so long that the top was practically burnt and a toothpick inserted came out clean. It's a good thing that I only used 3 cups of liquid (1/2 cup for 1/6th of the recipe) or else I can't imagine what the pudding would look like...mush? I'm sure that this was a great recipe for those who enjoy bread pudding, but I'm not a bread pudding fan.
Thanks to Lauren of Upper East Side Chronicle for choosing this week's recipe, which can be found on her blog. Don't forget to visit the TWD blogroll!
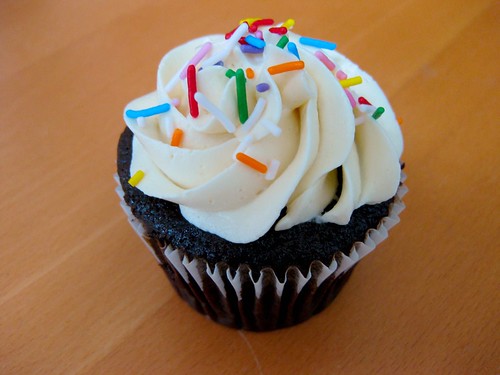 Cleaner, smoother and quicker! After getting a suggestion from Kate, who commented in my other post to replace flour for cornstarch, I decided to give it a try. As soon as I had the excuse to bake cupcakes, I immediately knew that this would be the frosting to make along with Hershey's Perfectly Chocolate Chocolate Cake. I've been dying to make these two things for the longest time and finally use my 1M tip!! I don't know what it is about the swirl, but everytime I see it on a cupcake, it just makes me smile.
Flour frosting V2 definitely tastes better. I think it partly has to do with cornstarch itself and partly because the milk/sugar/starch mixture is heated for less time so the milk flavour is less concentrated. Thickening with cornstarch is a bit different than flour though and you can't just dump it in and stir like crazy.
Here are some tips I found on google for thickening with cornstarch
* Make a slurry - dissolve 1 tbsp of cornstarch in 2 tbsp of cold liquid (water or in this case, milk) to prevent lumps
* Add slurry to the heated mixture you want to thicken
* Do not stir too vigorously or the starch granules will break and lose its thickening power
* Don't let the starch mixture come to a rolling boil or cook too long
* Don't lick the spoon you are stirring with or the enzymes in your saliva might break down the starch
* Acidic foods might weaken the thickening
* Too much sugar might weaken the thickening
As for the cake, my favourite chocolate cake recipe is still the old fashioned chocolate cake from Cook's Illustrated. There are a few more steps and messy bowls, but there's something about butter and possibly the method they use that I think really makes the difference in texture. Hershey's is good in that it's insanely moist and generally a crowd favourite because of that. It will probably be my go-to for a quick and easy chocolate cake when I'm short on time. I'll probably add some melted chocolate next time for greater depth in flavour because this cake was just a tiny bit flat for me. I think it has more to do with the cocoa I used because it wasn't the best quality, but it was the only natural cocoa I could find.
Flour Frosting V2
1 cup milk, divided into 3/4 cup and 1/4 cup
1 cup sugar
2 tbsp cornstarch
pinch of salt
1 tsp vanilla
1 cup butter, cut into tablespoon sized chunks at room temperature, but not too soft
Heat 3/4 cup milk, 1 cup sugar and a pinch of salt in a pot over medium heat until sugar is dissolved but do not let it come to a boil.
Make a slurry with the starch and remaining 1/4 cup milk. Stir to get rid of lumps
Pour starch slurry into milk and sugar mixture and continue heating over medium heat. Stir , but not vigorously or else the starch mixture might liquify. After 1 minute, tiny bubbles will appear on the side and mixture should thicken. Continue heating for 1-2 minutes to get cook out the flour taste. Mixture should be thickened by now. Don't let mixture come to a rolling boil or else the starch granules might break.
Pour thickened mixture into a bowl of standing mixer and cool until room temperature by leaving it out on the counter or in the fridge for 1 hour. Don't let it get cold or else it will take forever for the butter to incorporate with the mixture.
Cut butter into tablespoon chunks. On medium low speed, add the butter by the tablespoon until it is all incorporated. Increase the speed to medium or medium high and beat until it comes together (approx 5 minutes). During these 5 minutes, the frosting is going to transform from a curdled mess into a fluffy and soft frosting. If it takes a longer time to come together, just be patient and continue whipping until it gets fluffy.
Add vanilla and continue mixing at low speed for 1 minute.
Use immediately. If using later, you will have to rewhip the frosting.
Hershey's Perfect Chocolate Chocolate Cake
2 cups sugar
1-3/4 cups all-purpose flour
3/4 cup HERSHEY'S Cocoa (natural)
1-1/2 teaspoons baking powder
1-1/2 teaspoons baking soda
1 teaspoon salt
2 eggs
1 cup milk
1/2 cup vegetable oil
2 teaspoons vanilla extract
1 cup boiling water
(I added 1 tsp of instant coffee)
Directions:
1. Heat oven to 350°F. Grease and flour two 9-inch round baking pans.
2. Stir together sugar, flour, cocoa, baking powder, baking soda and salt in large bowl. Add eggs, milk, oil and vanilla; beat on medium speed of mixer 2 minutes. Stir in boiling water (batter will be thin). Pour batter into prepared pans.
3. Bake 30 to 35 minutes or until wooden pick inserted in center comes out clean. Cool 10 minutes; remove from pans to wire racks. Cool completely. Frost with "PERFECTLY CHOCOLATE" CHOCOLATE FROSTING. 10 to 12 servings.
VARIATIONS:
ONE-PAN CAKE: Grease and flour 13x9x2-inch baking pan. Heat oven to 350° F. Pour batter into prepared pan. Bake 35 to 40 minutes. Cool completely. Frost.
THREE LAYER CAKE: Grease and flour three 8-inch round baking pans. Heat oven to 350°F. Pour batter into prepared pans. Bake 30 to 35 minutes. Cool 10 minutes; remove from pans to wire racks. Cool completely. Frost.
BUNDT CAKE: Grease and flour 12-cup Bundt pan. Heat oven to 350°F. Pour batter into prepared pan. Bake 50 to 55 minutes. Cool 15 minutes; remove from pan to wire rack. Cool completely. Frost.
CUPCAKES: Line muffin cups (2-1/2 inches in diameter) with paper bake cups. Heat oven to 350°F. Fill cups 2/3 full with batter. Bake 22 to 25 minutes. Cool completely. Frost. About 30 cupcakes.
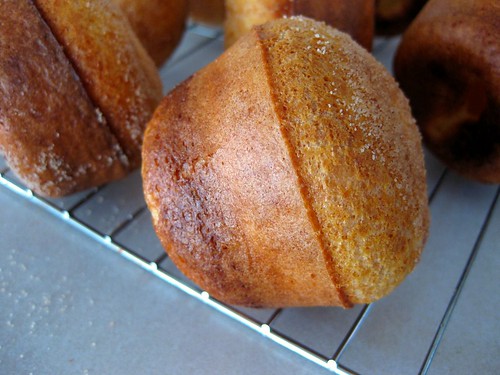 I was debating between cinnamon sugared puffs or cinnamon sugar muffins and it was hard to choose, since both sound amazing. Even though my puffs are supposed to look like this, they ended up looking like muffins... These were addicting, just as Kelly said they would be. When you bite into them, you get a nice contrast between a crisp and soft center. I felt that they were a too chewy, but I may have overwhisked when I did it by hand instead of using the food processor (aka the most annoying thing to clean). There are only 2 tbsps in the batter, but 4 tbsps for brushing on top. Was I really going to let myself consume almost an entire stick of butter myself in one day because I know how addicting these cinnamony-sugary puffs are? No. Instead, I just dunked them into a bowl of cinnamon sugar one at a time while they were still piping hot so the sugar would actualy stick..except that it didn't..haha. A little butter next time would probably be helpful. The recipe says to leave them to cool in the pan for a few minutes, but I removed them right after I took them out of the oven to retain as much crispness on the outside. It is, that amazing contrast between crisp and plushiness that makes these so good and I didn't want to lose it.

Sugar Puffs taken from Kelly of Eat, Make, Read
Recipe by David Lebovitz
For the puffs:
Softened unsalted butter, for greasing the pan
2 tablespoons butter, melted
3 large eggs, at room temperature
1 cup whole milk
1 teaspoon salt (1 used 1/2 tsp)
1 1/2 teaspoons sugar
1 cup flour
For the sugar coating:
2/3 cup sugar
1 teaspoon ground cinnamon
4 tablespoons butter, melted.
1. Preheat the oven to 400 degrees. Liberally grease a nonstick popover pan, or a muffin pan with 1/2-cup indentations, with softened butter.
2. For the puffs, put the 2 tablespoons melted butter, eggs, milk, salt and sugar in a blender and whiz for a few seconds.
3. Add the flour and whiz for 5 to 8 seconds, just until smooth.
4. Divide the batter among 9 greased molds, filling each 1/2 to 2/3 full. (I got 12)
5. Bake for 35 minutes, until the puffs are deep brown. (After 20 mins, I reduced the temperature to 350 because they were really starting to brown)
6. Remove from the oven, wait a few minutes until cool enough to handle, then remove the puffs from the pans. You may need a small knife to help pry them out. (I took them out right away instead of waiting)
7. Mix the sugar and cinnamon in a medium bowl. Thoroughly brush each puff all over with melted butter, then dredge in sugar and cinnamon mixture to coat completely. Let cool on a baking rack. Makes 9 puffs (I got 12).
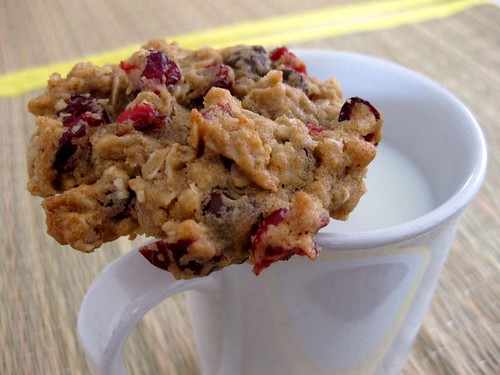 These are my favourite oatmeal cookies because they have the perfect balance of flour to oats to add-ins. I like how they're oaty, but just not quite to the point where it feels like I'm eating oatmeal from the bag. They are so good that even my brother eats them and he hardly eats sweets. I'm not usually crazy about adding in dried fruit, but in this case I think it really makes these extra special. I'm submitting this recipe to Bloggeraid, a really cool fundraiser cookbook started by Ivy from Kopiaste, Val from More Than Burnt Toast and Giz of Equal Opportunity Kitchen. All the profits go to school meals, which is part of the World Food Programme

Here's the bloggeraid homepage and the recipe book
 I've never made a crispy oatmeal cookie before. Actually, I think the WP cookies were my first non-chewy cookie. Since freezing cookie dough is the new thing, I prescooped and froze the cookies so they would be ready to bake. I knew I would be baking these soon so I wasn't worried about about freezer burn or dehydration. Normally I would wrap the dough tightly into a log and put it in a ziploc and then defrost and scoop. I reduced the butter by 4 tablespoons (from 14 to 10) because I read that these spread a lot for some people and I didn't want to have one large sheet of oatmeal cookie. Next time I'm going to use 12 tablespoons. I was debating whether or not to add chocolate in case no one would eat them because 'chewy' is always the overwhelming favourite, but I just stuck to the recipe.
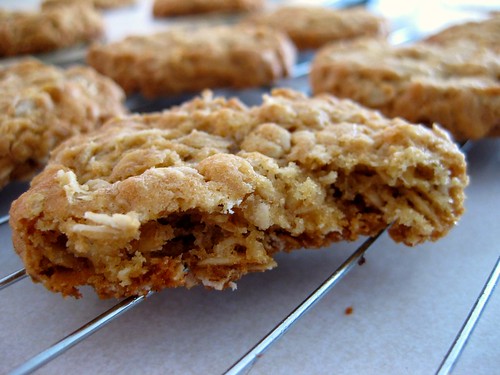
Baking chilled dough works really well if you're looking for chewy and thicker cookies. I wasn't so sure it would be the same for thin and crisp cookies so I let my frozen dough come to room temperature. I also baked at 325 for 20 minutes because cookies always burn at 350 in my oven. These were really good for crispy cookies because they had crunch without that stale or hard/thick quality. The best part is biting into them and getting a nice flaky texture... it's almost like a suprise! If you're in the mood for a thin and crisp oatmeal cookie, these are the ones to make. The shatteryness makes these really special and it's crispy and crunchy without feeling like you're biting into a hockey puck.
In case you're like me and wonder how these taste the next day... They were still crunchy on the edges, but they lost some of their crispness. The center was a little stick to your teeth.. not sure if you would like that, but I find that texture interesting. Maybe if I baked them a little longer, they might have remained crunchy throughout. I guess I'm just used to baking chewy cookies all the time and worry about overbaking that it was almost hard to stop myself from pulling these out too early.
Thin and Crispy Oatmeal Cookies
Cook's Illustrated
Makes 24 cookies
1 cup unbleached all-purpose flour (5 ounces)
3/4 teaspoon baking powder
1/2 teaspoon baking soda
1/2 teaspoon table salt
14 tablespoons unsalted butter (1 3/4 sticks), softened but still cool, about 65 degrees (I used 10 tbsps, will try 12 next time)
1 cup granulated sugar (7 ounces)
1/4 cup packed light brown sugar (1 3/4 ounces)
1 large egg
1 teaspoon vanilla extract
2 1/2 cups old-fashioned rolled oats
1. Adjust oven rack to middle position and heat oven to 350 degrees. Line 3 large (18- by 12-inch) baking sheets with parchment paper. Whisk flour, baking powder, baking soda, and salt in medium bowl.
2. In standing mixer fitted with paddle attachment, beat butter and sugars at medium-low speed until just combined, about 20 seconds. Increase speed to medium and continue to beat until light and fluffy, about 1 minute longer. Scrape down bowl with rubber spatula. Add egg and vanilla and beat on medium-low until fully incorporated, about 30 seconds. Scrape down bowl again. With mixer running at low speed, add flour mixture and mix until just incorporated and smooth, 10 seconds. With mixer still running on low, gradually add oats and mix until well incorporated, 20 seconds. Give dough final stir with rubber spatula to ensure that no flour pockets remain and ingredients are evenly distributed.
3. Divide dough into 24 equal portions, each about 2 tablespoons (or use #30 cookie scoop), then roll between palms into balls. Place cookies on prepared baking sheets, spacing them about 21/2 inches apart, 8 dough balls per sheet (see note above). Using fingertips, gently press each dough ball to 3/4-inch thickness.
4. Bake 1 sheet at a time until cookies are deep golden brown, edges are crisp, and centers yield to slight pressure when pressed, 13 to 16 minutes, rotating baking sheet halfway through. Transfer baking sheet to wire rack; cool cookies completely on sheet.
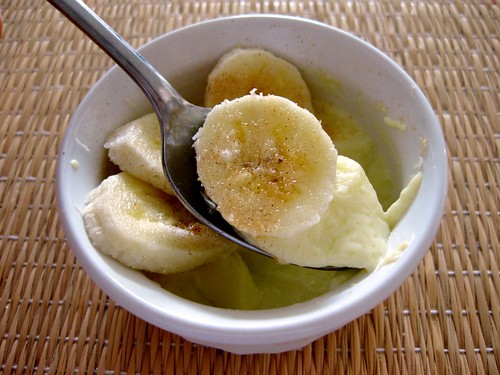 Custard, yum! Banana, yum! Pie crust, umm... I blame my dislike for pie crust on a scary chicken pot pie incident in grade 6 when we went on a 3 day trip at a wilderness lodge. Of course that crust is nothing compared to Dorie's and it wasn’t so much the crust that bothered me than the filling *shudders*, but for some reason I just can’t let it go. I didn't want a bunch of leftover egg whites so for every 2 yolks, I just used one egg, which worked but is probably not as rich. Here is my banana cream, which I hope is just as wonderfully delicious minus the crust and the whipped cream. There's nothing like a dusting of cinnamon sugar over bananas! (ok, so maybe it's not as delicious as whipped cream!!)
Thanks to Amy of Sing for Your Supper for choosing this recipe, which can be found on her blog and here. Don't forget to visit the TWD Blogroll!
Oops! I messed up the stupid 12:00 thing again.. I must be too stressed from the research papers I'm writing!!
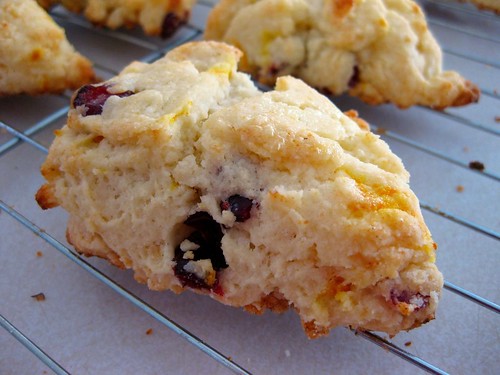 These may not be the prettiest looking things, but they sure were yummy. Since I enjoyed the melt in your mouth texture of the whipping cream pound cake, I wanted to see if it would have the same effect on scones. Instead of taking out the food processor, I used my fingers to cut the butter into the flour. As much as I love using appliances, cleaning up can be a pain and it actually feels good to be using my hands once in a while instead of relying on machines. I don't think these were supposed to look all clumpy, but when I dumped the heavy cream into the flour mixture, it wasn't exactly incorporating. Certain sections were absorbing while other parts were still floury. I didn't want to overmix so I just pressed the pieces together. Compared to the scones made with sour cream and buttermilk, I enjoyed these the best because of how soft they were. I halved the recipe and ended up with 8 mini ones instead of the 8 large ones. Considering that an entire tablespoon of heavy cream is in a single scone (16% of your recommended sat fat intake for one day).. don't forget about the butter either, I would probably be mad if these didn't have the melt in your mouth texture. If you're ever in the mood for splurging on scones..haha, I would say try these!
My mom is obsessed with scones so I'm going to try the ones made with sour cream again because I have a feeling I may have overmixed the first time around. Plus, it would be nice to see if I could get comparable results without using heavy cream. Does anyone have any good ideas (savoury or sweet?) for add-ins other than chocolate? I went with cranberry orange this time because I really enjoyed it in my muffins and I'm not too crazy about plain ones because it feels like I'm eating a blob of dough.
Cream Scones
Cook's Illustrated, taken from here
2 cups (10 ounces) unbleached all-purpose flour, preferably a low-protein brand such as Gold Medal or Pillsbury
1 tablespoon baking powder
3 tablespoons sugar (I added 4 tbsps for a bit more sweetness)
1/2 teaspoon salt
5 tablespoons chilled unsalted butter, cut into 1/4-inch cubes
1/2 cup currants (I used craisins)
1 cup heavy cream
(I added zest of one orange)
1. Adjust oven rack to middle position and heat oven to 425 degrees.
2. Place flour, baking powder, sugar, and salt in large bowl or workbowl of food processor fitted with steel blade. Whisk together or pulse six times.
3. If making by hand, use two knives, a pastry blender, or your fingertips and quickly cut in butter until mixture resembles coarse meal, with a few
slightly larger butter lumps. Stir in currants (craisins). If using food processor, remove cover and distribute butter evenly over dry ingredients. Cover and pulse 12 times, each pulse lasting 1 second. Add currants and pulse one more time. Transfer dough to large bowl.
4. Stir in heavy cream with rubber spatula or fork until dough begins to form, about 30 seconds. (I would probably add this gradually instead of dumping it in at once next time)
5. Transfer dough and all dry, floury bits to countertop and knead dough by hand just until it comes together into a rough, slightly sticky ball, 5 to 10 seconds. Cut scones into 8 wedges. Place wedges on ungreased baking sheet. (Baking sheet can be wrapped in plastic and refrigerated for up to 2 hours.)
6. Bake until scone tops are light brown, 12 to 15 minutes. Cool on wire rack for at least 10 minutes. Serve warm or at room temperature.

